My Trips:
My Blogspot Journal
2011 Trip @ LakeshoreImages Images
2012 Trip @ LakeshoreImages Images
2014 Trip @ LakeshoreImages Images
Back to Jon Vermilye's Photo & Travel Page
All photographs Copyright © 2016
Some other pages at this site:
Lower Antelope Canyon AZ
Upper Antelope Canyon, AZ
Bodie Ghost Town, CA
Bryce Canyon National Park, UT
Canyon de Chelly, AZ
Canyonlands National Park, UT
Capitol Reef National Park, UT
Devils Tower National Monument, WY
Glacier National Park, MT
Goblin Valley State Park, UT
Hanging Lake, CO
Kodachrome Basin State Park, UT
Mesa Verde National Park, CO
Mono Lake, CA
Mt Rainier National Park, WA
Rocky Mountain National Park, CO
The Grand Tetons National Park, WY
Valley of Fire State Park, NV
Yellowstone National Park, WY
Yosemite National Park, CA
Zion National Park, UT
Carlsbad Caverns National Park, NM
Caverns of Sonora, TX
Luray Caverns, VA
Jewel & Wind Cave, SD
Mammoth Cave National Park, KY
I've done a number of additions & modifications to my 2011 Escape 17b. While I have a page for them, I added this as a separate page since it might be useful to others that want to exchange the crank up vent cover for the electric vent used on newer Escapes, and I wanted to include a number of pictures of the process.
The first step is ordering the parts from Escape. While it would save some money buying the power vent from Amazon or etrailer, the problem is the old cover has a 9 1/2" square hole in the roof of the trailer & the Ventline VP-543 power vent fits in a 6 1/4" hole. An adapter is necessary. It would also stick too far into the shower to look right unless the top adapter is raised. While it is certainly possible to make you own adapter, Escape sells a kit that includes the vent, adapters for both the roof & the shower, and the screws to put it together. The price at the current exchange rate is around $200.00 US.
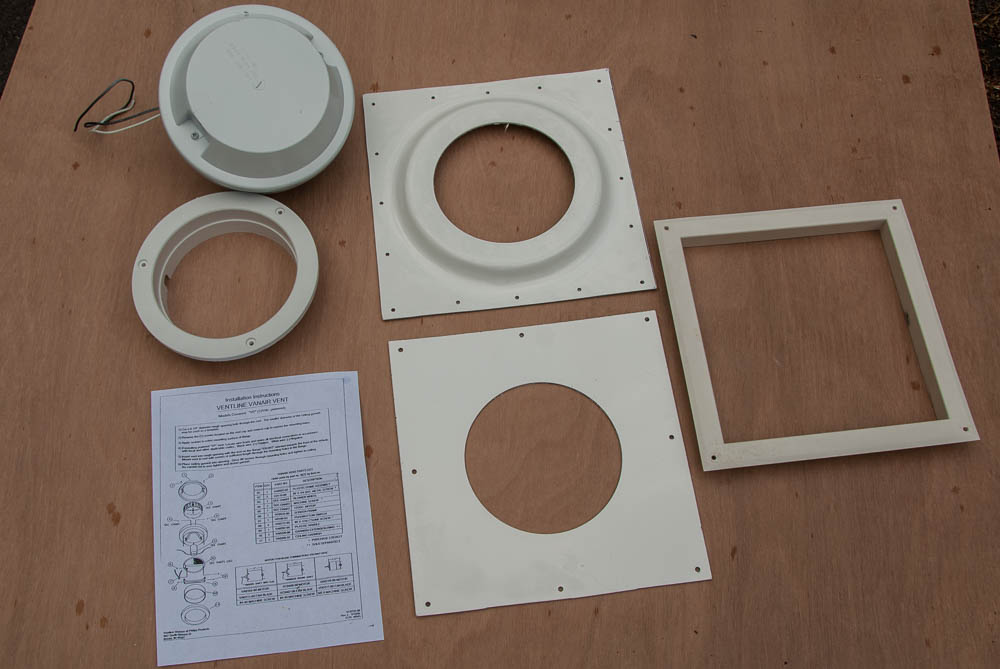 Here are the parts. (Click on any image to see a larger version) The stock vent is black - I painted it with Krylon Fusion 42322 Dover White, the closest match to the Escape's gel coat. Since there are no instructions with the kit from Escape, I downloaded a parts list & minimal instructions from Ventline. If necessary, a Google search "Ventline VP-543 install instructions" will provide links to a couple of YouTube videos of installations in vans.
I also kept the shower surround (pictured on the right). If I can remove the lip, I'll use it to provide a more finished look to the shower ceiling.
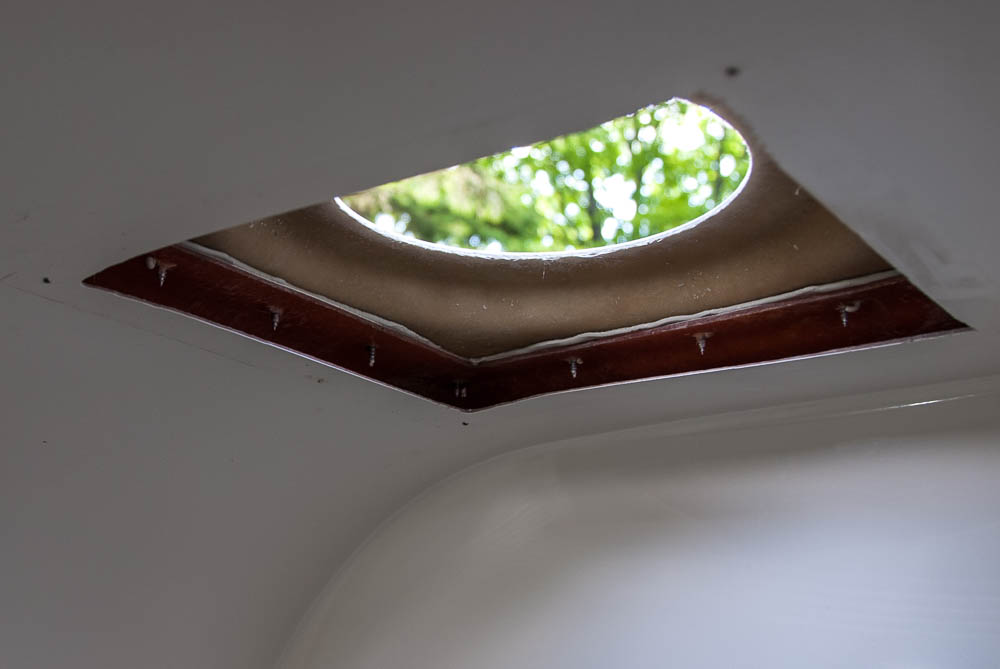
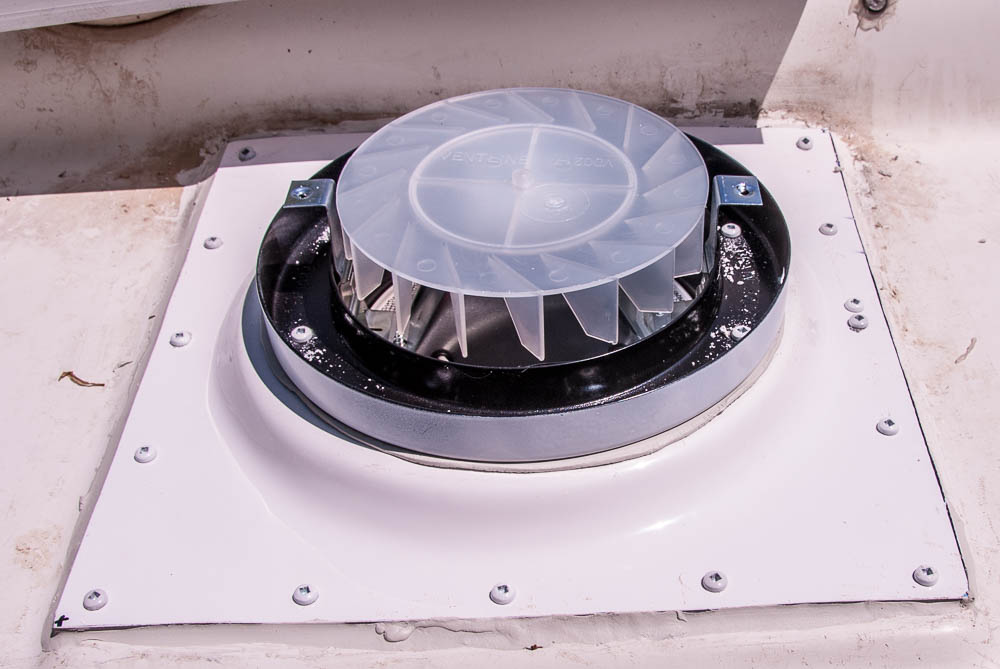
Next step is to remove the old vent. Depending on how many times you have re caulked it, this can be the most difficult part of the project. I have 2 additional layers of ProFlex added to stop leaks while on the road.
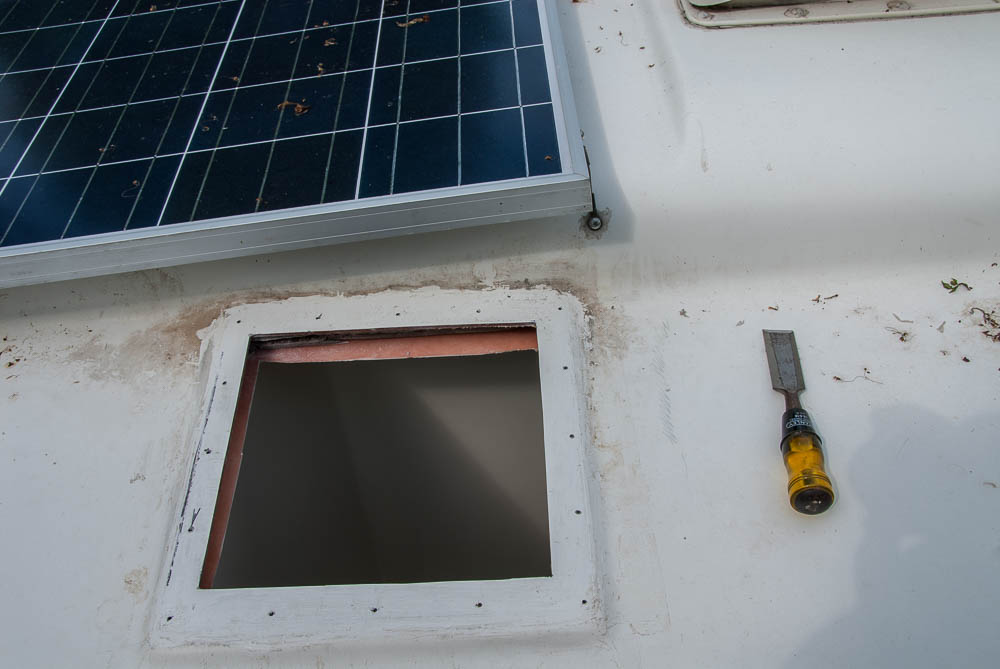 While a putty knife might work for just the layer of the Butyl Escape uses under the lip of the original vent, I needed a chisel to scrape off both the butyl & ProFlex. An additional difficulty was the solar panel I added that is just above part of the vent which got in the way of removing/installing screws on that side as well as making scraping the caulk difficult. After a couple of hours of work I was down to the gel coat of the roof. At that point I dry fit everything together to prevent surprises.
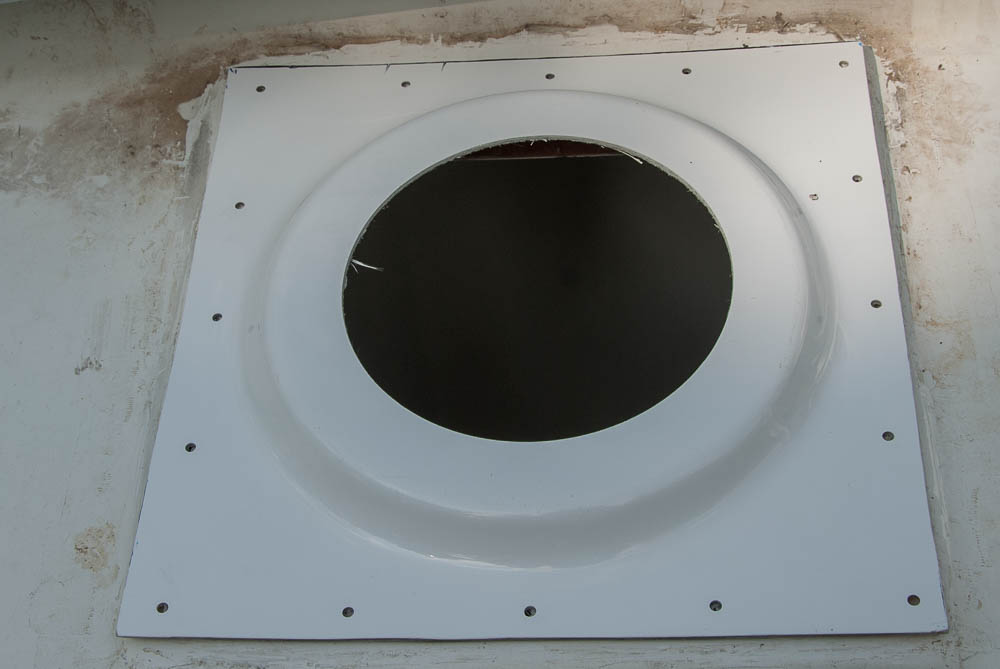 The upper adapter plate comes predrilled. Unfortunately, the holes do not all line up with the holes in the roof. I tried it in all 4 possible orientations & chose the one that had the most holes line up with those in the trailer. I put down a layer of 1" wide Butyl putty, pulled off the paper backing & screwed down the adapter.
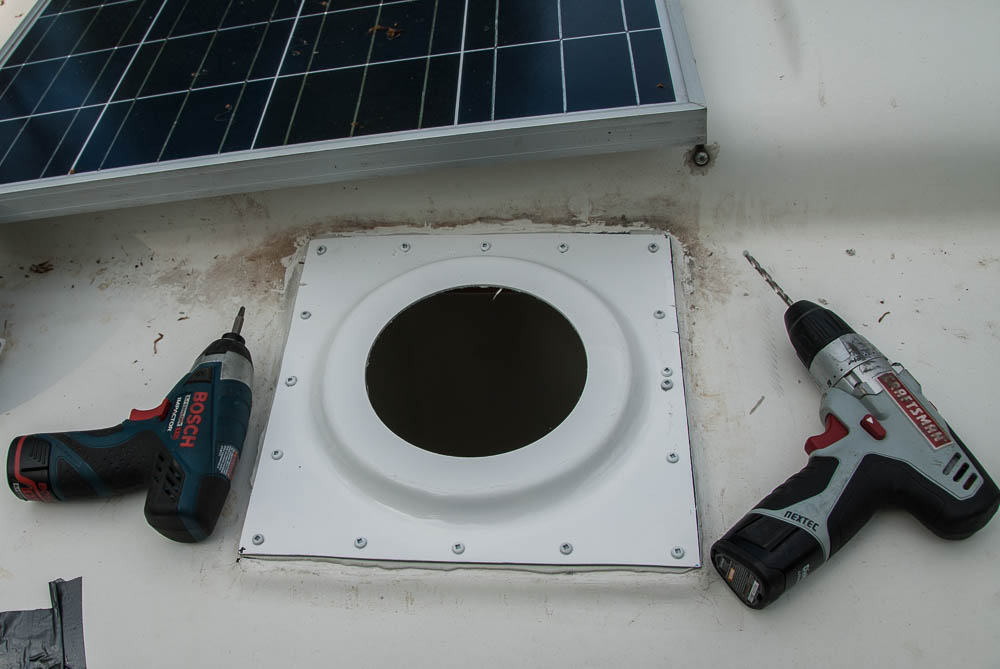 When a screw didn't line up with the hole in the trailer, I drilled a pilot hole. One hole was close enough that the pilot hole ran into the original hole, allowing the screw to strip out before it flatten the caulk. My solution was to drill a new, nearby hole.
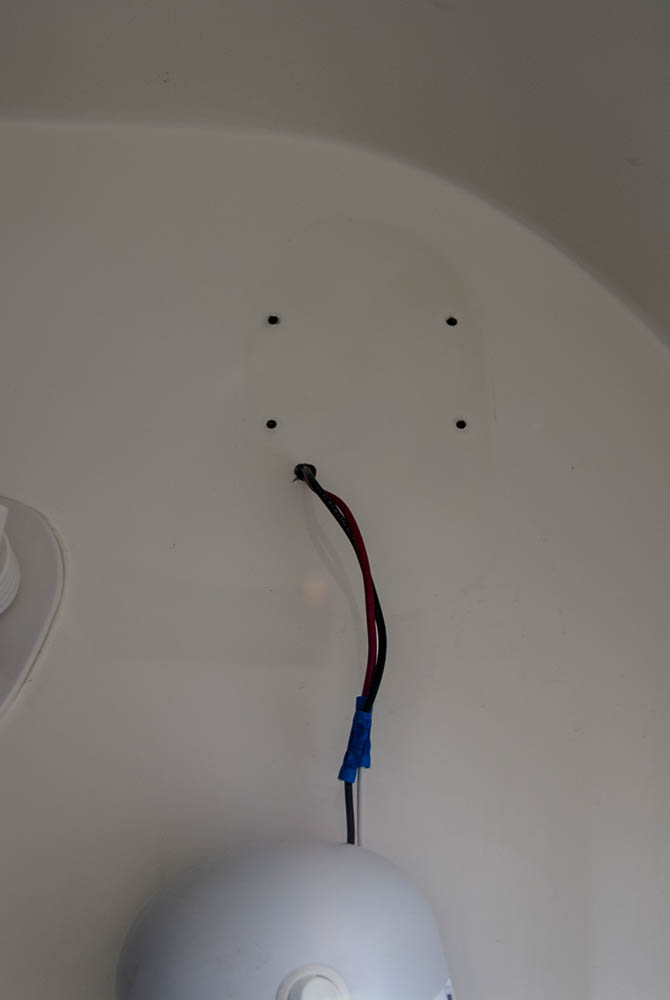
 Two views from inside (in the second there is duct tape over the top hole - it started to rain. Since it was raining, I started on the electrical connections to the power vent. It has an on/off switch, and about 10" leads. I am powering it from the bathroom light.
 Unfortunately, the hole for the power to the bathroom light is too small to allow adding a splice for the vent, so I had to enlarge it. After that I discovered that the hole in the shower stall does not line up with the hole in the cabinet over the stove. I had to drill a new hole to run the wire.
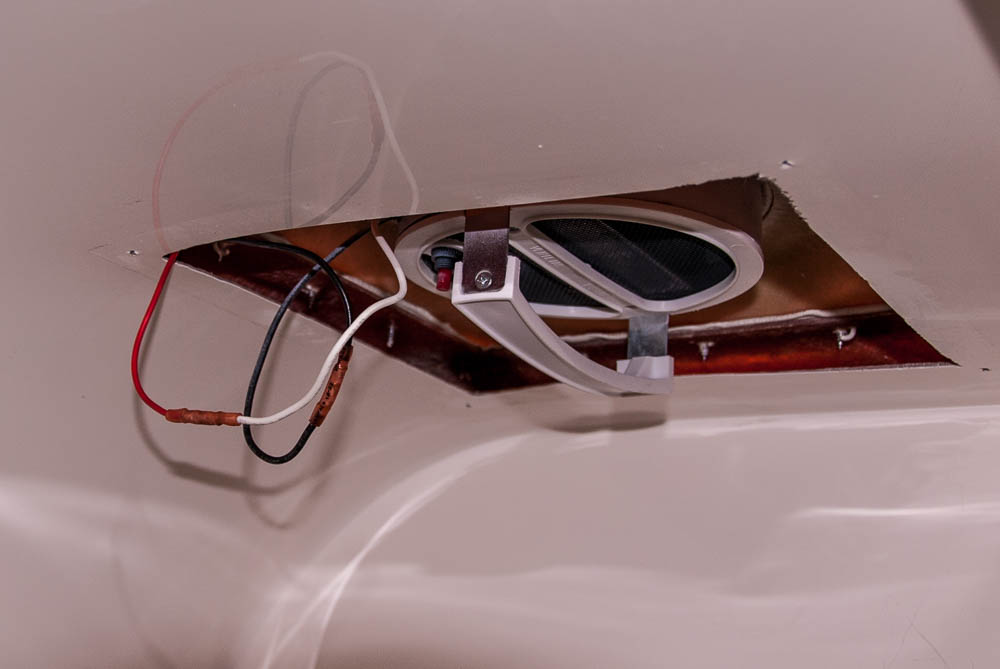
The wire run over the shower stall was "interesting". I'd probably still be fishing for the wires without my Harbor Freight inspection camera. With the camera I was able to use a fish to hook on to the wires & pull them across the stall. I already had an enlarged hole behind the shower stall in the forward face of the cabinet over the stove when I needed to run a cable for a new cell phone antenna.

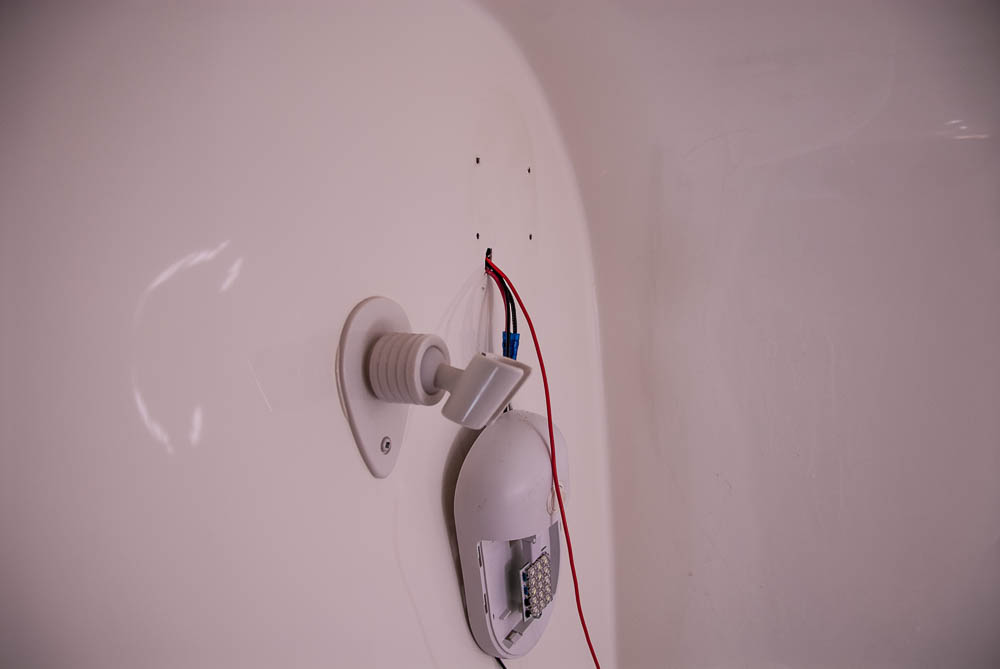
 The first image shows the wiring inside the cabinet. The diagonal wires are the run for the fan. The other two images show the ends of the run.
 Next was mounting the power vent to the Escape supplied flange and using heat shrink crimp connectors to wire the vent.
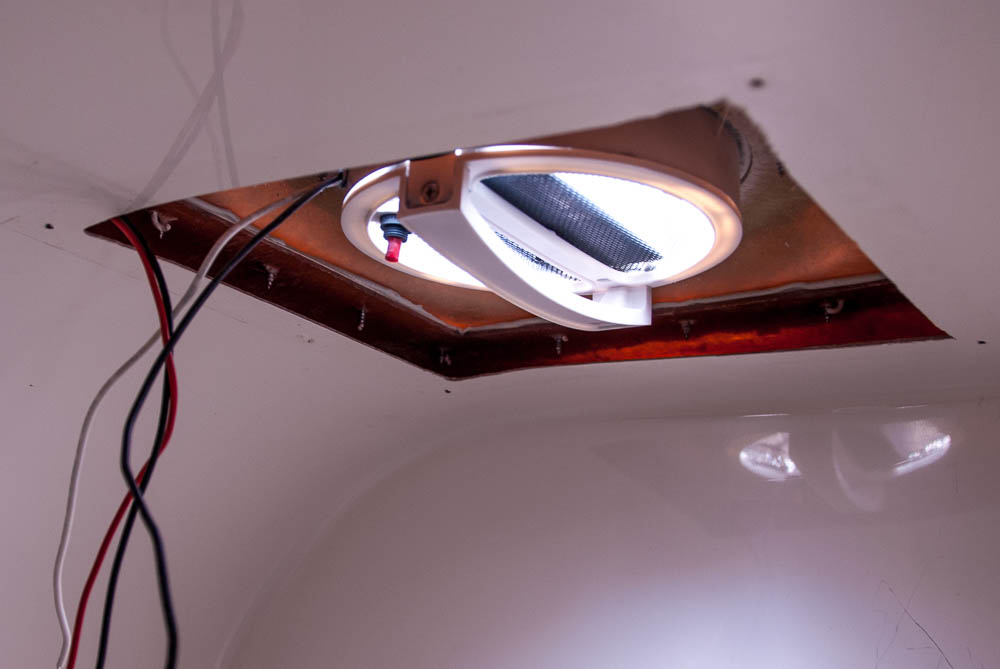
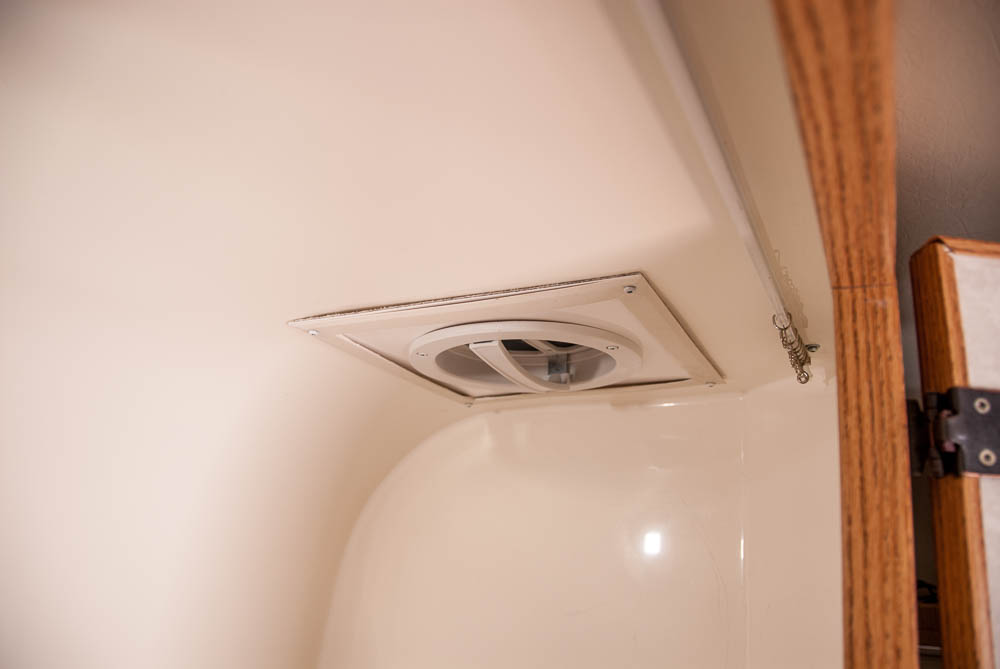 After that I added the Escape supplied interior flange. I did manage to cut the lip from the original manual shower vent & added it to the ceiling. Not sure it was worth the trouble, since the overall fit is a bit rough. The ceiling of the stall is curved & the flanges are flat so they don't fit perfectly together, but it is in. Again, the holes in the new ceiling flange do not line up with the holes in the stall ceiling from the original vent.
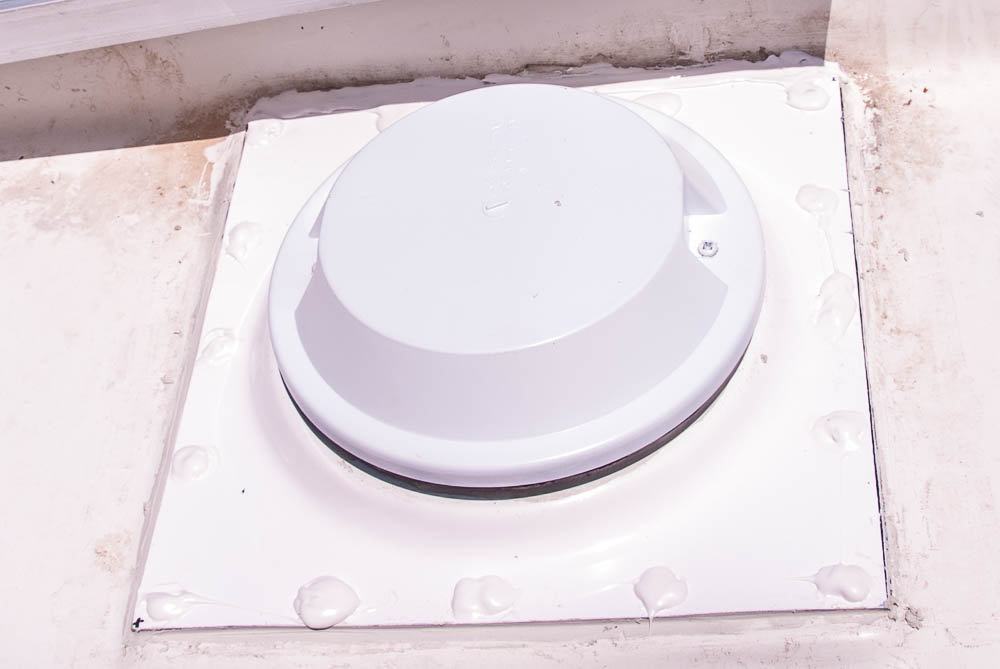 The last step was to cover the screw heads (both the screws mounting the vent to the flange under the cover & those attaching the flange to the roof) with Dicor Self-Leveling Lap Sealant.
Overall about 5-6 hours over 2 days.
This page is maintained by: vermilye@oswego.edu
Last Update:
May 28, 2016