Trailer Modifications
- Escape 21
Back to Jon Vermilye's Photo & Trip Page
Other
Trips:
1996 Trip Across the USA
2011 Trip Across US & Canada
Trailer Modifications - Escape 17B
Here are some modifications & Additions I've made to my Escape 21 Travel Trailer. For those not familiar with the Escape, they currently manufacture an Escape 17B (which I had for 6 years), an Escape 19, an Escape 21, and an Escape 5.0TA, a 21' fifth wheel. All are trailers constructed with a 2 part fiberglass shell (top & bottom) that produce lightweight, pretty near leak free trailers. There is no frame - insulation & aircraft vinyl is added to the inside of the fiberglass skin. For those interested in how fiberglass trailers are constructed, I have a page of Build Photos for my 21. Escape sends them a couple times a week as the trailer is built.
Like my former 17B, the 21 has all the "stuff" found in a larger stick built trailer, and the additional 4' let me have some features that just wouldn't fit in the 17. Still a wet bath (the shower and toilet are in the same space) but I now have a built in microwave, a real gas oven, a 6 cubic foot 2 door, 3 way refrigerator, a full size bed and a 4 person dinette with wrap around seating.
While many of the modifications I did to my 17 are either now standard or available as options on the 21, I still end up doing modifications to make the trailer better suit my needs.
New Modifications - 2018
New Modifications During Fall, 2019
New Modifications - 2024
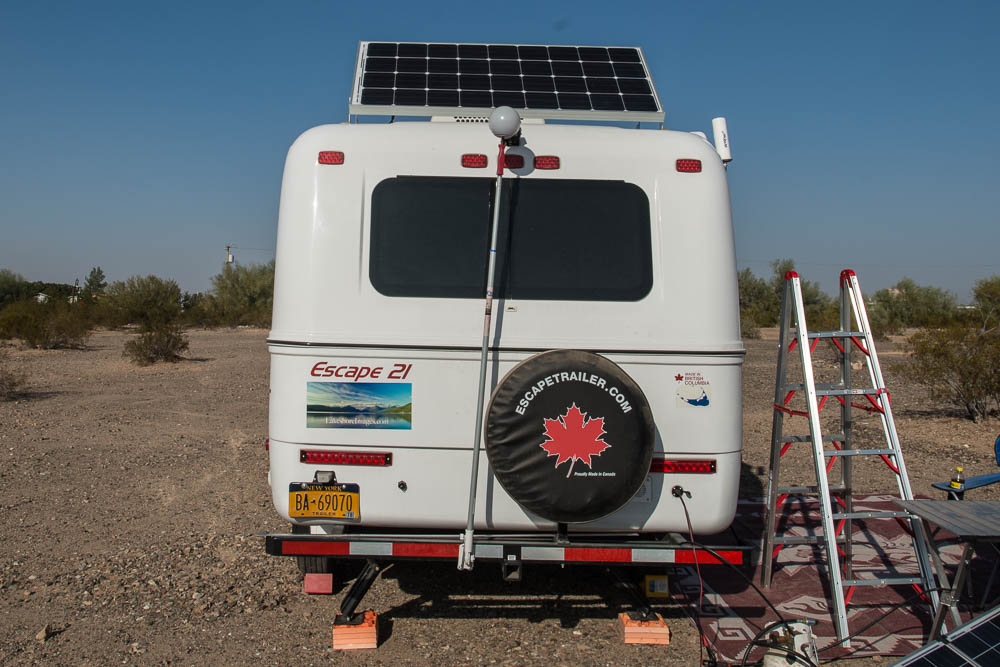
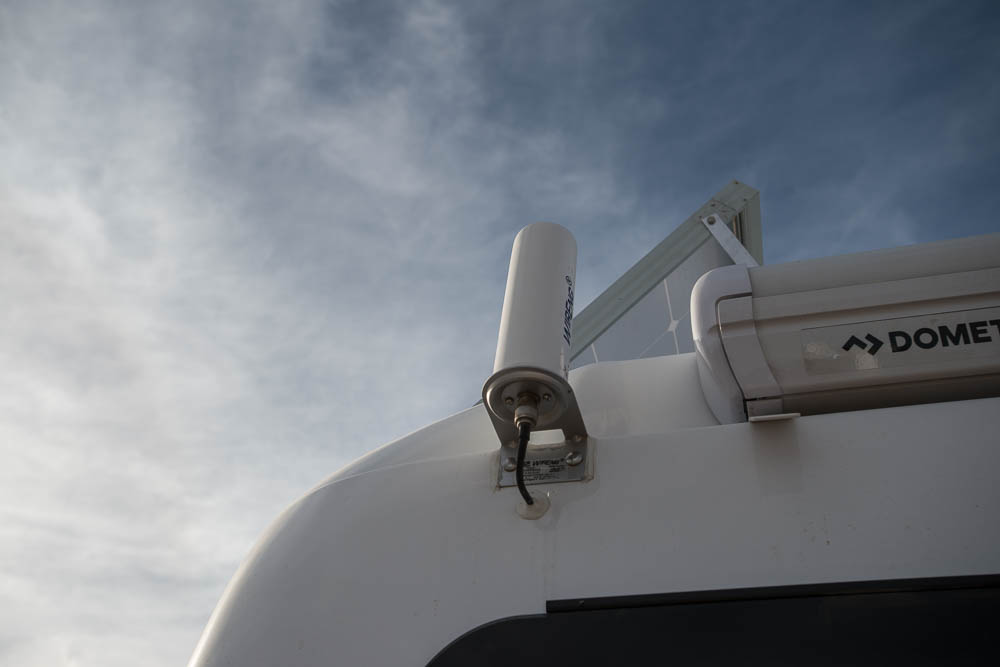
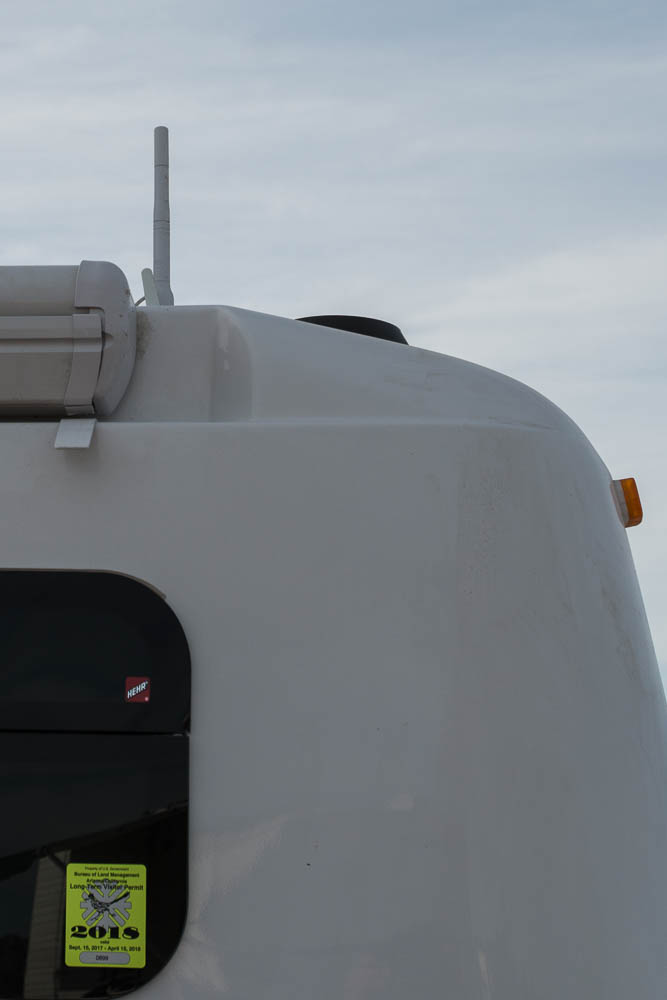
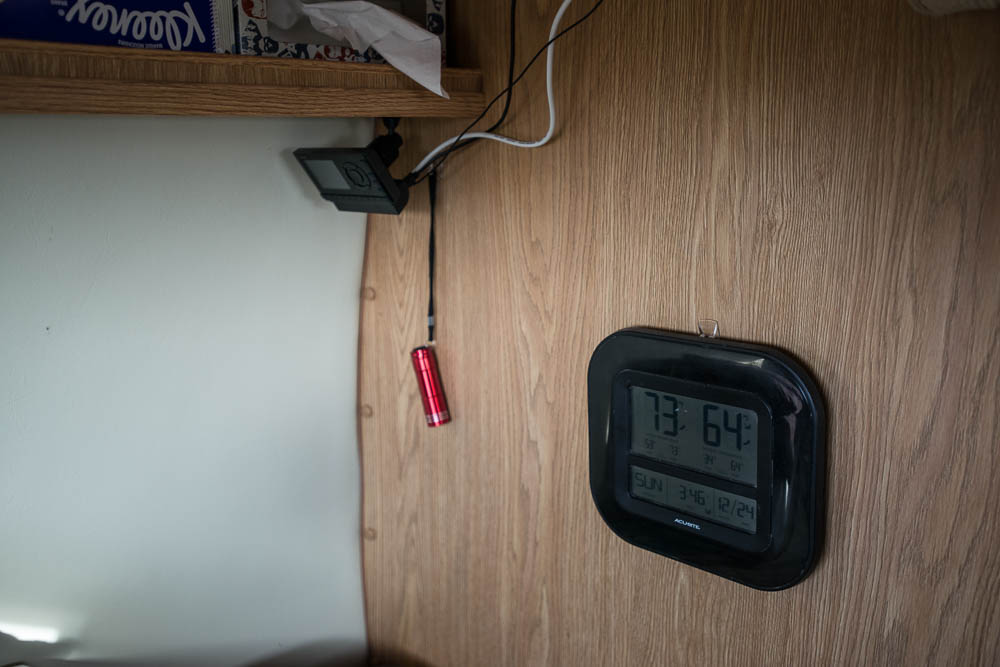
I has Escape install a cell phone antenna, a WireNg Marine cell antenna that is the same model I added to the 17, and a XM Radio antenna that has more gain than the stock magnetic antenna that comes with the XM Radio (and which doesn't stick to fiberglass all that well!)
|
|
|
| WireNg Cell Antenna | XM Antenna | XM Radio & Outside Thermometer |
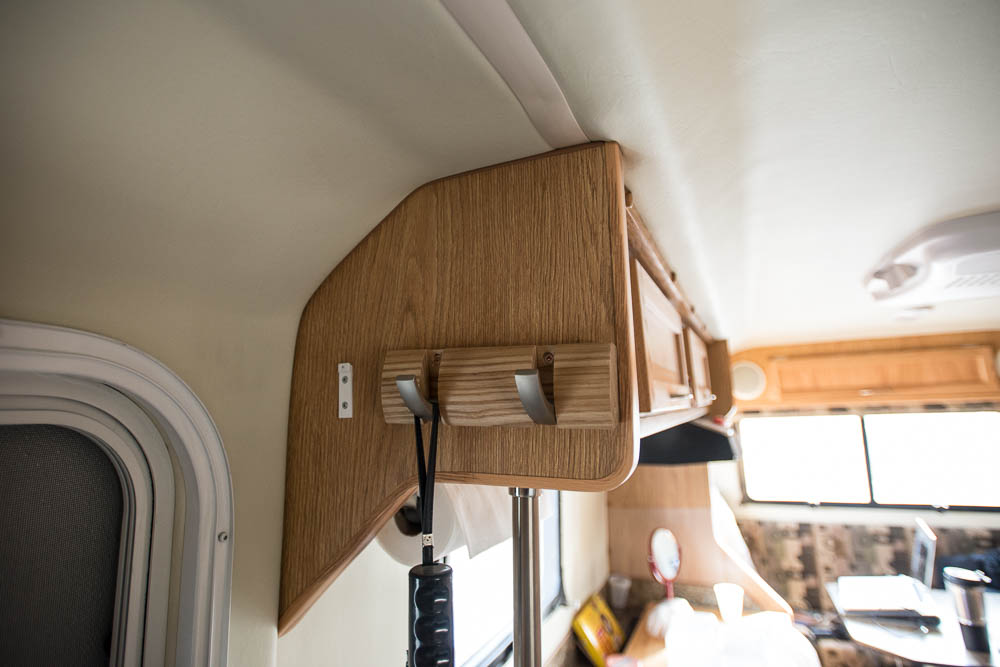
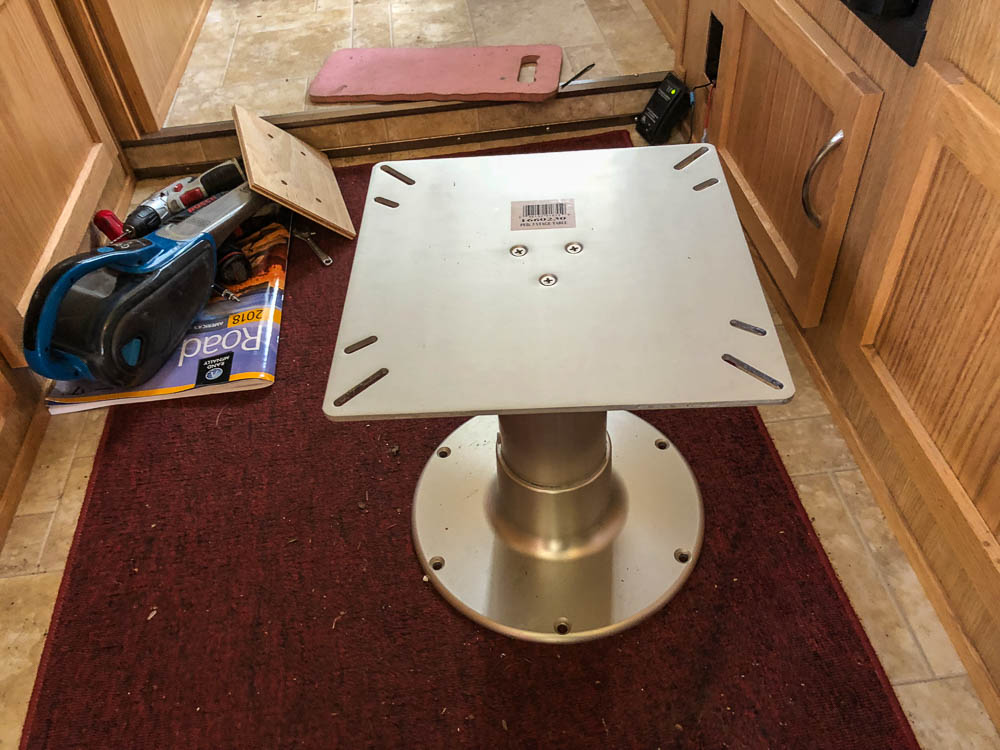
A couple of other additions were made during my orientation session at Escape so that they were positioned where I wanted them. They added a Springfield table support, and three Umbra hooks, cutting 2 of them to fit the spaces I chose.
 |
 |
 |
 |
| Springfield Adjustable Table Mount | Umbra By the Door | Umbra On Bathroom Wall | Umbra On Refrigerator Wall |
Another minor addition was a paper towel rack. I like this model, combined with Viva paper towels (Viva because they rarely unroll while traveling).
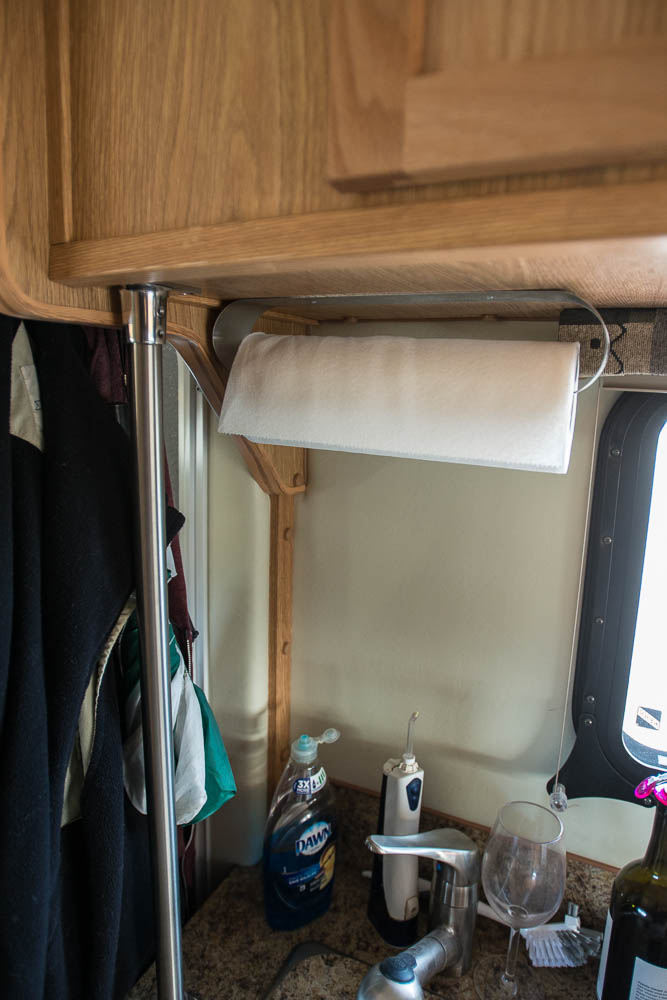 |
| Towel Rack |
I ordered a bamboo spice rack since I really hate digging through one of the lower cabinets for the different spices I carry. The problem is all the racks I found had fairly low front rails, which is fine for homes (well, maybe not in California where you have to always worry about the "Next Big One"), but not in a trailer where each time you move you would be picking the bottles off the floor. While the bamboo rack has low rails, I was able to add a couple of small stretch cords to hold the spices in.
Mounting it on the 1/16" thick wall was difficult, particularly because it is only 3/4" of an inch dead space behind the paneling. I ended up using wing toggles since all the normal anchors I found were designed for thicker walls. A bit of a pain to install, but the job is done.
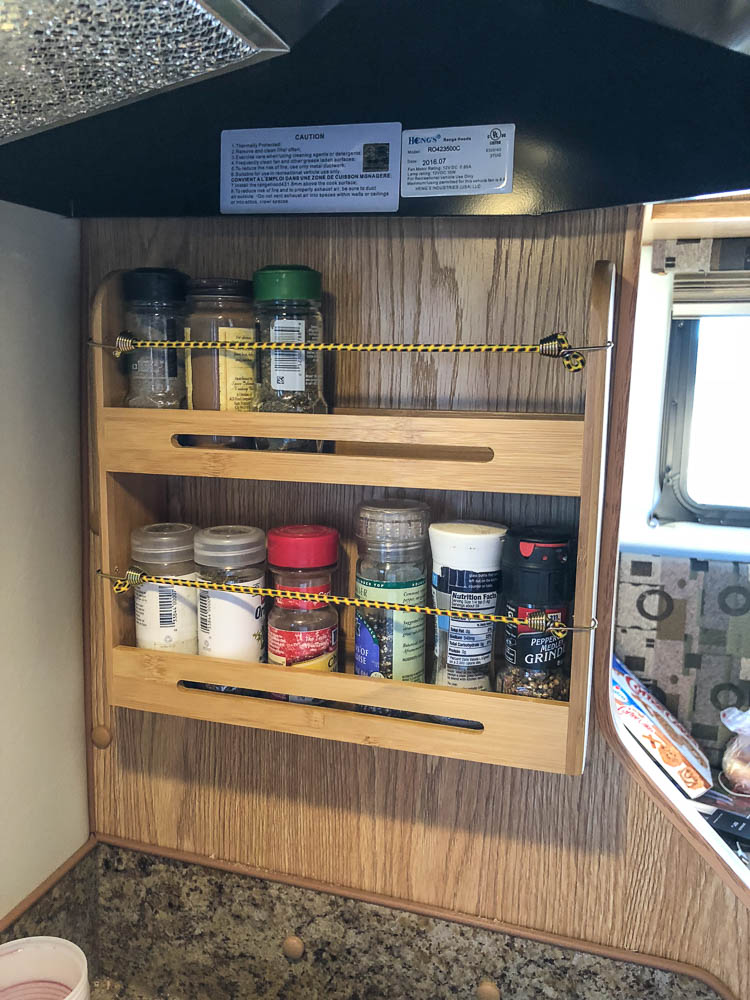 |
| Spice Rack |
One of the first modifications I did was to install a battery monitor. The Bogart Industries TriMetric TM2030-A monitor consists of two parts, a large shunt through which all the battery current (in & out) runs, and the monitor itself. The advantage of the battery monitor is it measures amp hours in & out, a far more accurate indication of the state of charge of the batteries than the indicator built into the solar controller, or the meter built into the trailer.
 |
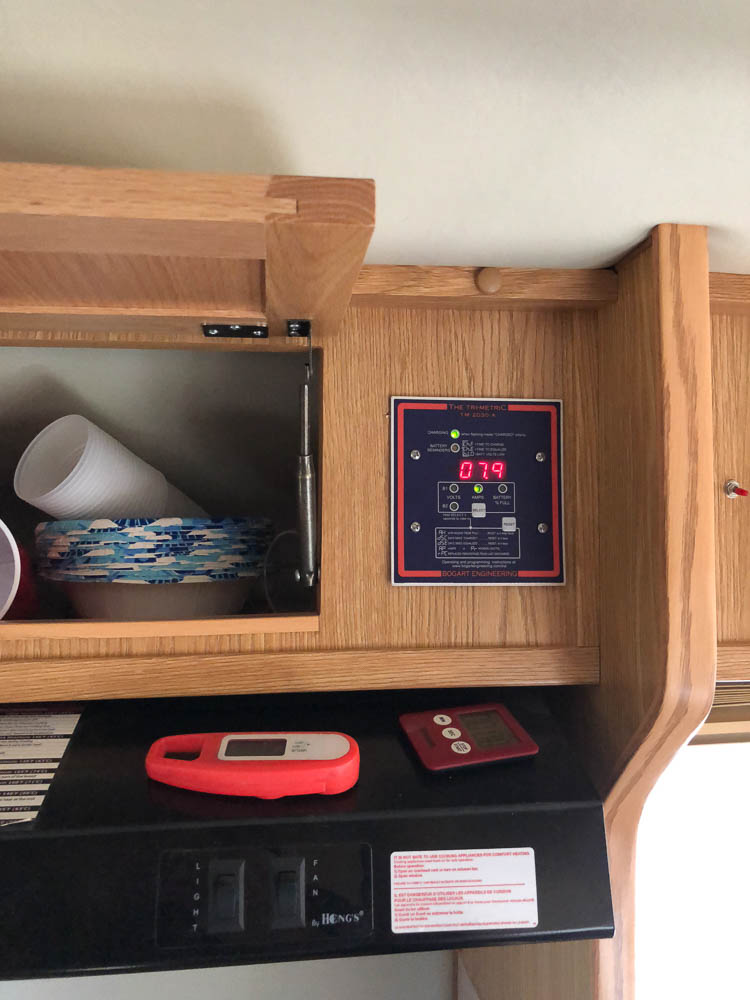 |
| The Shunt | The Monitor |
Another early addition was LED lights in the upper storage cabinets. Escape won't install the lights, but will add electrical drops in each cabinet which made the process much easier than in the 17. Like the 17, I used manual switches rather than magnetic or other "automatic" switches. I prefer to be able to leave the doors open during cold weather without the lights on.
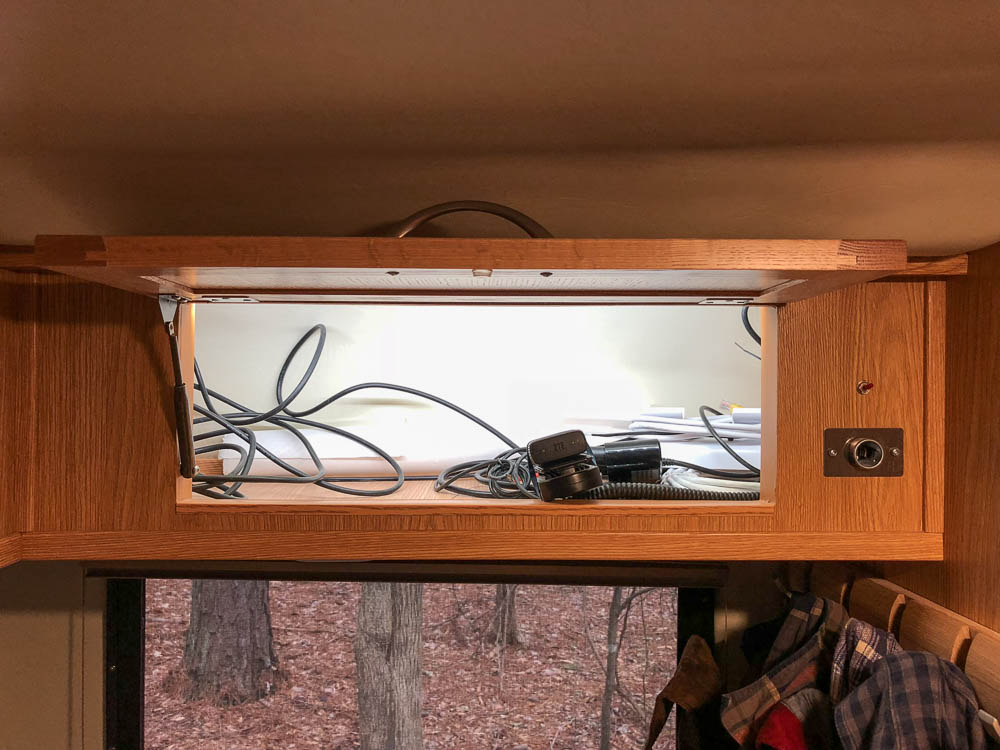 |
| Cabinet Lights |
I would have liked to have sent them the JVC radio I installed in the 17, but it is no longer made & the FM sensitivity specifications on the closest replacement were not as good. Since that was the main reason for buying the JVC, I looked else where. I sent them a Kenwood KDC-BT765HD, which looked good on paper. Unfortunately, in actual use, it was worse than my truck radio (which is worse than the old RAV4 radio) picking up distant stations. So, one of my early projects was to change the radio for a Pioneer DEH-X8800BHS. Better than the Kenwood, but still not up to the JVC. Boy do I miss that radio! I like to listen to NPR radio & classical stations, both which are usually low power & far between. Now if I liked country, that seems to be available anywhere...
Since I often use my iPhone as a internet radio, I added a phone holder next to the head of the bed:
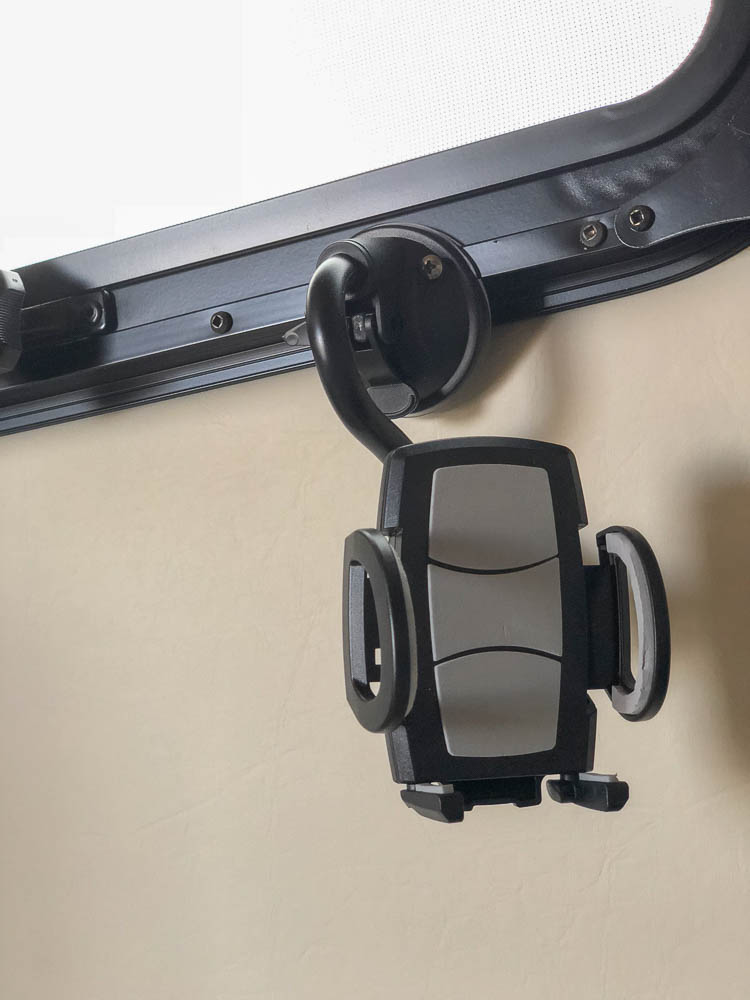 |
| Cell Phone Holder |
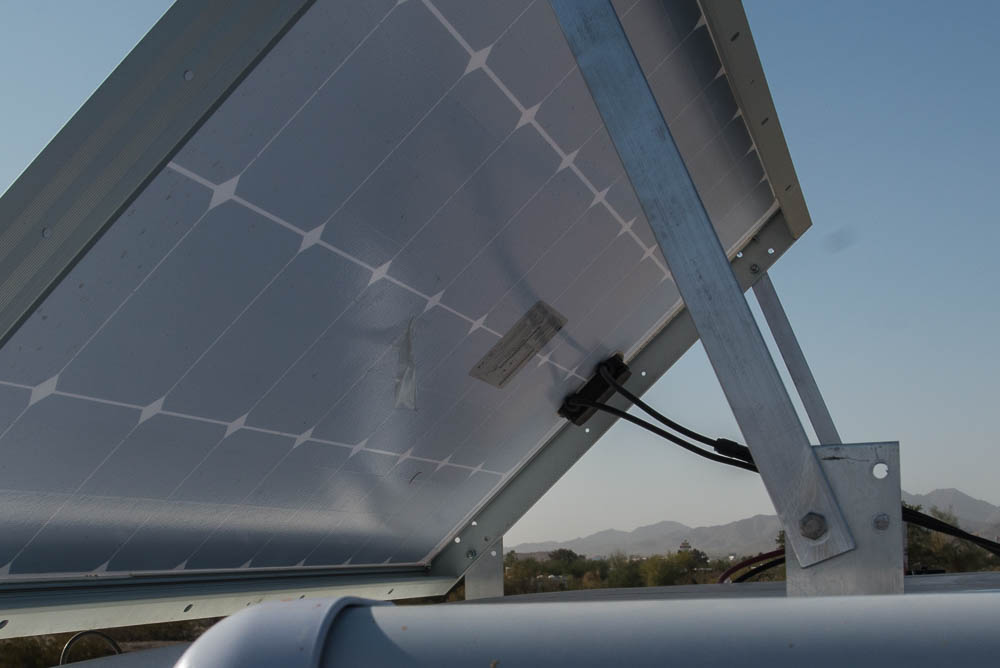
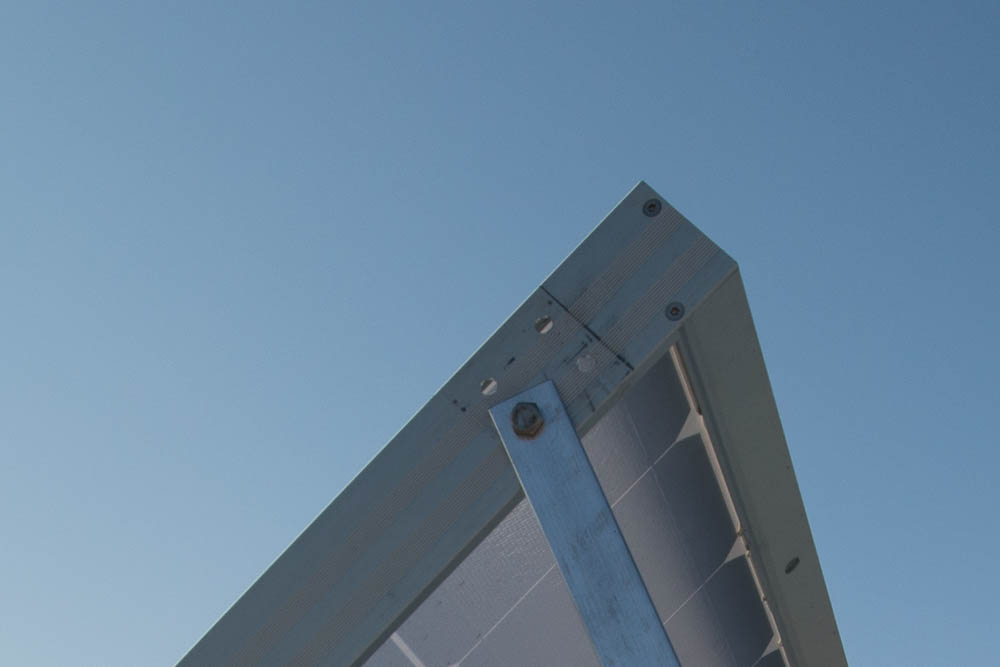
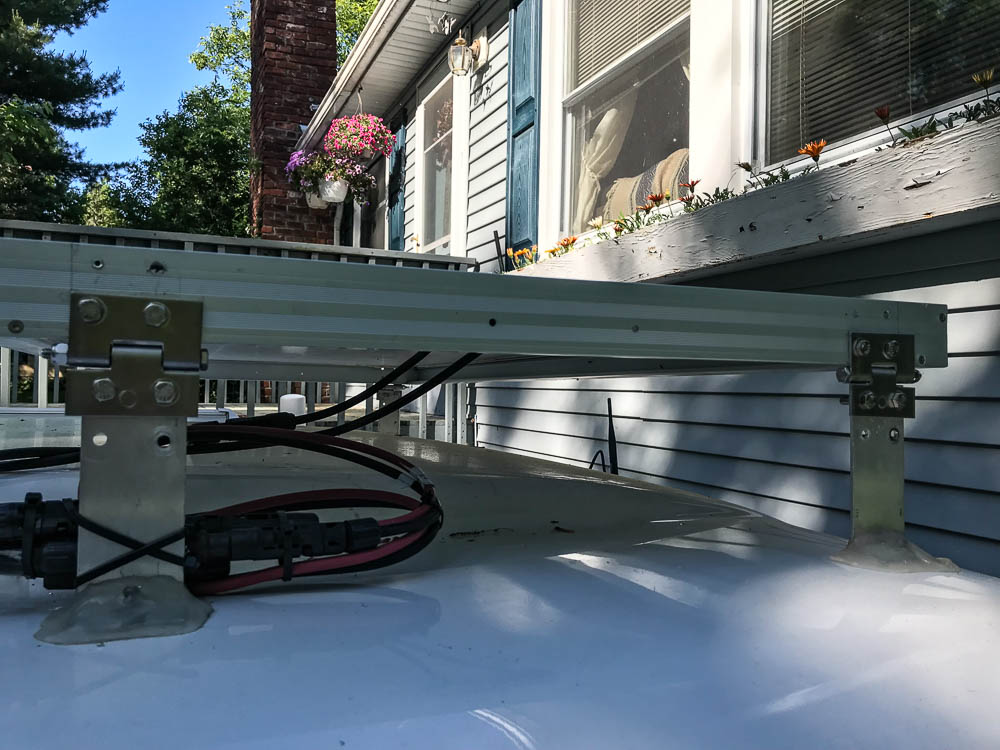
I ordered the 21 with 2 160 watt solar panels on the roof, and a Zamp (SAE) connector for my portable 160 watt panel. One of the modifications that will be helpful during the winters I spend at Quartzsite is to make the roof panels tiltable. The flat panels work fine during the summer when the sun is overhead (and the days are longer) but even with the usually clear winter skies at Quartzsite, the low angle sun doesn't put much energy into the flat mounted panels other than an hour or two around noon.
The plan was to tilt the panels perpendicular to the trailer length, however to do that and keep the mounting hardware installed by Escape, I'd need to find 2" heavy duty aluminum hinges, preferable with at least 1/4" removable hinge pins. So, at least for now, they are going to tip towards the back of the trailer. Scroll down for the additional modifications that allow east/west tilting.
 |
 |
|
 |
| Tilting Details | Tilting Details | Rear Panel & Ladder | Both Tilted |
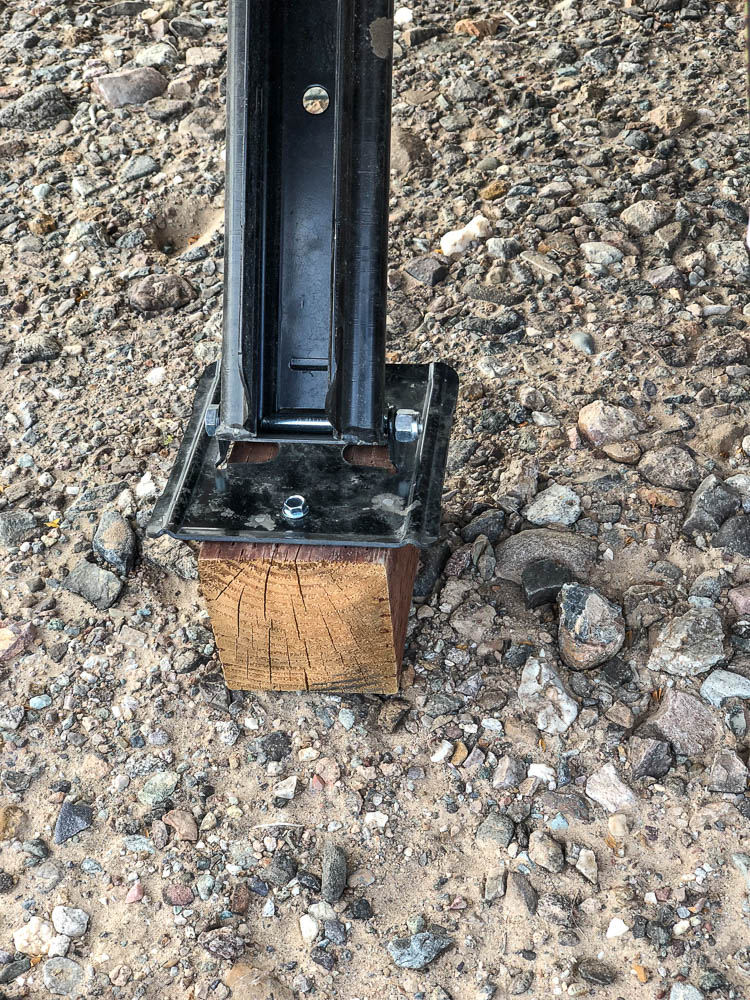
Like my 17B, I wanted to carry a ladder to reach the roof for cleaning, adjusting the solar panels, etc. Since the 21 is wider, I was able to purchase a 6' folding ladder rather than the 5' I added to the 17. Essentially, the same storage; a 5" vinyl fence post bolted to the trailer frame. The 6' ladder is sturdier than the 5' since it was available as a two sided ladder.
 |
 |
 |
 |
| Ladder Storage | The Mount | The Mount | Lag Bolts to 2"X2" |
 |
 |
 |
 |
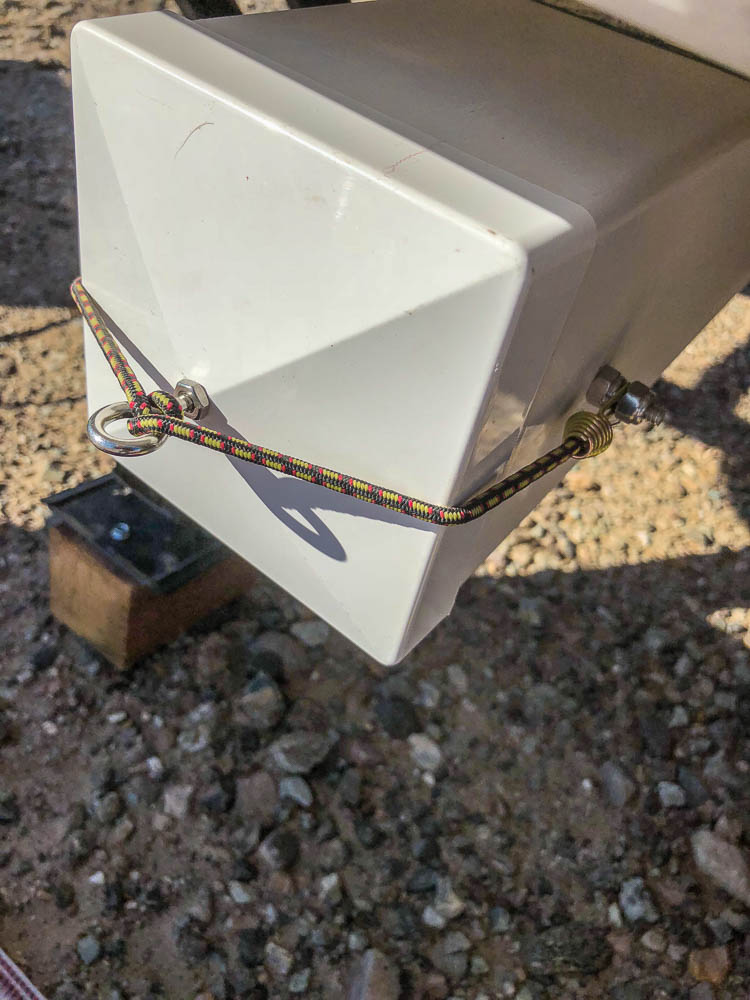
| The Cover | 4"X4" Blocks | Glow Ball Mount | Glow Ball |
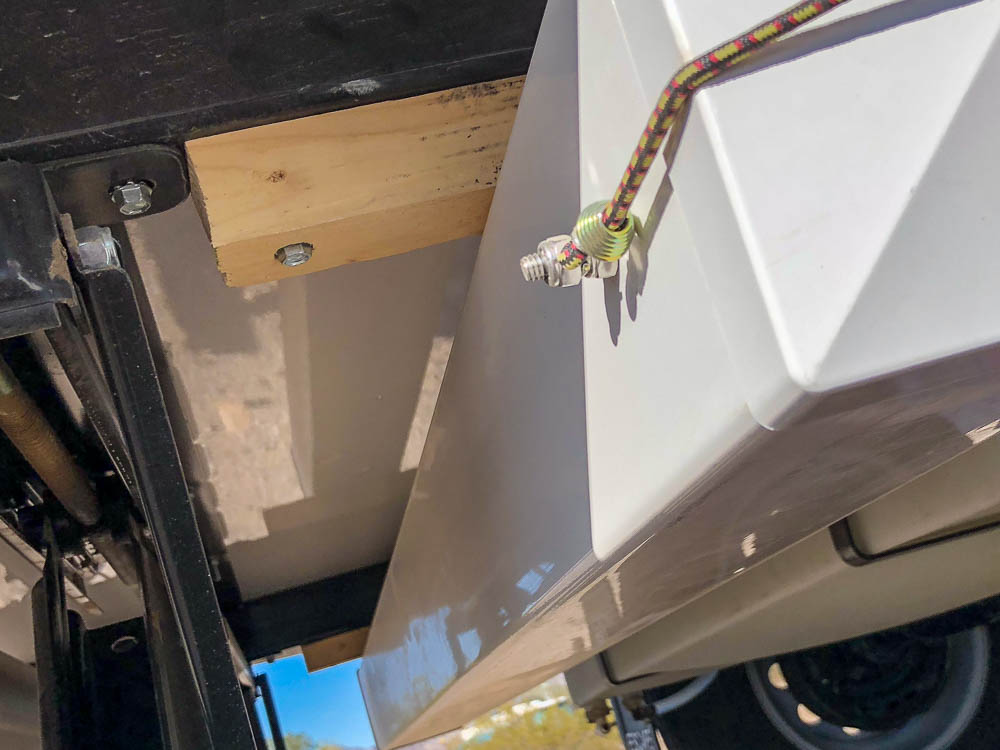
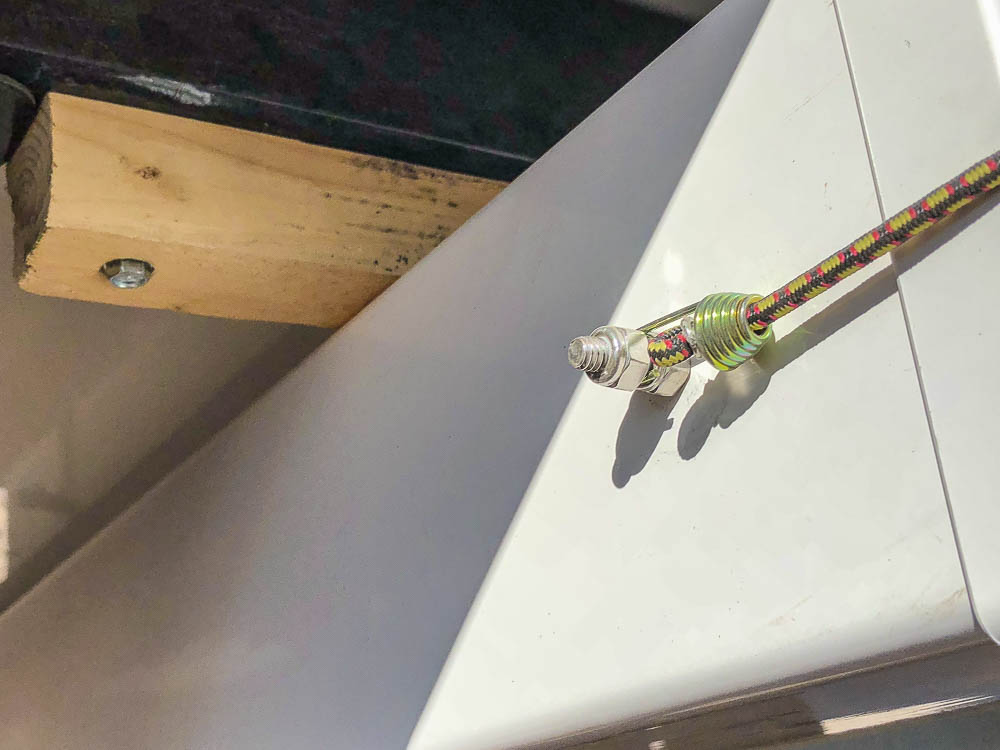
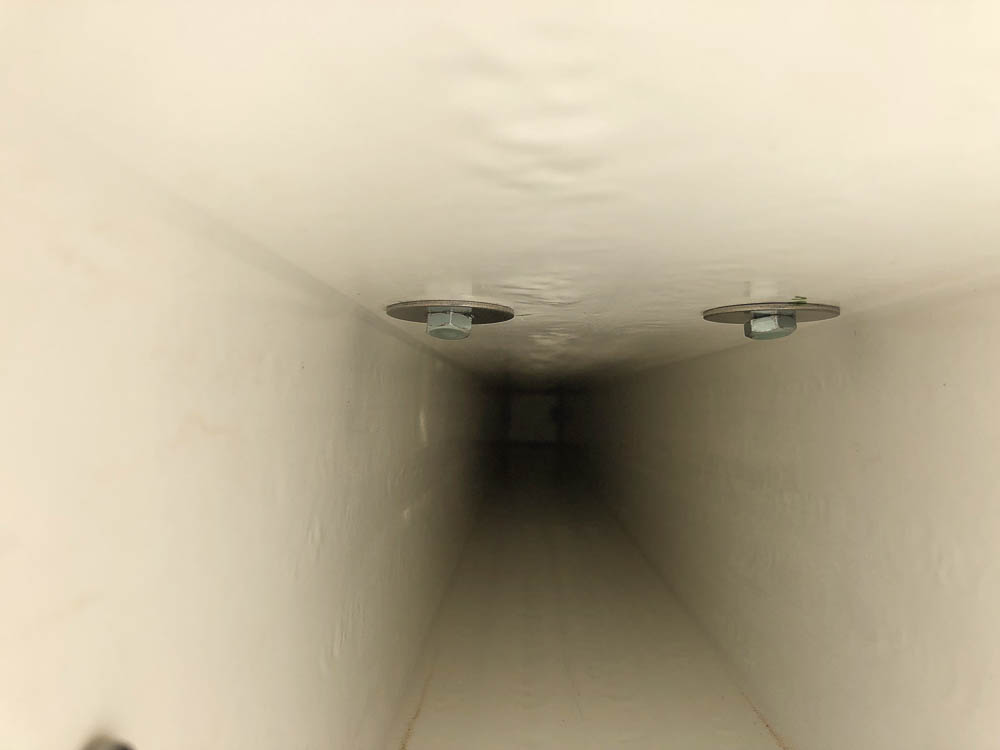
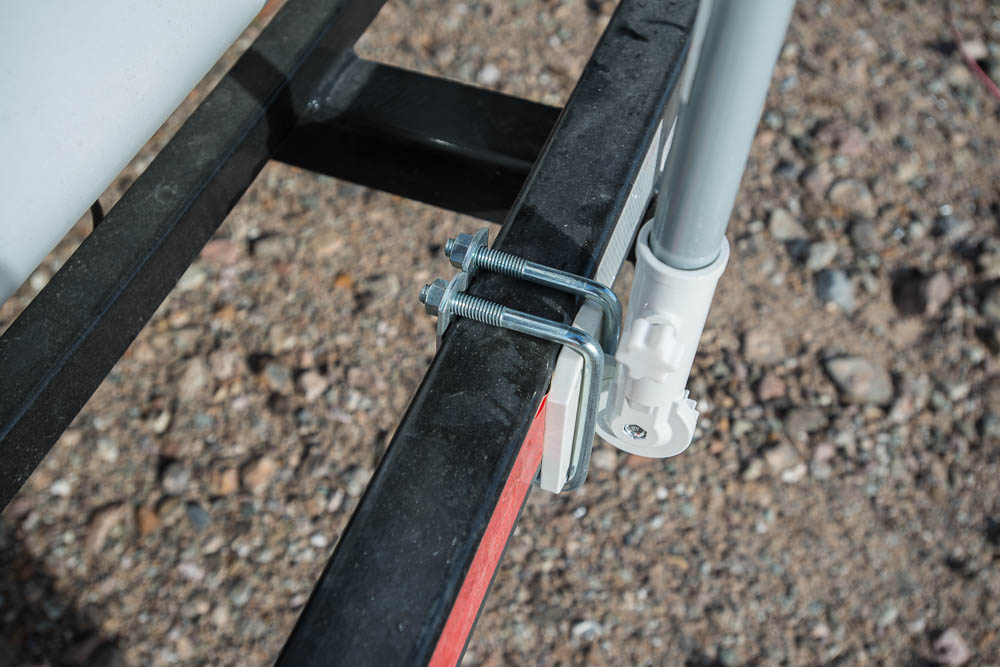
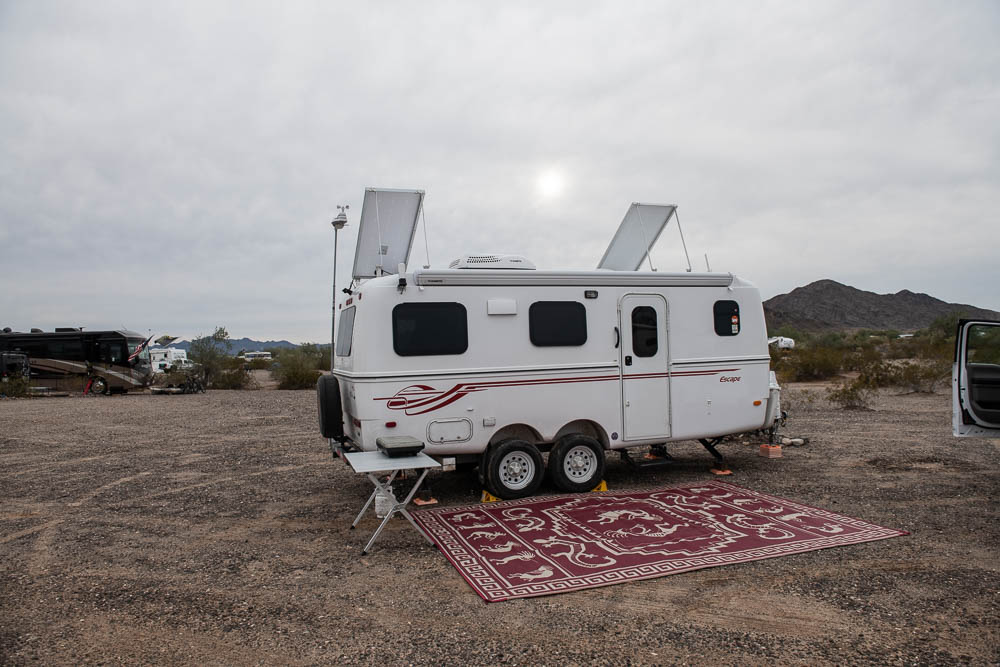
I added a mount to the rear bumper for an 8' adjustable pole (a paint roller extension) that I use for either my glow ball or a external WiFi transmitter/receiver. Since I am using an AT&T Mobley unit for my internet connection here at Quartzsite, I put the glow ball on the post.
Now that I'm back in Oswego, a number of projects are underway. The first was to make what will be the LAST radio replacement. I've been through 3 previous radios, trying to find one that has the range of the JVC KD-AR959BS that I had installed in my Escape 17B. While the previous radios had excellent specifications (the same as the JVC), in reality they didn't have the reception of the first JVC radio. While it appears to be obsolete, I found one at an Amazon Associate, and installed it. It works just as well as the one in the 17B. It may be because it is analog rather than digital, but since I often camp in the middle of nowhere & like to listen to NPR radio, it works for me.
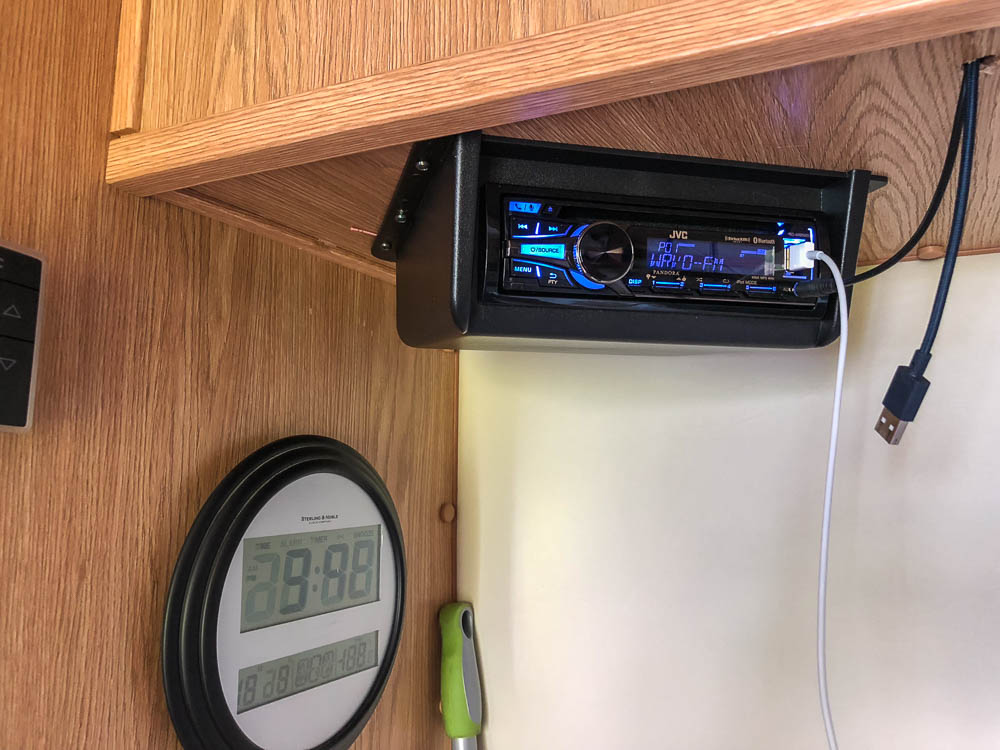 |
| JVC KD-AR959BS Receiver |
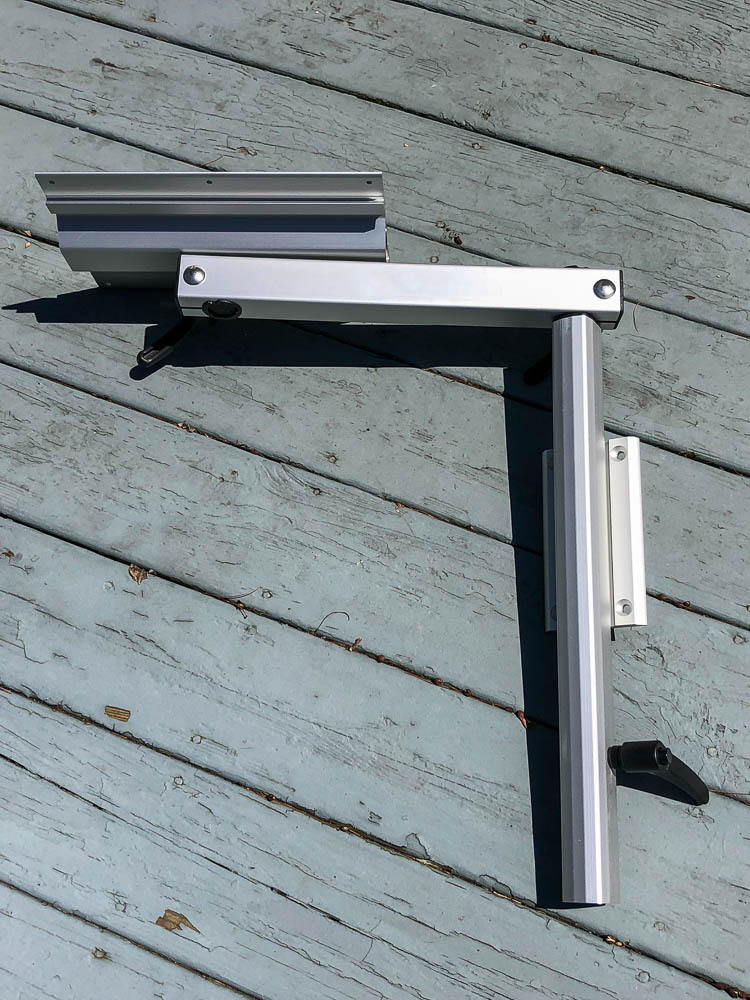
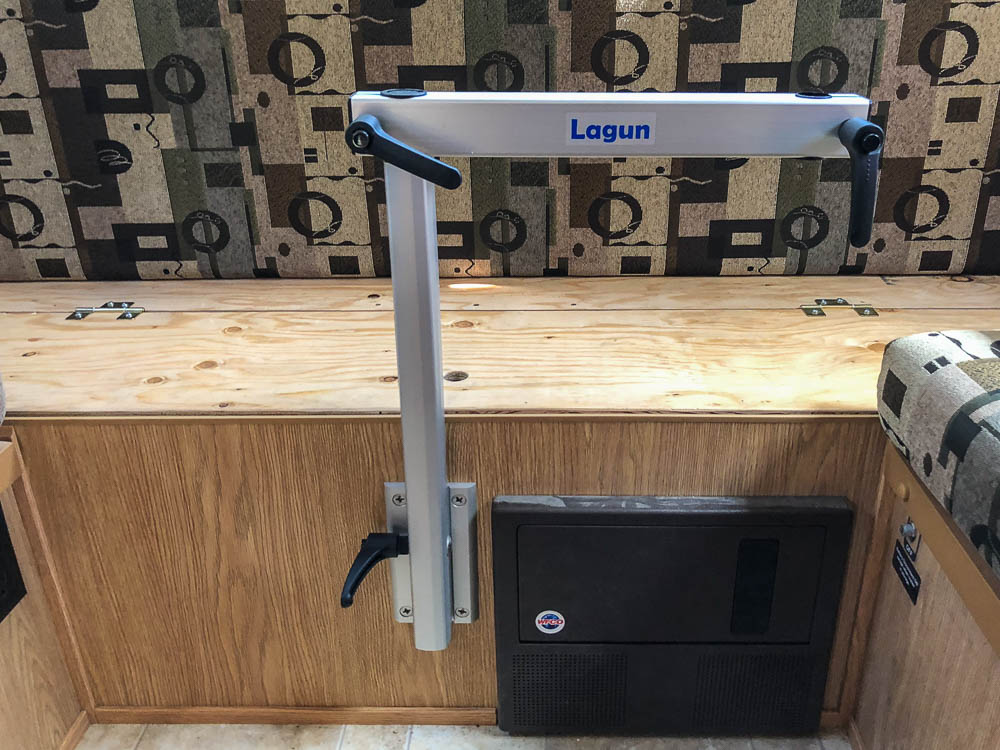
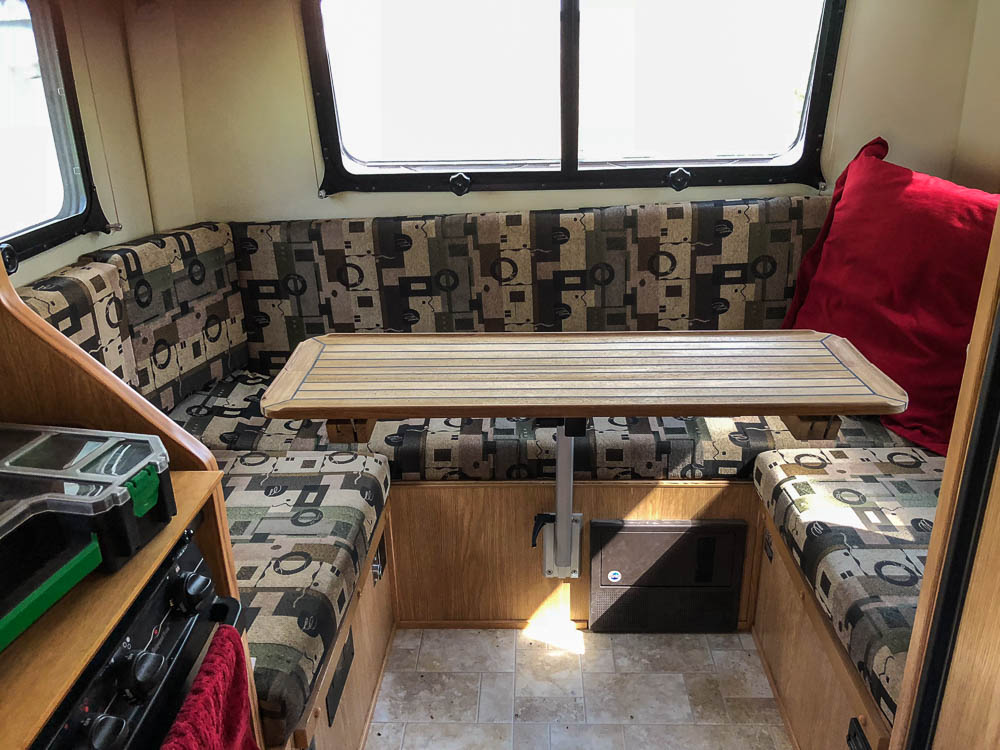
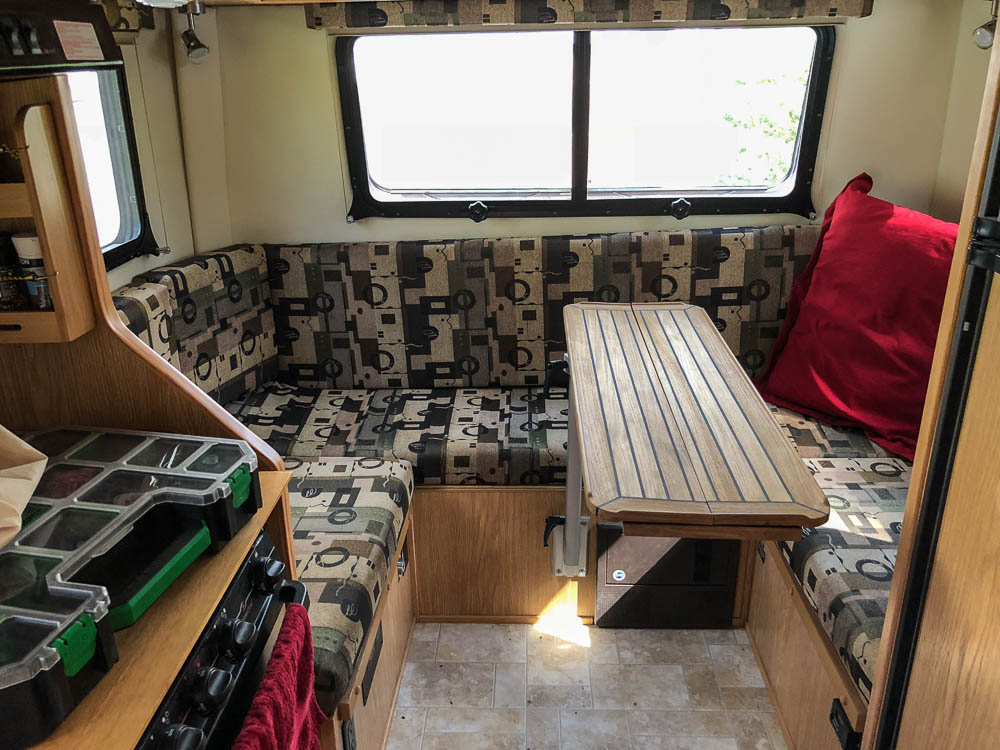
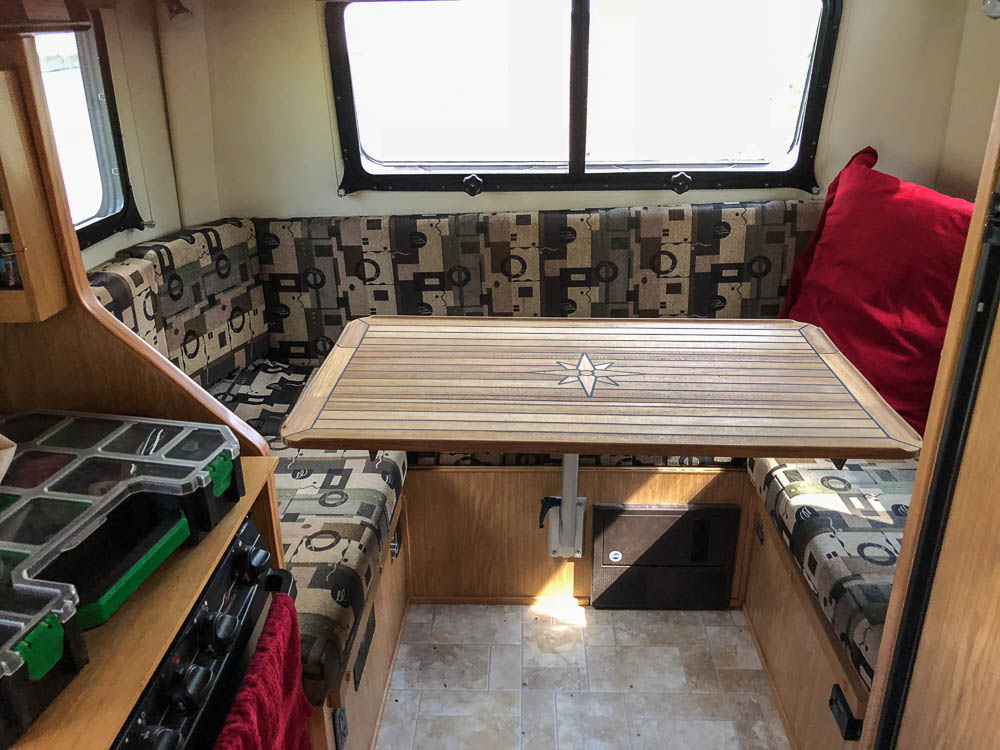
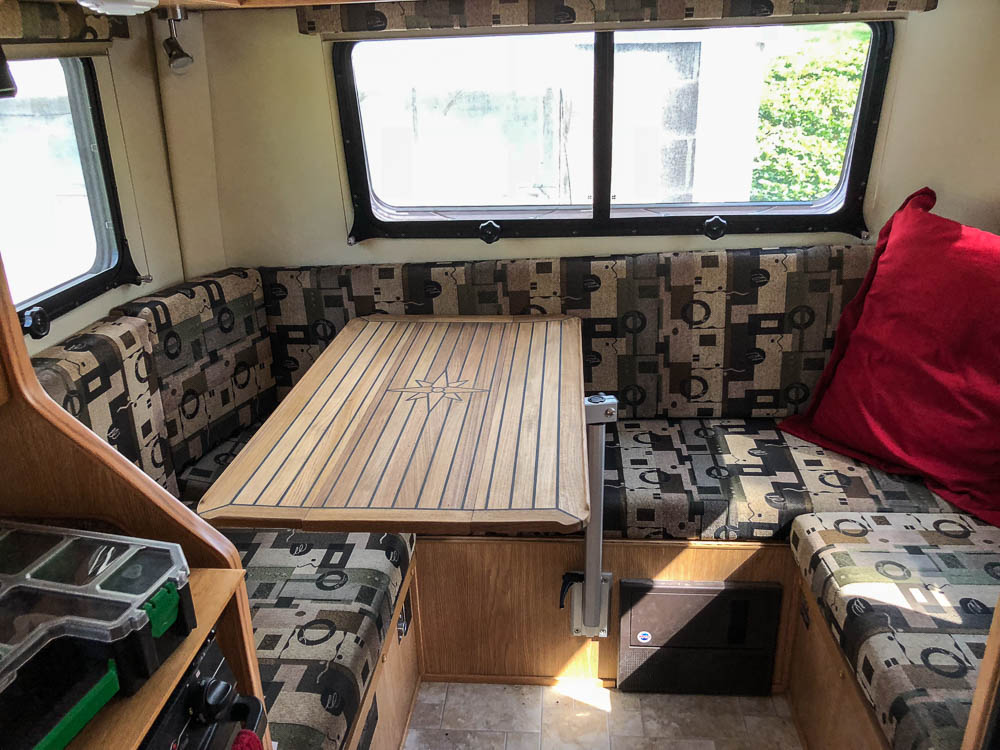
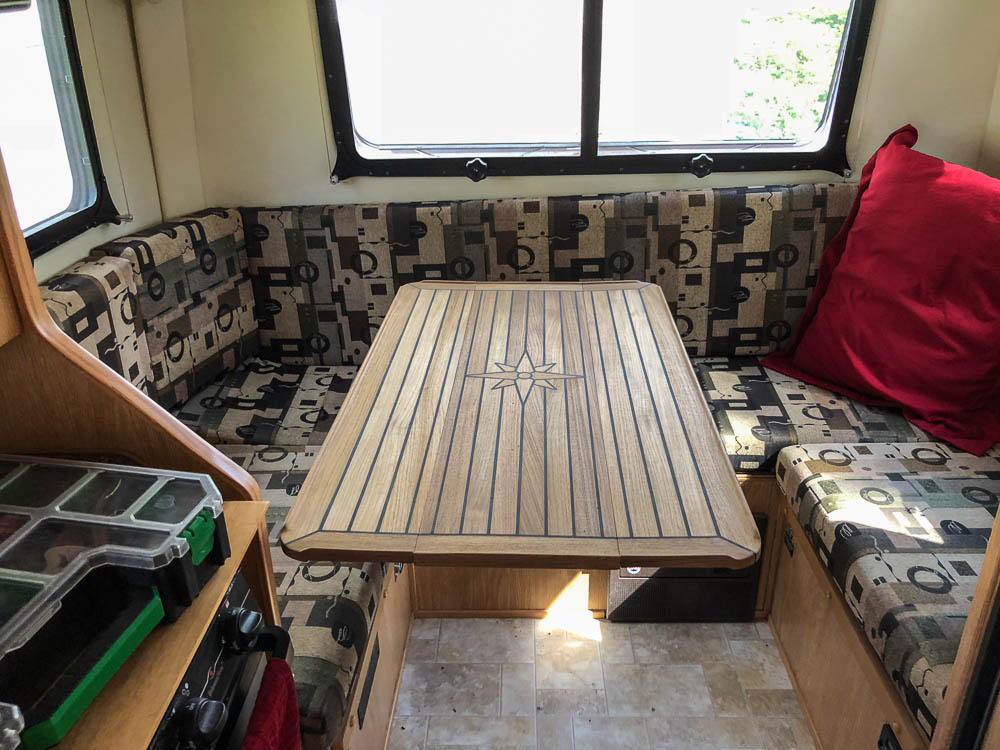
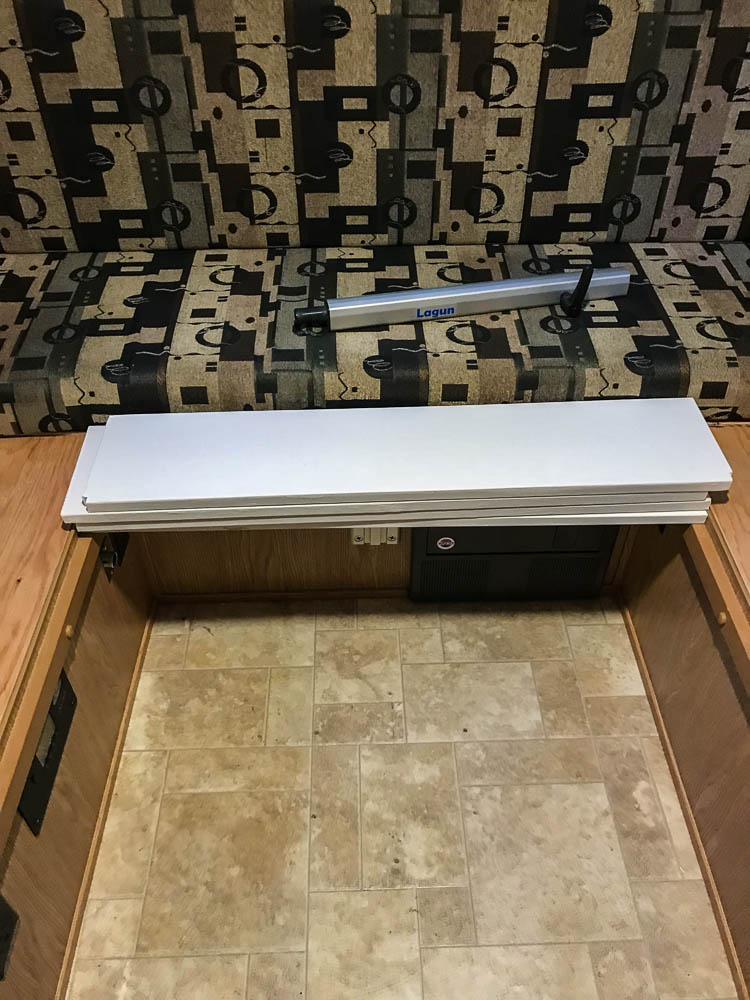
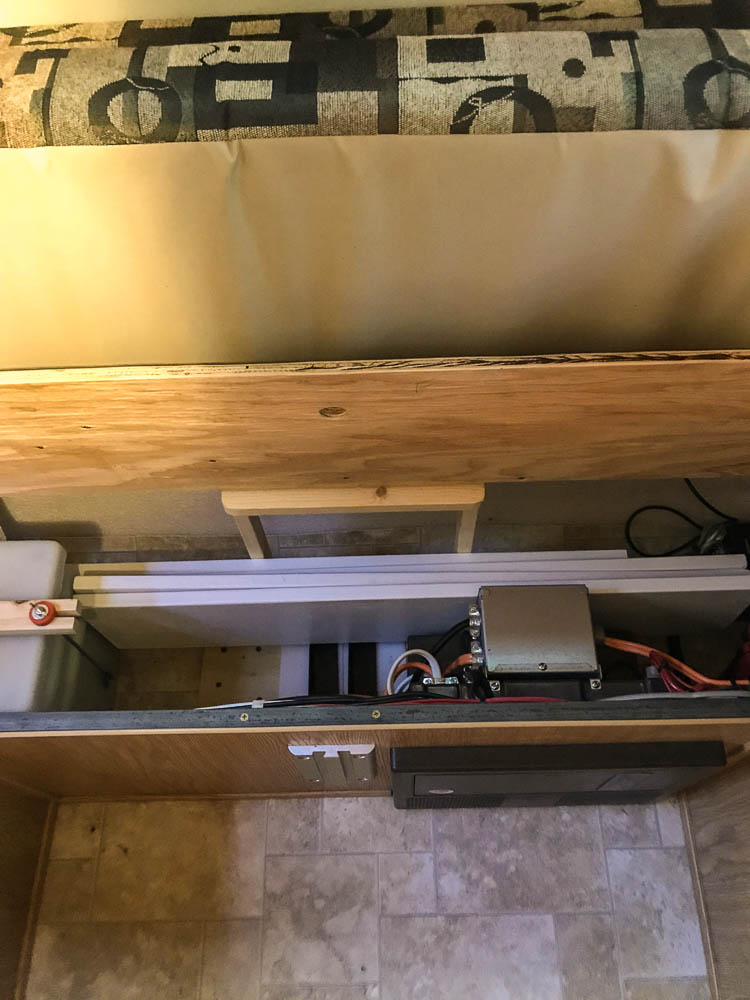
The next project is to replace the Escape provided table & the Springfield pedestal I provided with a Lagun support & folding teak table. While I liked the Springfield compared to the two post system that Escape provides, I can't slide the table off to the side to make access to the under seat storage areas, and even with the table slid as far to one side as possible, turning around to reach into the upper cabinets is difficult. Another advantage of the Lagun mount is the table (and mount) can be removed. The disadvantage is the teak table I am using with the Lagun mount cannot be used as a base for a bed. I'll add a couple of boards that will store under the rear bench seat that can be used to make a bed base.
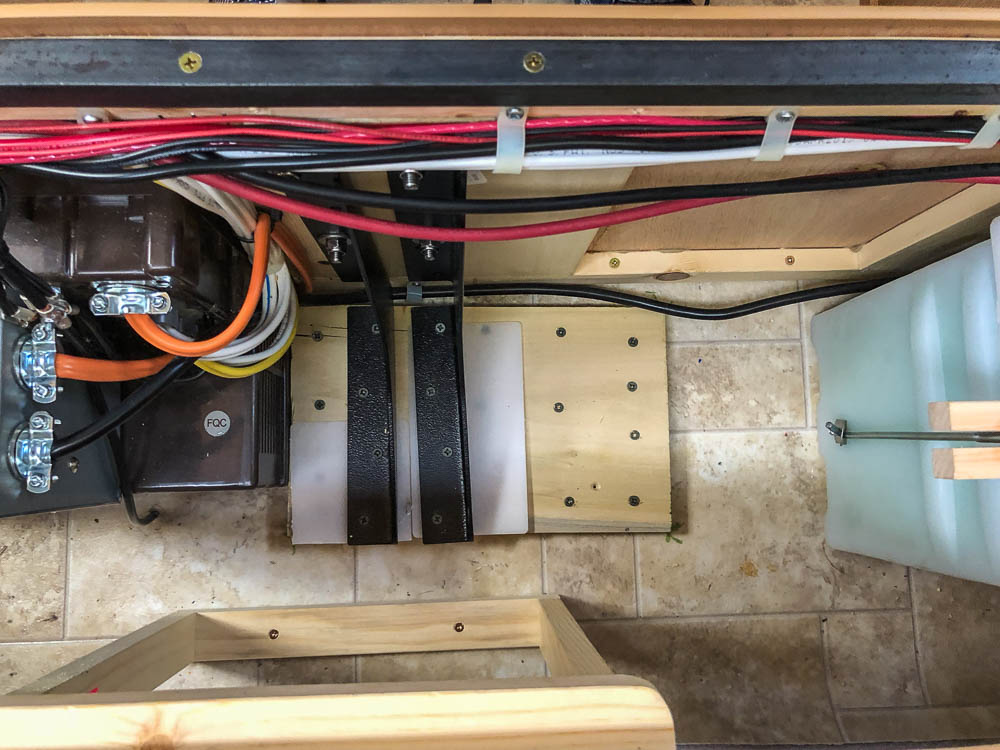
I added a 5' long piece of 1/8" X 3/4" X 3/4" steel angle iron to the top of the seating front to prevent flexing, and a pair of 1/8" X 8" X 12" AM0812B Workstation Brackets from Woodworkers Hardware (the are also available from Amazon) for additional support. The table is quite sturdy, even though it weighs more than the stock Escape table. The photos show it open & closed in a couple of positions. As most who have made the conversion have done, I switched the slide clamp from the right to the left side of the arm so it clears the converter. A couple of minutes with a triangular file for the switch.
My only complaint is the supports for the slide mechanics extend far enough to hit the arm as you turn it. A couple of large 1/8" inch thick plastic washers would solve the problem. I emailed Marine Teak hoping they have such, but if not, I can make a couple out of Teflon. Anyone interested in a Springfield Table Mount?
 |
 |
 |
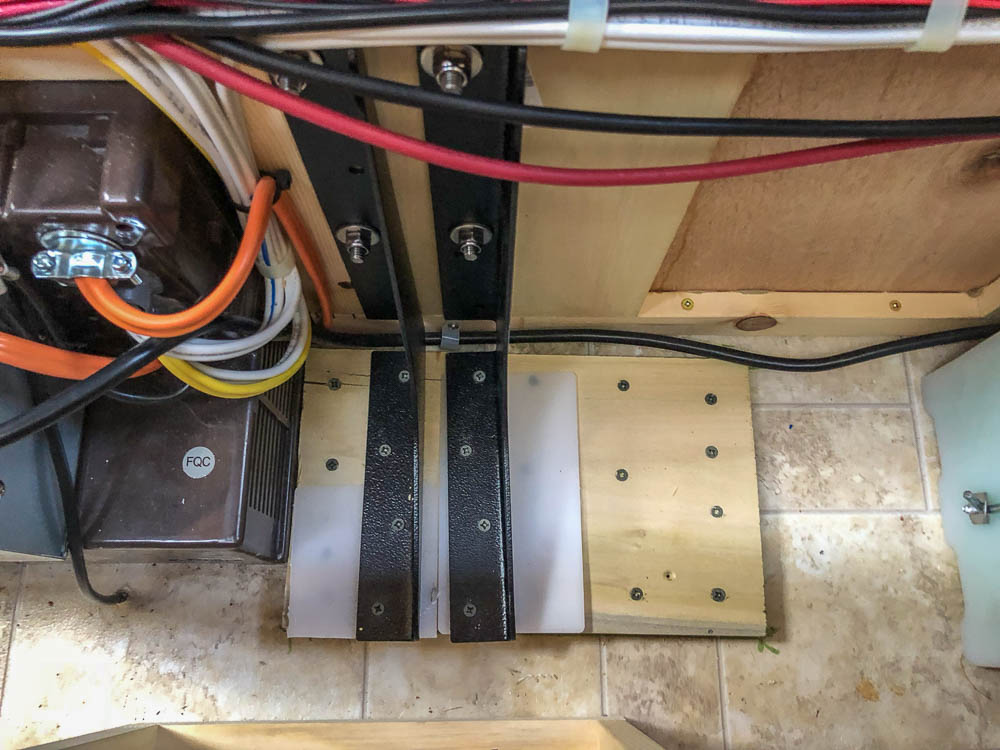 |
| The Lagun Mount | Inside "U" Shaped Dinette Seat Supports for Lagun Arm | ||
 |
 |
 |
 |
| Teak Sliding Table on Lagun Mount | Air Gateway & 12V Supply | ||
 |
 |
 |
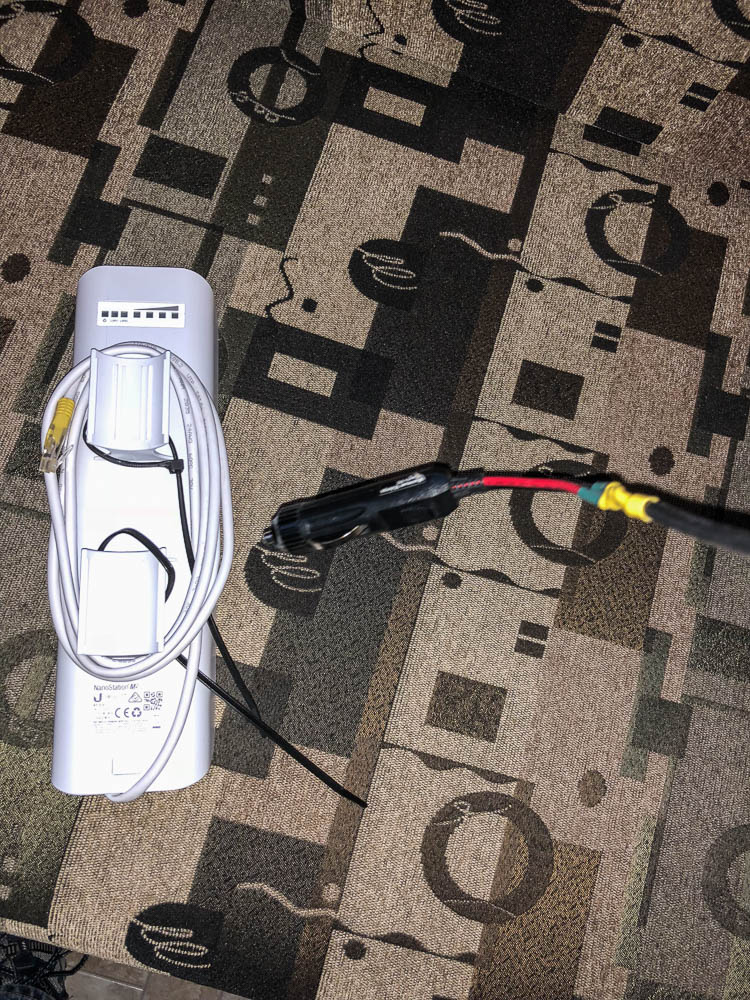 |
| Teak Sliding Table on Lagun Mount | The Springfield Mount | WiFi Nanostation | |
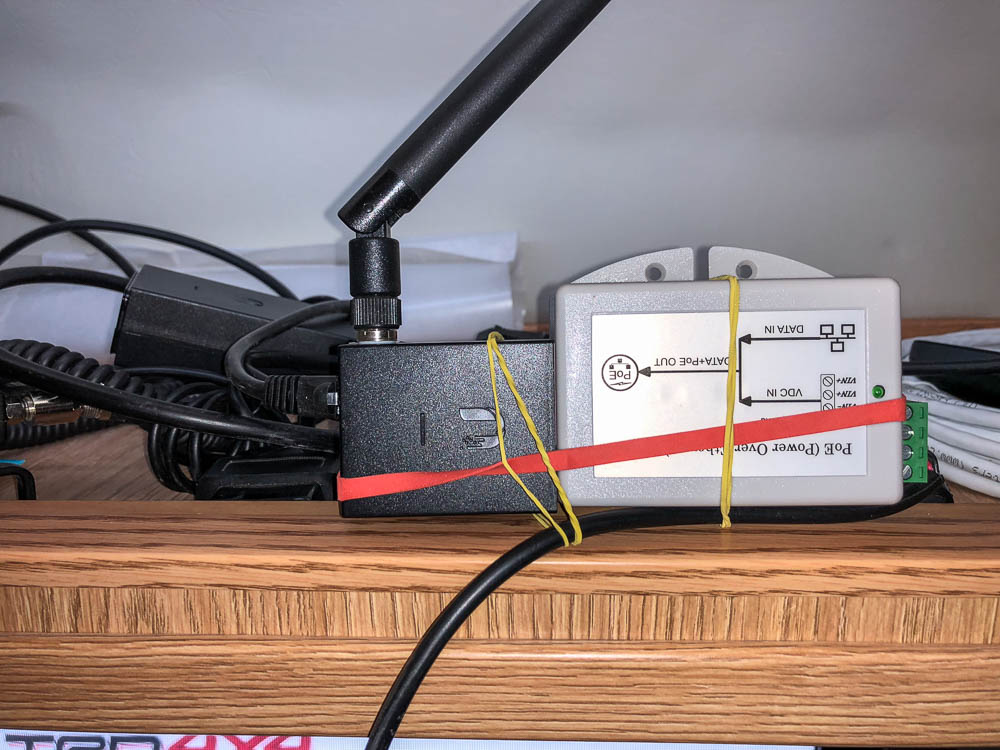
A couple of people have asked about my Nanostation & Air Gateway combination to provide a WiFi connection to the trailer. The Nanostation goes on a pole outside the trailer. It is a WiFi Radio, getting its power from a 12V supply rather than the standard 120V supply that comes with it. The 12V supply is a Tycon Power TP-DCDC-1224 9-36VDC In, 24VDC Out 19W DC to DC Conv / POE. The Nanostation has a range of over a mile when connecting to a good WiFi source, sends the received channel to the Air Gateway via a Ethernet cable (the same cable supplies 24V to run the radio), and the Air Gateway provides a local WiFi that covers the trailer (and, for me, the tow vehicle and area around the campsite).
 |
|
 |
 |
| Protected Switch | 3 Way For Radio | New Receptacle | Replaced 3" Dump Valve |
The next project was to add a switch to the propane detector. While I would prefer to have it on all the time, it has a mind of its own, and likes to go off at 3:00AM for no reason. The original did it so much I replaced it, but the new one, while better, still false alarms. I added a protective cover to the switch so it won't accidentally be switched off. The next photo is boring, but a good addition. The JVC receiver, like most auto radios, is designed to be continuously connected to 12V to retain memory, and a second wire connected to the vehicle ignition to turn on & off the radio. I added a switch near the head of the bed to turn it off at night, but it is difficult to reach when standing. The solution was to use a pair of single pole, double throw switches wired as a "3 Way" switch, and place the second switch near the radio.
After that it was time to do some more electrical work. When Escape built the trailer, I had them add a 120V receptacle that was wired directly to the converter rather than through the transfer switch. The idea was to use it for the electric cube heater, a fairly high current draw device. By wiring directly to the converter, I'd bypass the transfer switch contractor contacts, hopefully adding to it's life. The only problem was the location. I constantly knocked the connection loose when going to my usual seat at the dinette. So, a new receptacle on the other side was in order.
The last job of the day was a stinky one (actually difficult enough that I would prefer to use another word). I had a slight leak in the 3" slide valve, the dump valve for the black tank. Sometimes, when removing the cap on the sewer connection, about 1/2 a cup of black water would spill. Very annoying, and stinky! I saved it for the last thing for the day because I knew I'd want a shower when done. I have to say that Escape makes it almost impossible to change a valve. 2 of the bolts are blocked by the plumber's tape that holds the 3" drain to the trailer. There is no slack in the system, so getting the gaskets in place, then sliding the valve body in place is a bear. Lots of cursing, but it is done. It looks like it went together OK, but I'll find out the next time I have to dump!
A quick addition is an interior fan for the refrigerator. I've never been impressed with the performance of the battery operated versions, but these computer cooling fan versions work well. I had to run the power through the drain to the 12V input.
 |
| Refrigerator Fan |
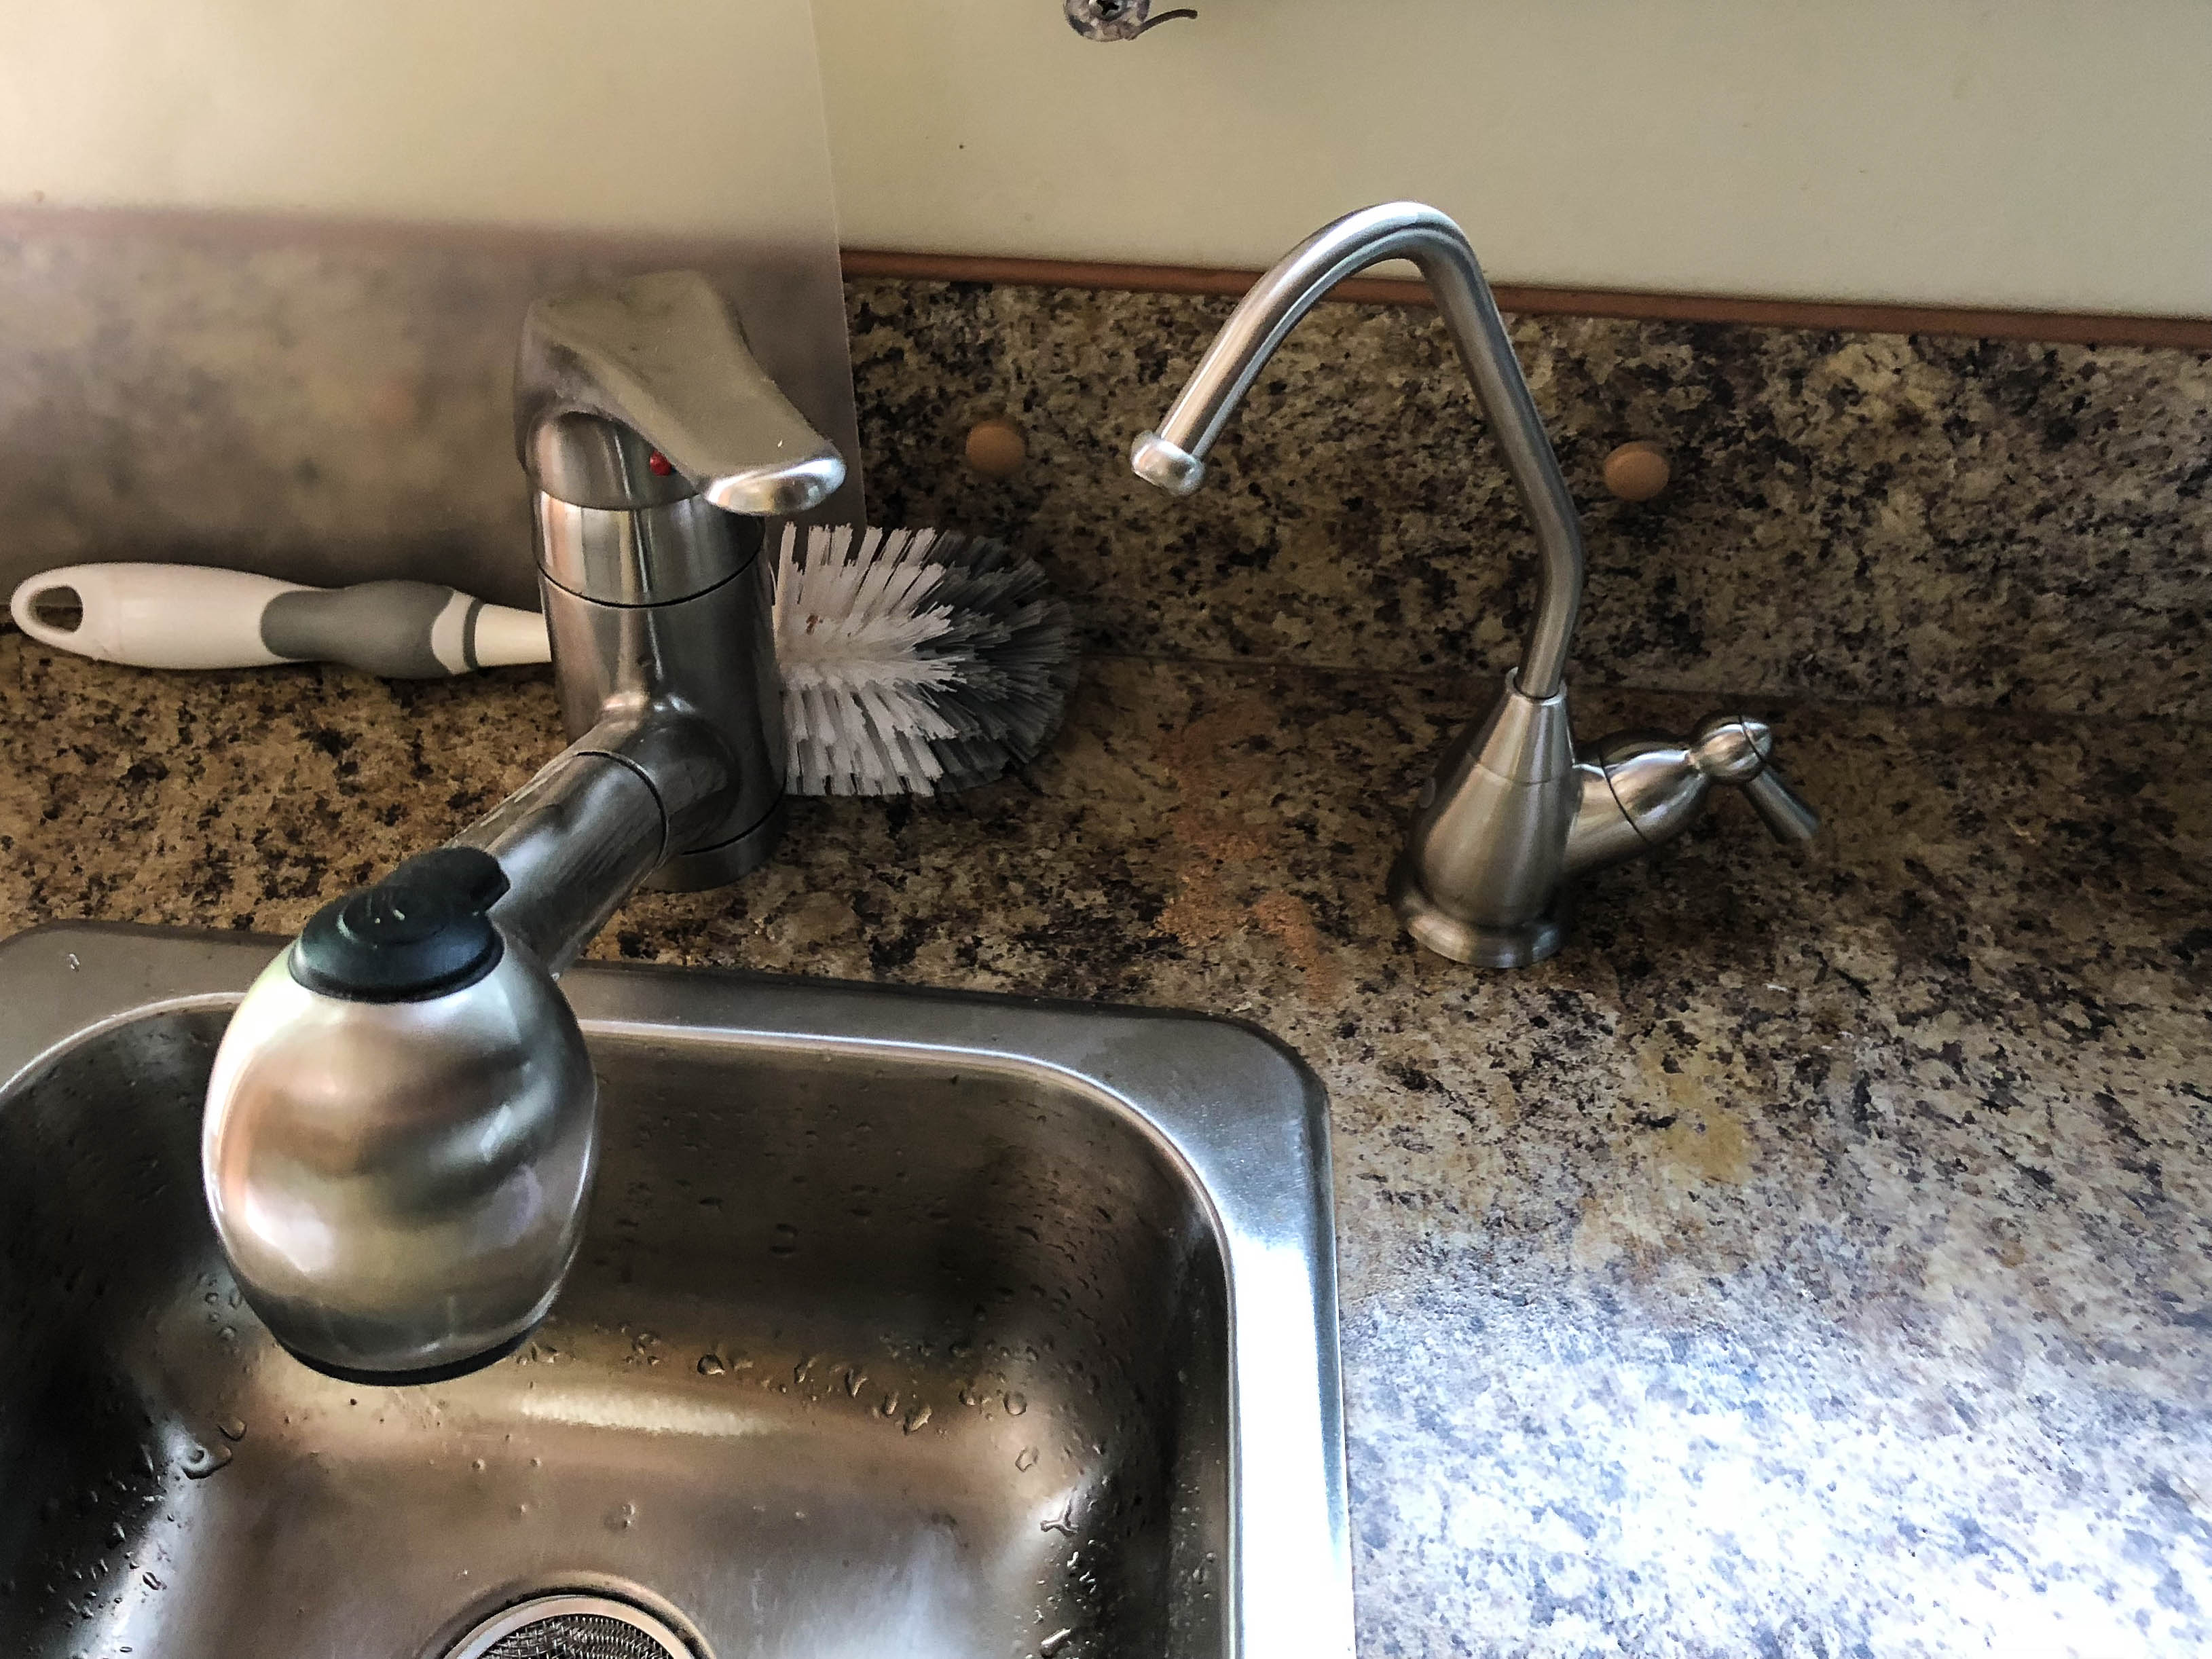
The modifications continue. First, I added a filter faucet. I liked having this on the Escape 17, so it was something I wanted to do. There isn't room for a standard 10" filter set, so as I did in the 17, I used a refrigerator filter. It removes chlorine & sediment. Not as effective as a 2 section 10" filter set, but it makes better tasting coffee when the campground water is over chlorinated. Since the cabinet floor is still a bit damp, I'm going to wait for it to dry before I Velcro the filter to the floor.
 |
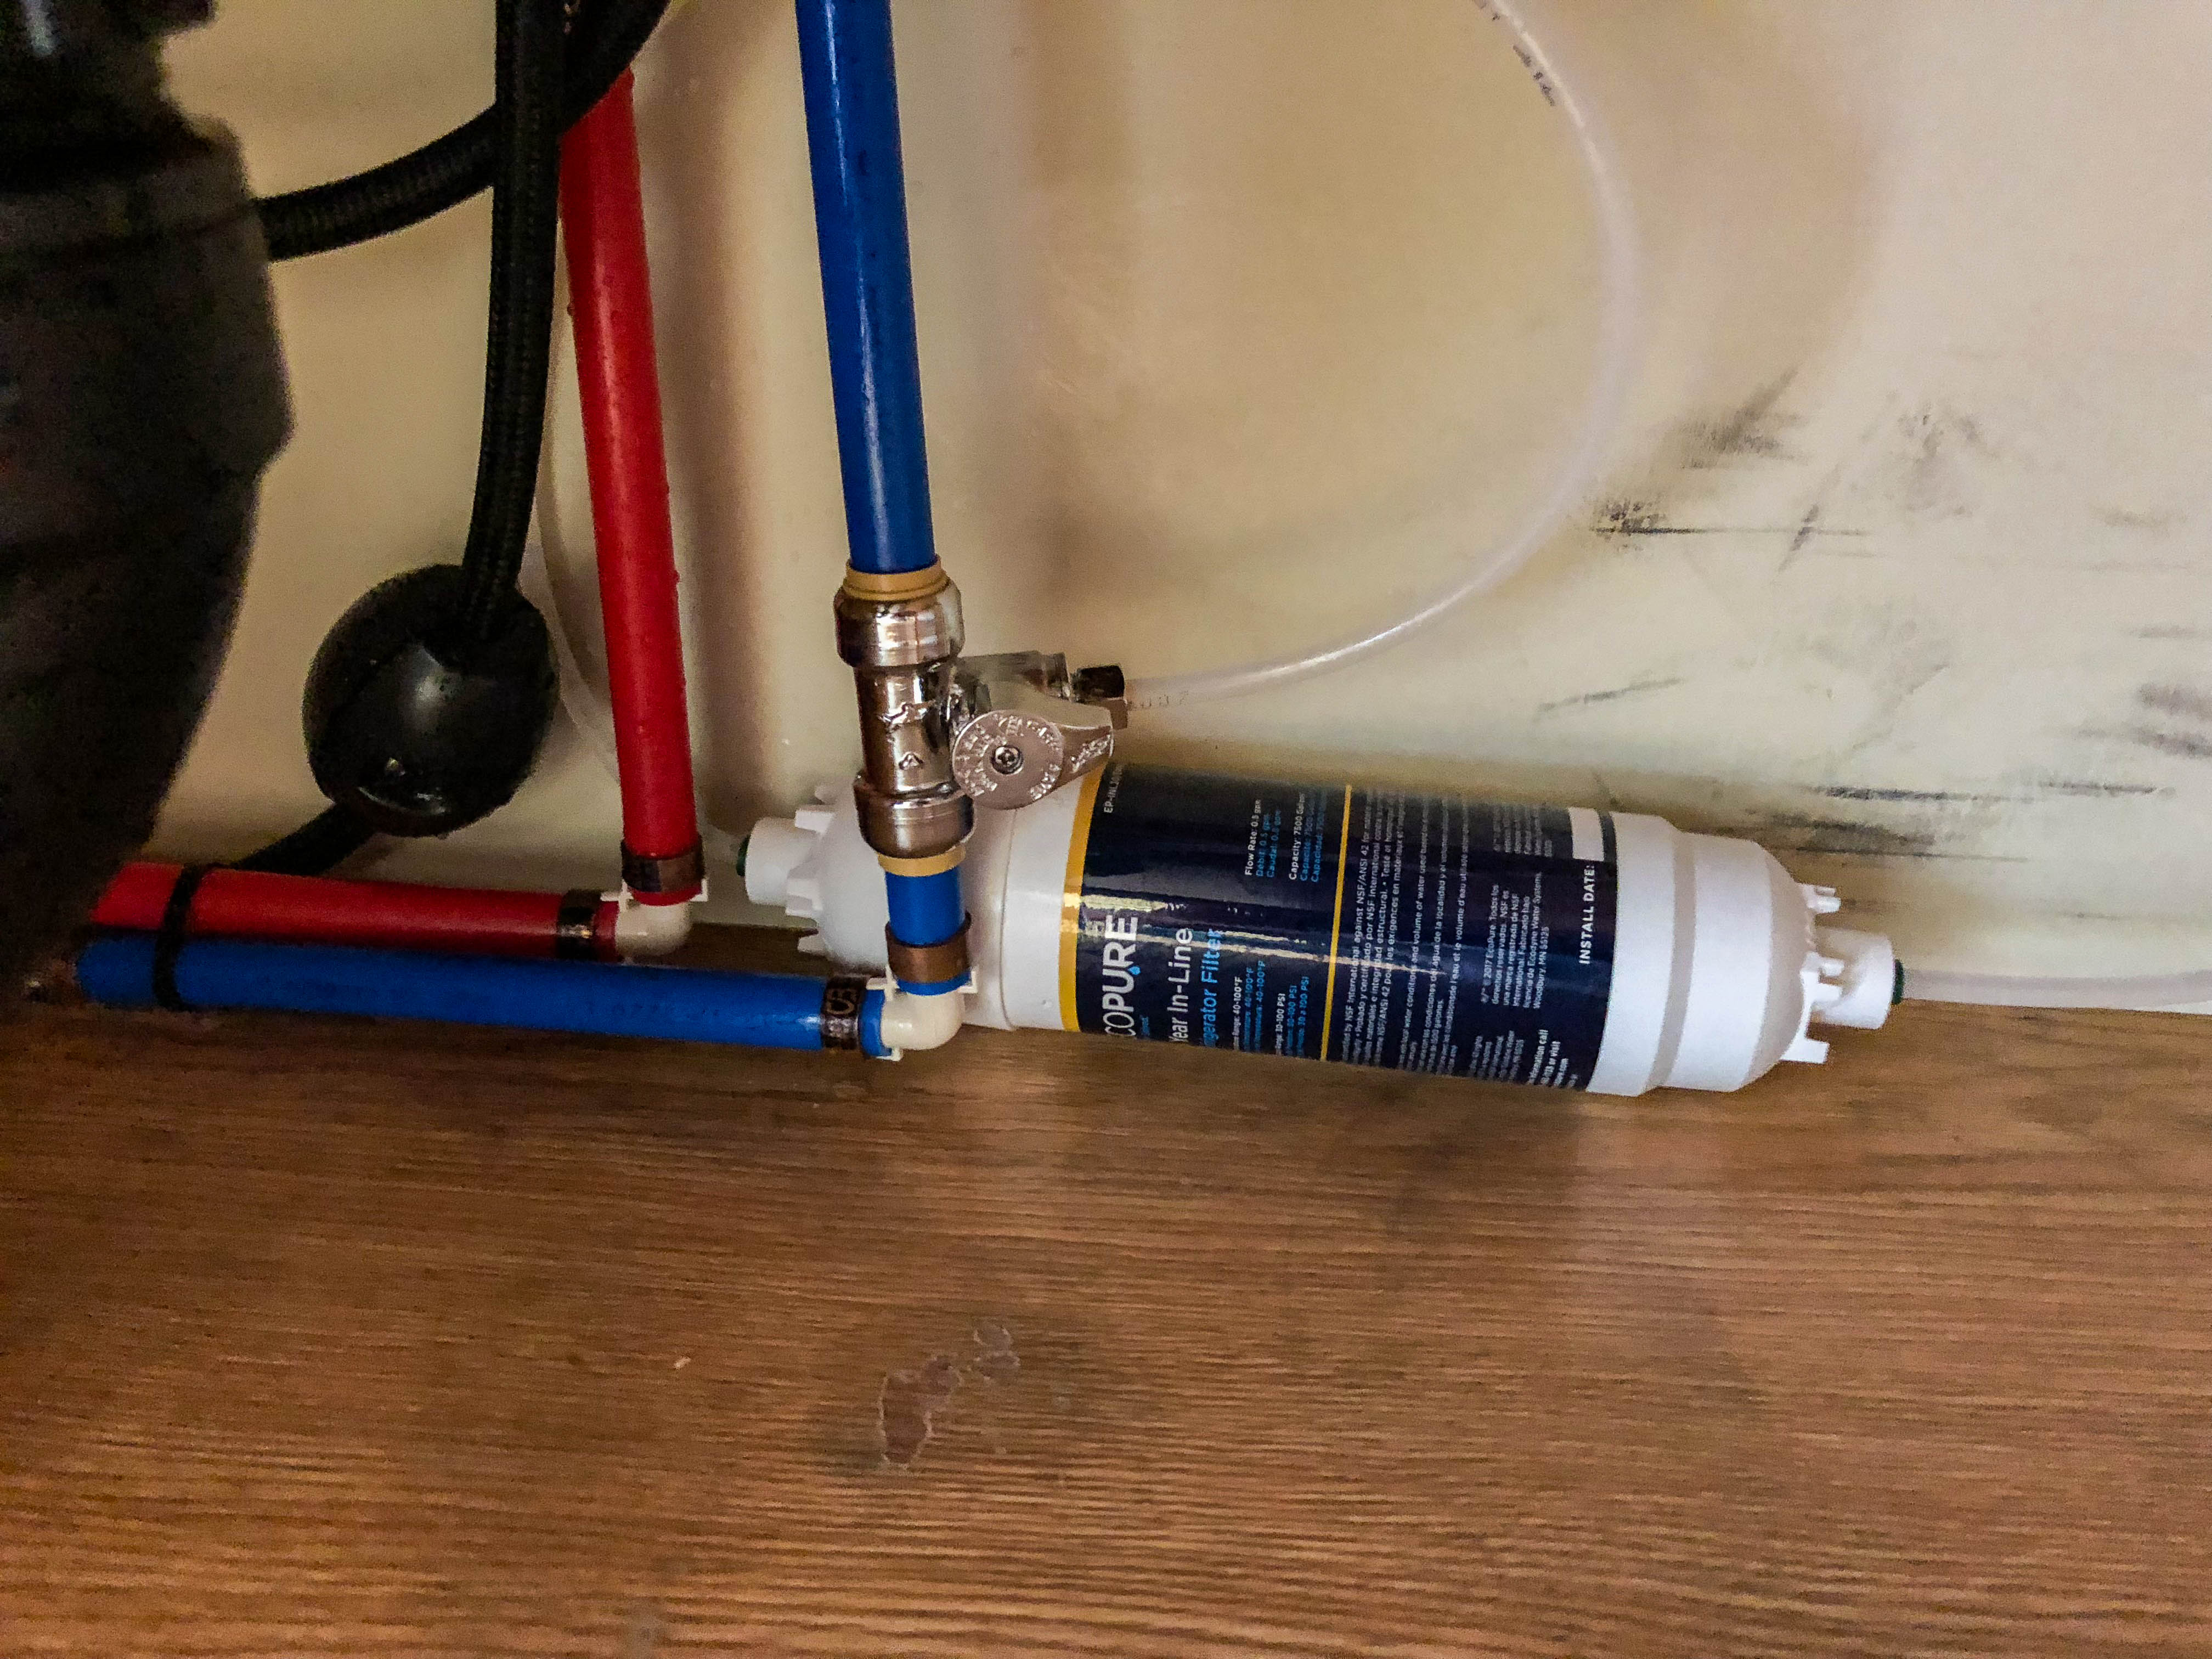 |
| The Faucet | The Filter |
2018:
The next isn't really a trailer modification, but a new truck. While the Tacoma was capable of towing the 21 (it was great with the 17), it spent too much time when towing at 60MPH in 3rd gear at 4000RPM. Gas mileage when towing ran around 11.5MPG. I could live with both of those since I love the truck for off roading & non towing, but the main problem is I was overweight payload wise. At least 150 lbs overall and about the same over on the rear axle.
So, it was off to look at new, full size trucks. I settled on a Ford 150 with the 3.5 EcoBoost engine. A few bells & whistles, some of which are required if you want other things. I had to order it; hope it comes in before I plan to leave for a trip to central Canada in mid August. For those interested, here is the build sheet:
 |
| Ford 150 Build Sheet |
Next was adding tire monitors to the trailer. This is the second system I ordered. The first was cheaper, but could not be set to PSI (it showed Bars) and the same problem for temperature (it liked °C, while I preferred °F). The instructions were useless so it went back to Amazon. The Tire Minder system seems to work OK, although I wish it would indicate when it was out or range. Instead, it just shows the last recorded reading. I did discover that it does drop the readings after being out of range for 20 minutes or so.
 |
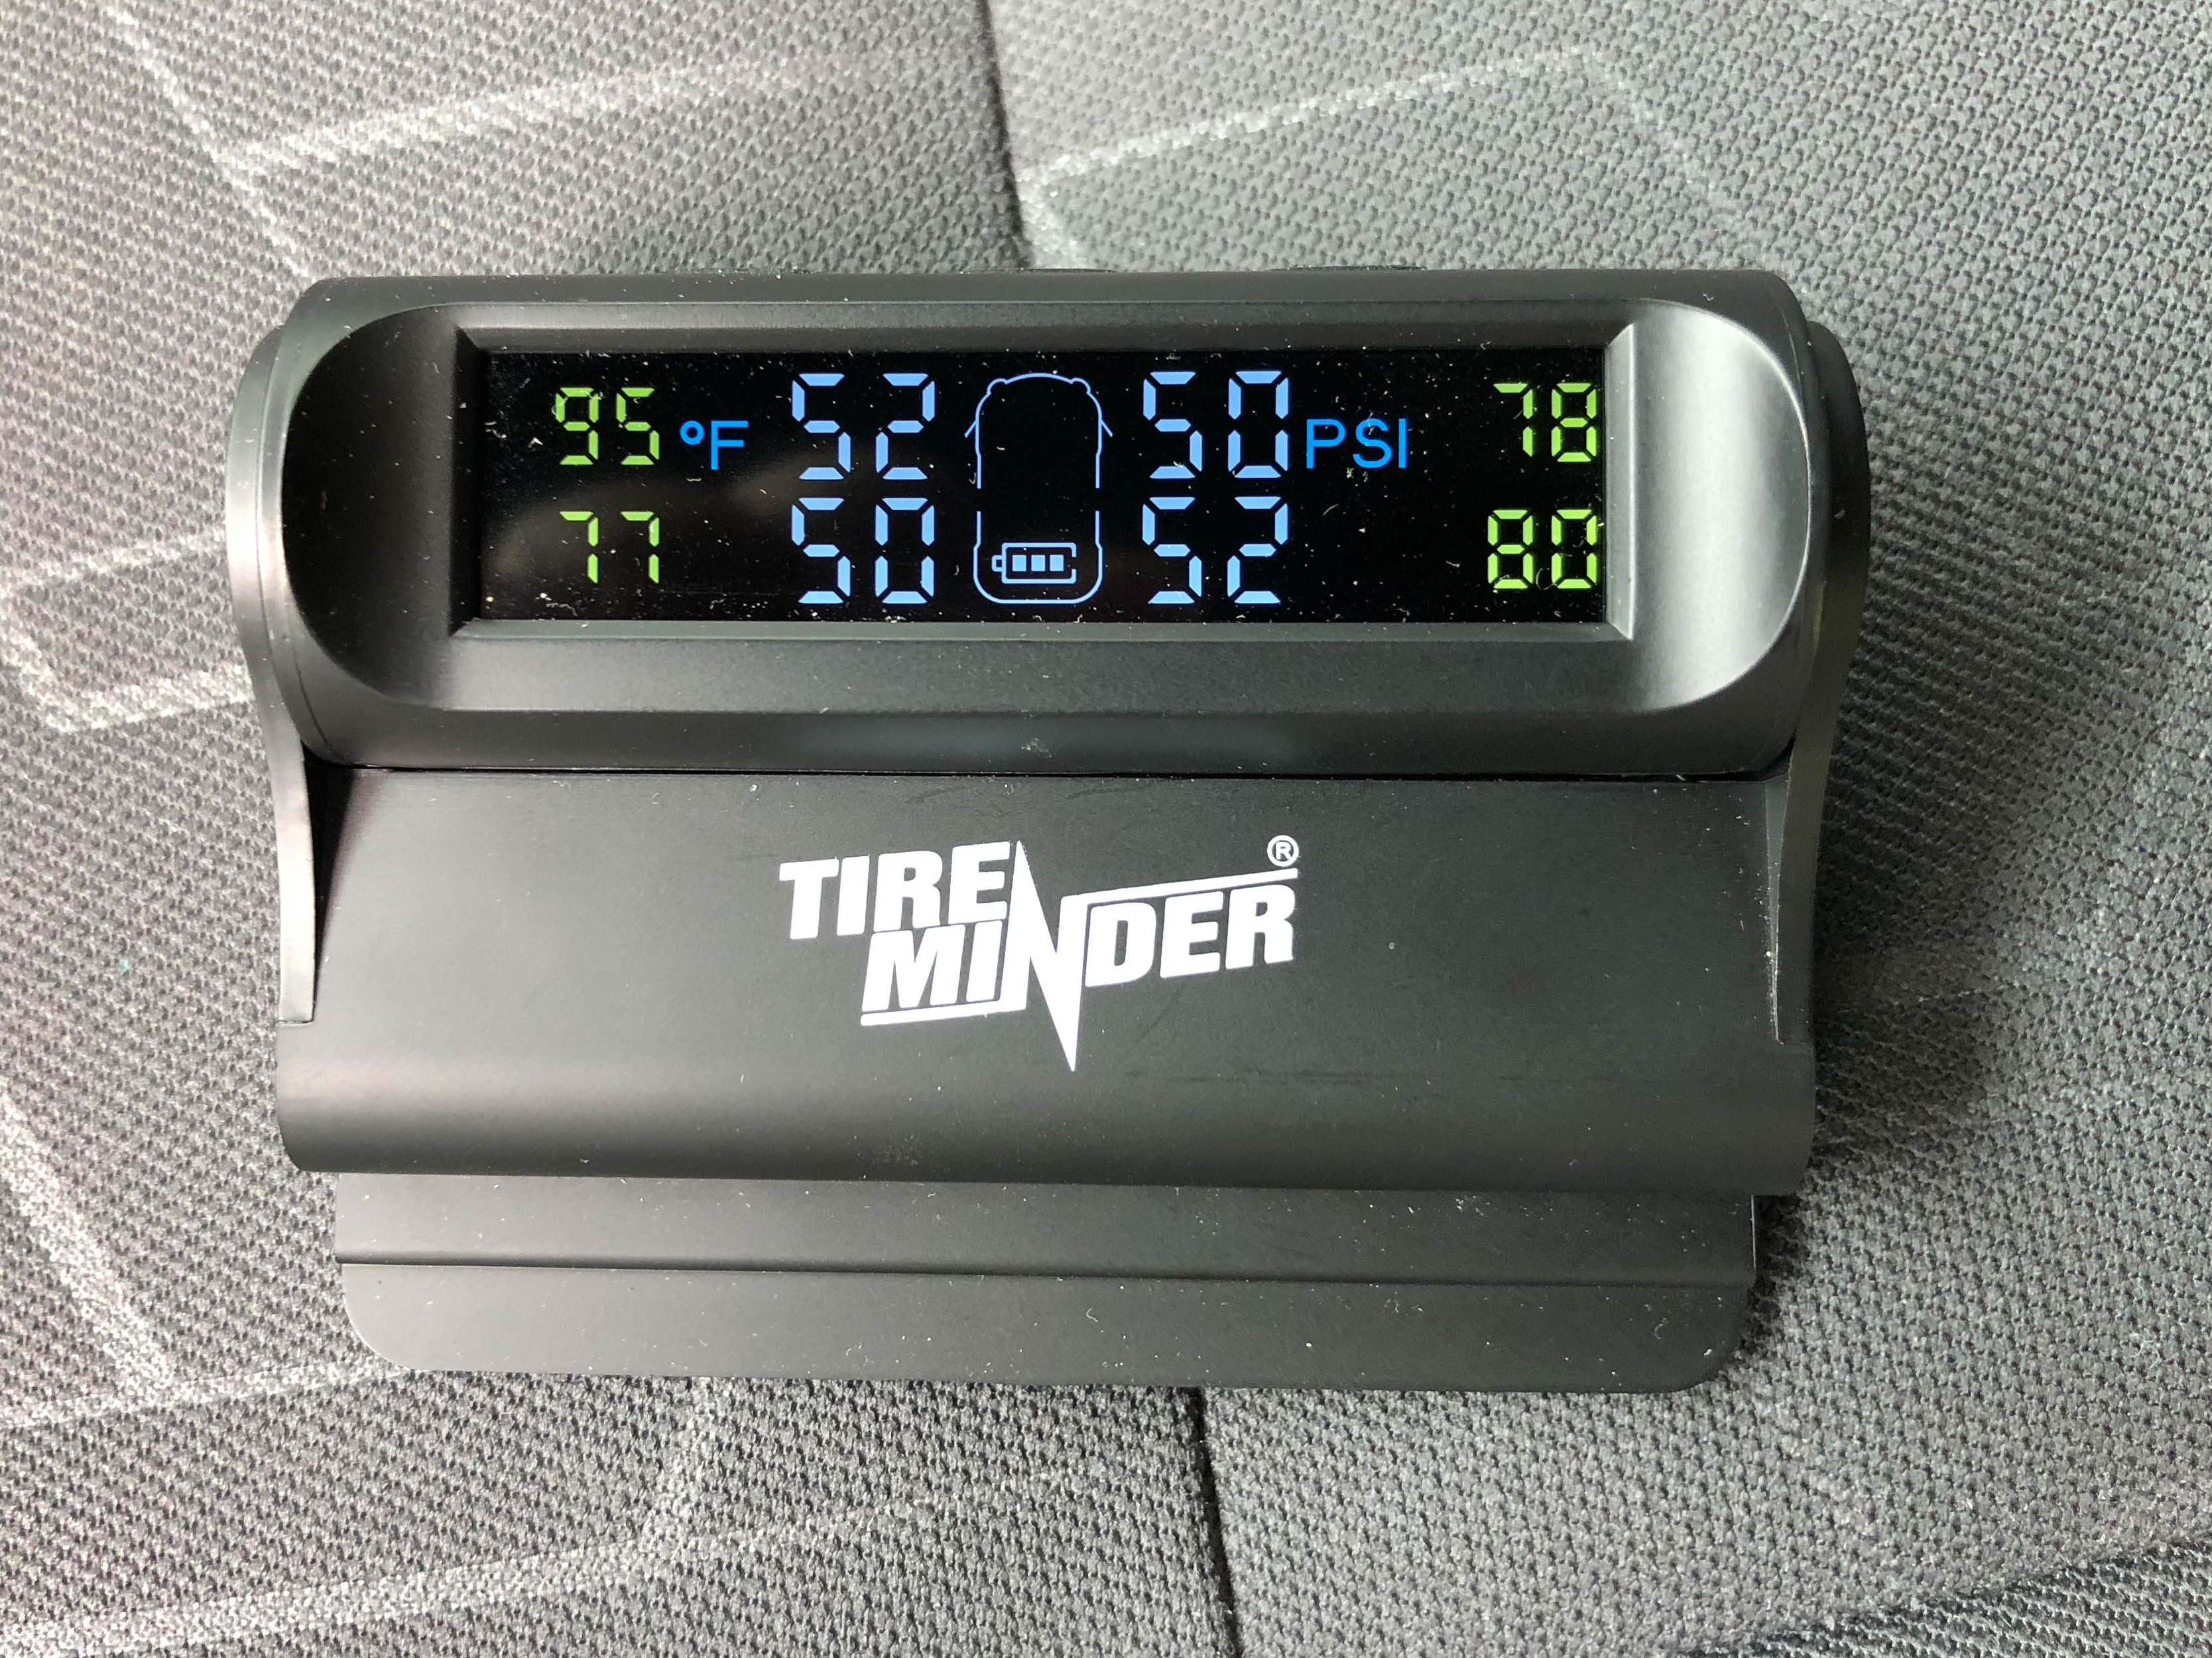 |
| Tire Minder | Tire Minder |
The next modification was to adjust the awning. I have had a problem with the front corner of the awning hitting below the guide when retracting. This broke the plastic guide, which I replaced in Quartzsite, but I didn't want to attempt the adjustment until I got back to Oswego. I followed Reace's directions at the Escape Forum and it now closes as designed.
Another modification was to remove the Escape provided RCA microwave & replace it with a Panosonic Inverter, a NN-SD372S. The internal lamp burned out in the $47.00 RCA microwave, and the replacement (that might be the right lamp) was over $15.00 with shipping, and the inverter microwave will likely hit the batteries a bit easier even though it is rated at 200 more watts. I used the same right angle clips that Escape pop riveted into the RCA case. I did have to find a T20 security torx bit to pull the case. While the new microwave is a higher power (950 watts vs 700 for the RCA), it doesn't draw much more at full power because of the inverter technology. It will draw even less at lower than full power.
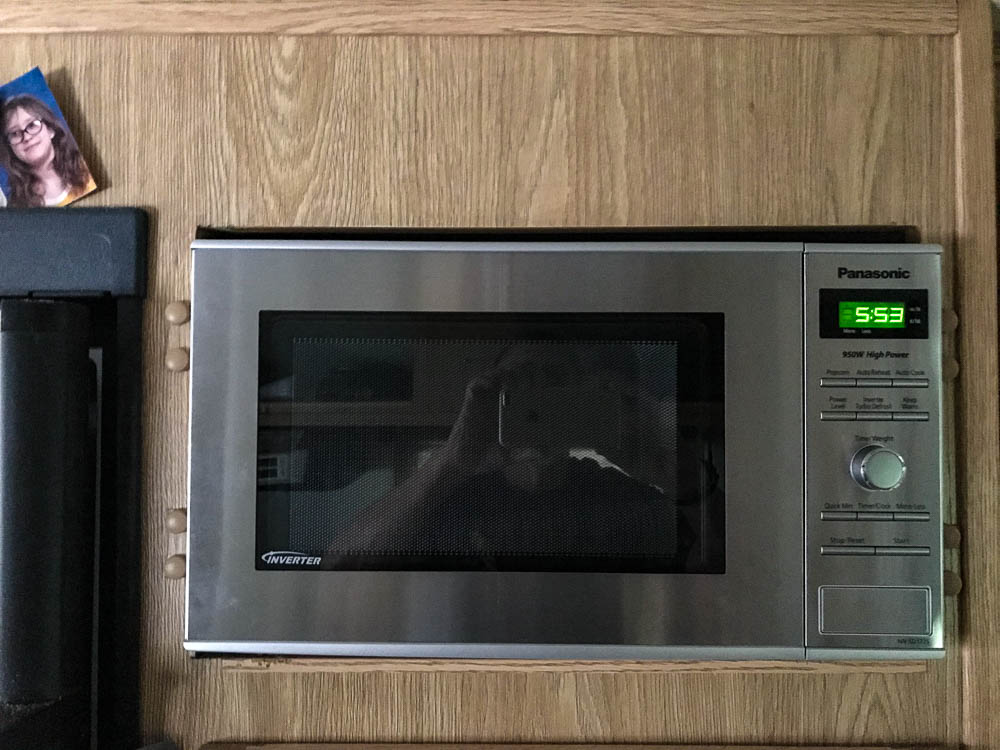 |
| Panosonic Inverter Microwave |
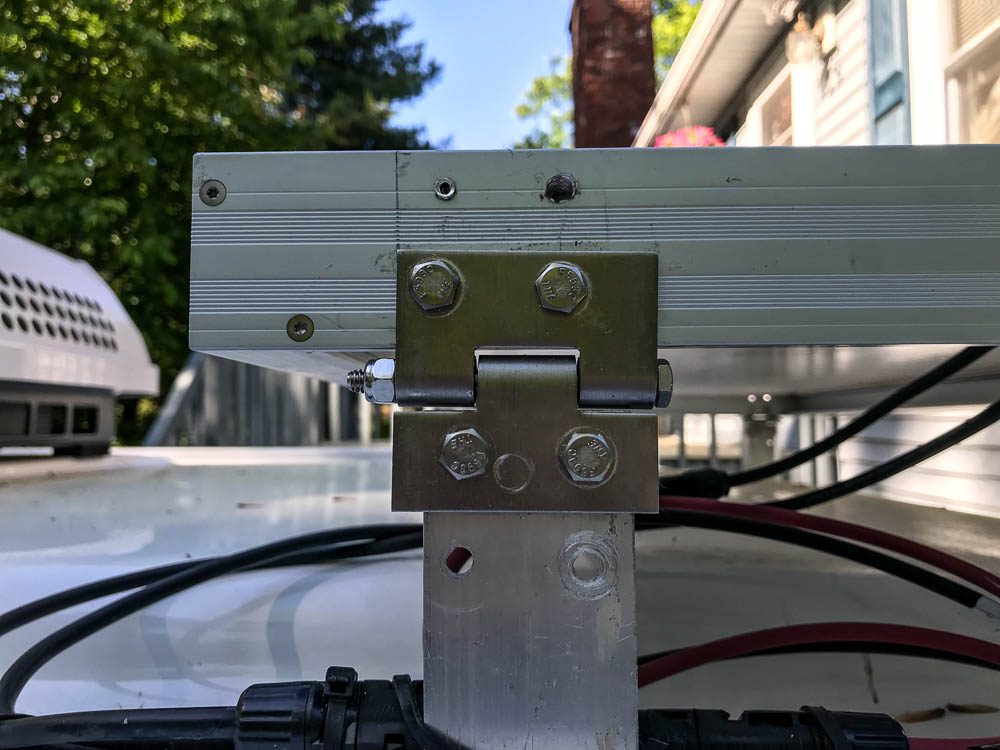
A big project was to add some hinges to the solar panels so they can be tilted to the left or right of the length of the trailer. I now have 3 choices of parking directions with properly tilted panels (at least the proper angle for Phoenix, AZ in January). It will still be a project to tilt them in any direction, particularly to the rear (now it will require removing 6 bolts on each panel), although the left & right is easier than it was with the old rear tilting system (2 bolts per panel). All in all, I probably won't make use of the tilting unless I'm going to be at a dry campsite for more than a week or so.
 |
 |
 |
| New Hinges for Tilting Solar Panels | ||
I got tired of bending over with a flashlight to push the button that turns on the inverter (part of the GoPower Solar Controller), so I ordered a separate remote with current & voltage readouts. Ran the wire before the remote arrived, which was a project getting to the space over the refrigerator. The remote arrived, and it was a different model # than I ordered. After an on-line chat with GoPower, I discovered that the GoPower GP-HS1500, the inverter supplied with the trailer, had been discontinued two years ago, and the remote is no longer available. PPL sent me what they thought was the replacement, but it is designed for their new inverters, not the GP-HS1500. So, I sent it back & ordered the simple remote switch. It is much smaller, and would have fit next to the TriMetric monitor, but since the wire is already run, I installed it over the refrigerator.
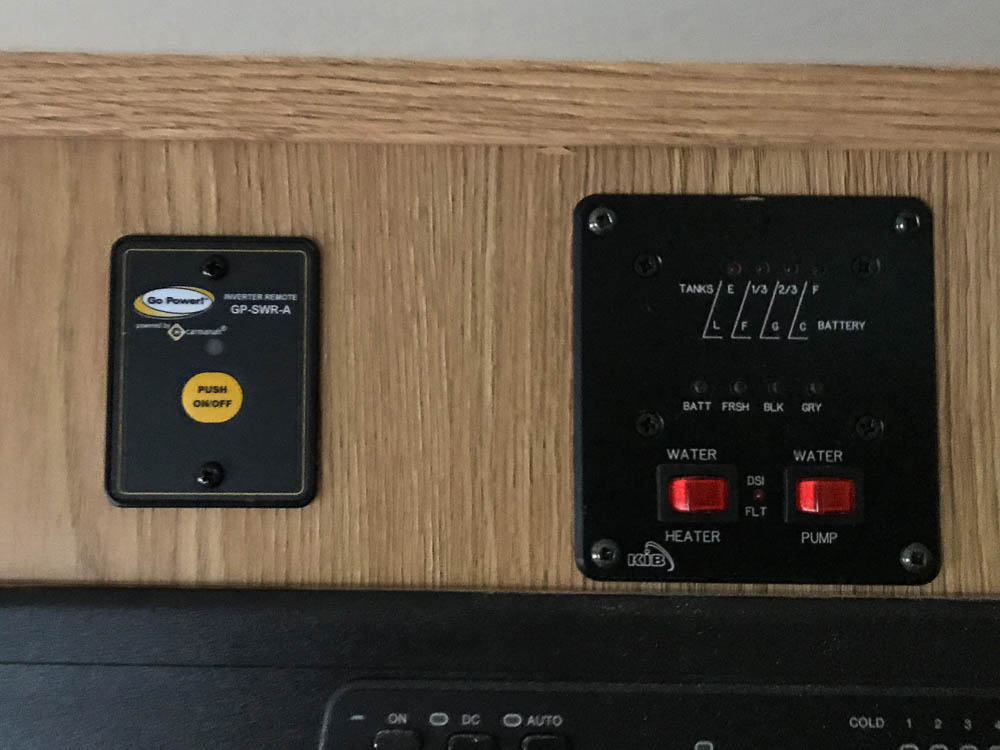 |
| Inverter Remote |
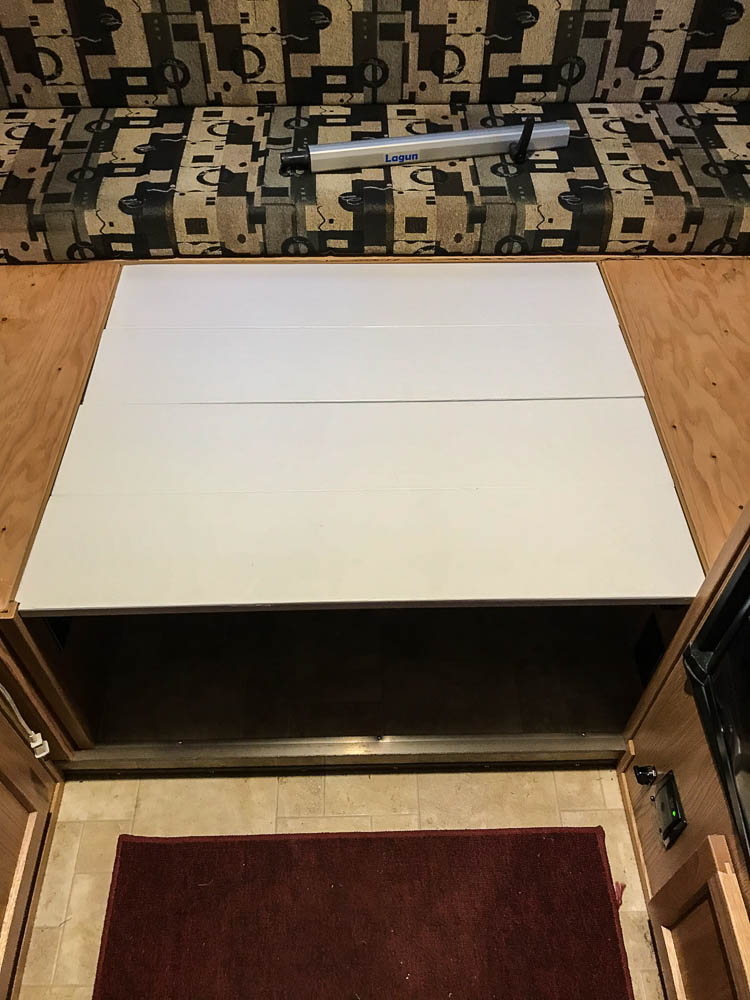
Since I switched to the Lagun mount and the Teak folding table, I can no longer use the table as a base for making a rear bed. I made a set of filler boards out of pine 1" X 8"s. I looked at using hardwood, but the additional weight didn't add much in the way of stiffness, and the pine works well. The boards are numbered because the space is tapered, requiring slightly different widths depending on the location. They store under the rear seat.
 |
 |
 |
| Filler Boards | ||
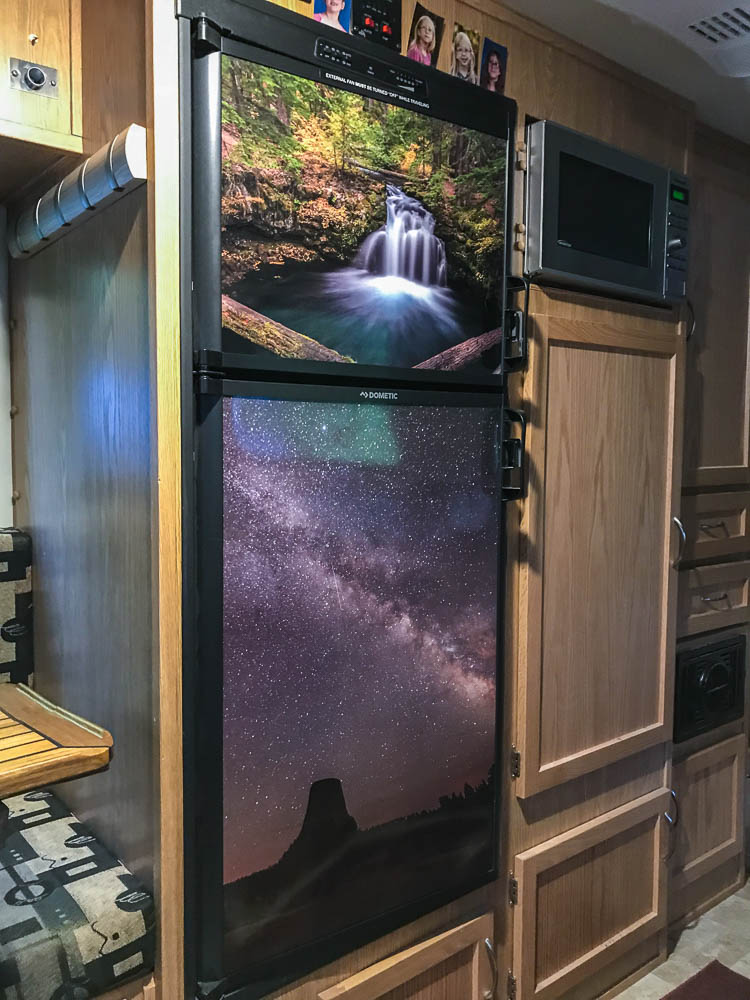
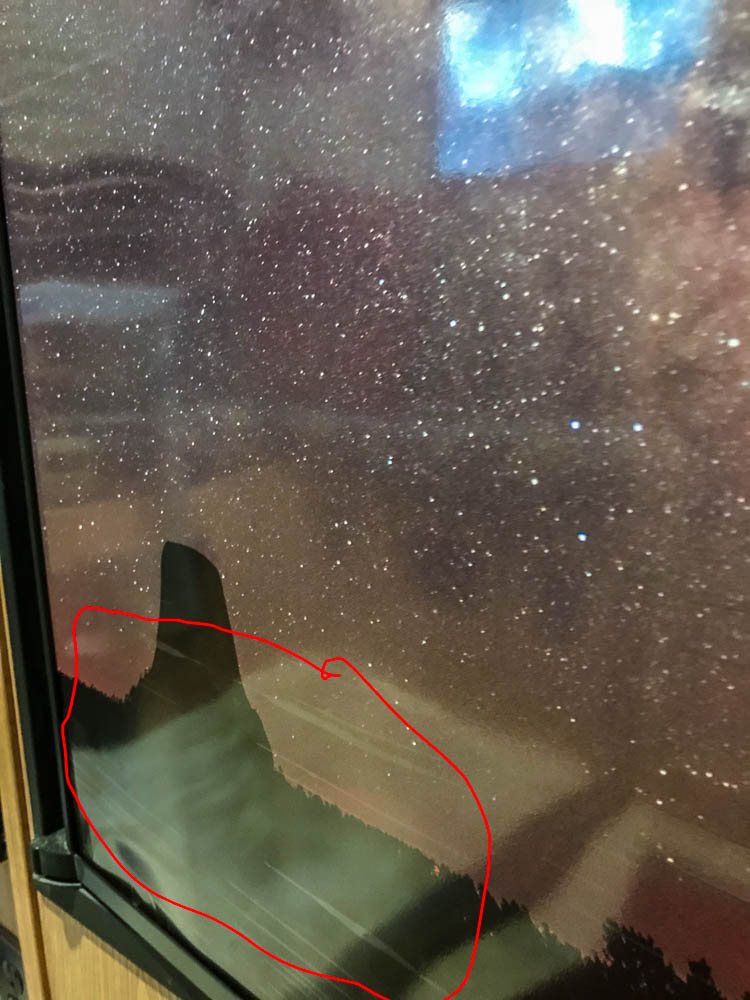
As I did with the refrigerator in my previous trailer, I decided to decorate the front of the refrigerator with one of my photos (well, 2 since the new trailer's refrigerator is a two door). As I did with the "House on Fire" photo I used in the Escape 17 Refrigerator, I sent the image files to Posterbrain. They did an excellent job on the previous photo, including a good job of adding a matte laminate to the photo. Unfortunately, this time they stated they no longer did the matte laminate, and I accepted a gloss version. The quality of the laminate was very poor. Streaks in both images, and a de-laminated section in the smaller photo. I no longer suggest using them, and will look elsewhere for replacement prints. It is too bad since the printing is great, and the cost not too bad.
 |
 |
 |
| The Photos | De-lamination | Streaks |
The next addition is something I did in the 17; add a West Marine High Backed Chair. I find them more comfortable than the standard cushions. I will need to make up some filler cushions, but with the arms, the chair is almost wide enough to completely replace the passenger side bottom & back cushion. Of course that presents the problem that one now needs a place to store both cushions if you want to be able to make up a rear bed. The smaller back cushion is now in the truck bed, and the larger seat cushion now sits at the foot of the bed. When I get around to it I'll cover the plywood seat with something to make it look better than the bare plywood, but for now I have a comfortable seat.
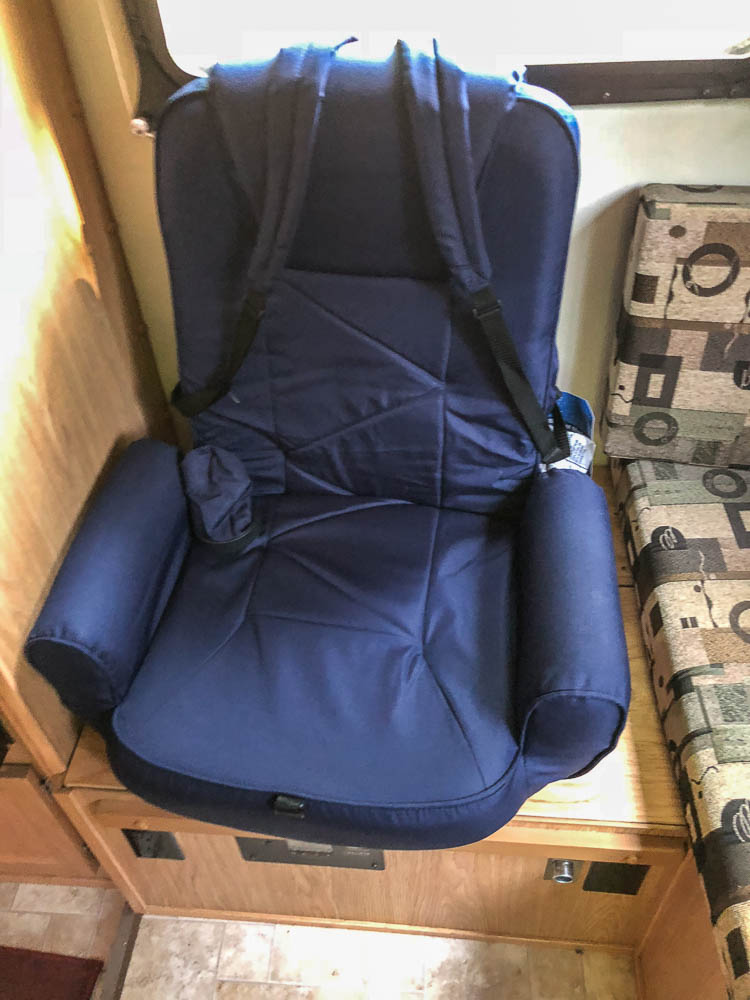 |
| West Marine High Backed Chair |
The next project is a switch to lithium batteries. Since it includes lots of text & photos, I have started a separate page, and will add to it as the project progresses.
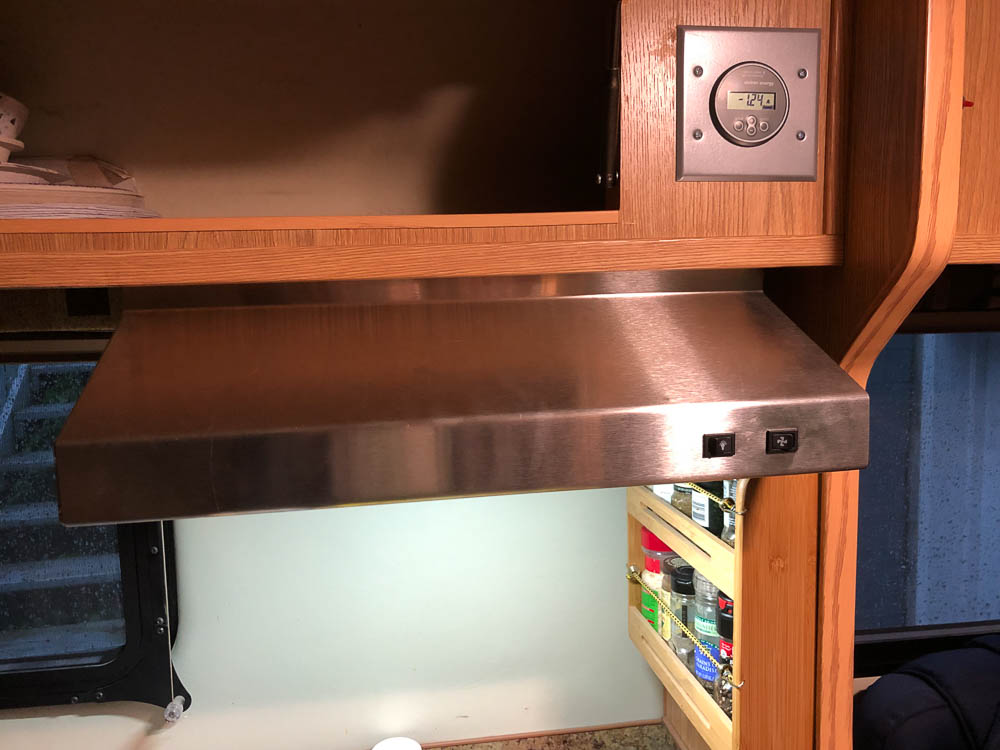
While the major project was changing to lithium batteries, I did add another project at the same time. I replaced the range hood with a stainless hood & a Fabulous fan & light. I use the old fan most of the time I used the oven, both to remove the heat, and to vent the CO it produces, particularly while it gets up to heat. Without the fan, while the oven warms to the set heat, it sets off my CO detector. The problem is the stock fan is quite loud. I had already replaced the anemic lamp with an LED, but really disliked the noise.
The new fan is a squirrel cage type which is much quieter than the original. It has 3 speeds, vs only one for th stock fan. Finally, the LED light has two settings - bright & night light.
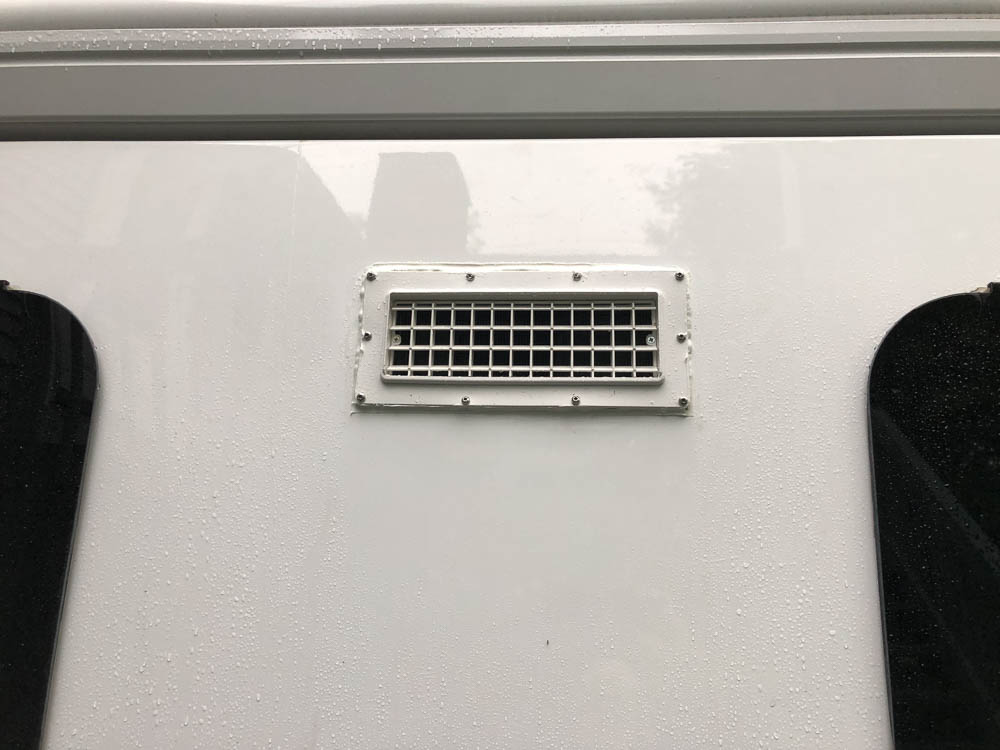
While I could have added the new fan & light unit to the old steel vent, the fan & light is welded in, making removing it difficult. So, I ordered a Ventline Stainless Steel S0721 Series RV Range Hood .
Adding the Fabulous Fan to the new stainless hood was easy, but removing thee old outside vent was a task - lots of ProFlex caulk to remove. Another problem is the new outside vent added to the new stainless hood ended up with the outside vent about 3/8" higher than the old vent, exposing a couple of the old mounting holes. I filled them with caulk, and may glue the old outside cover on to the new outside vent.
 |
 |
| Outside Cover | The Vent Hood |
I do wish I could add an audio file that shows how quiet the new fan is compared to the original, but you will just have to take my word. There is one minor problem - the new Stainless hood is not magnetic, so I'll need to find a new location for my meat thermometer, timer & refrigerator thermometer.
Fall, 2019:
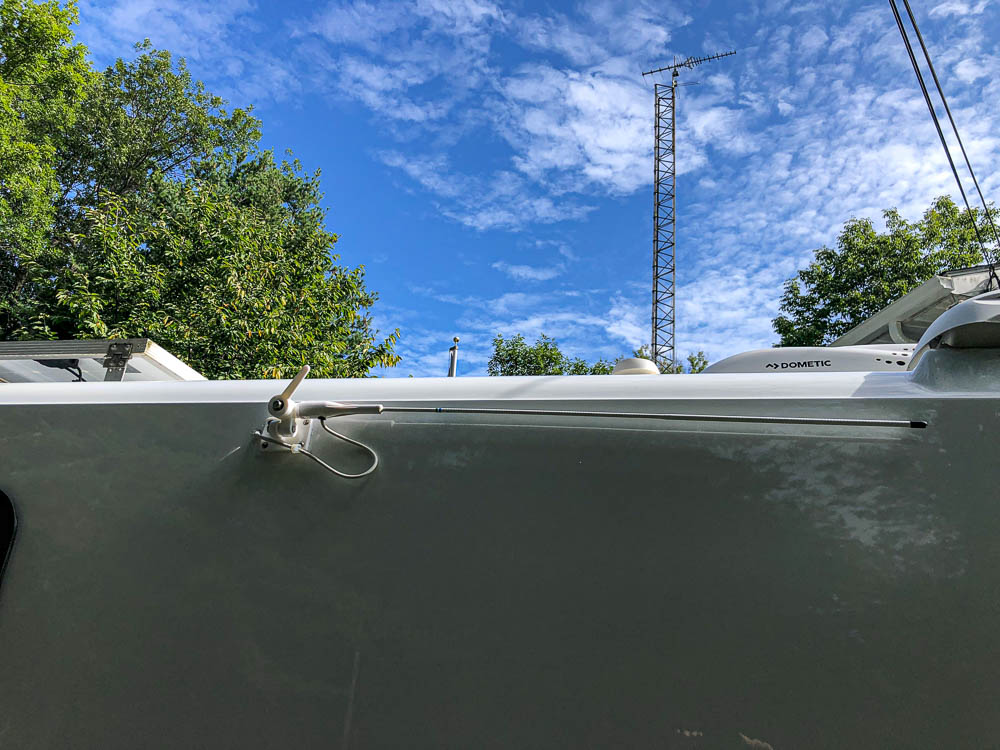
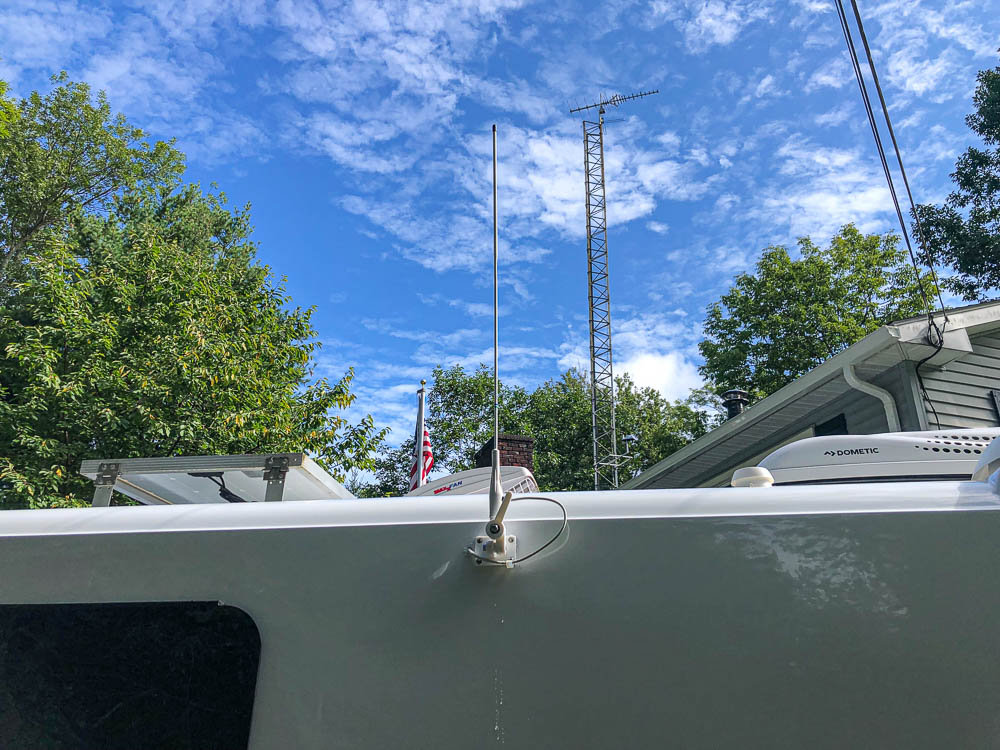
In my never ending quest for better FM radio reception, I have added the "final" antenna. This is a Shakespeare boat antenna. It folds down for travel, and is 39" long. It makes a great improvement for weak stations, at least in my driveway.
 |
 |
| Folded for Travel | Ready to Use |
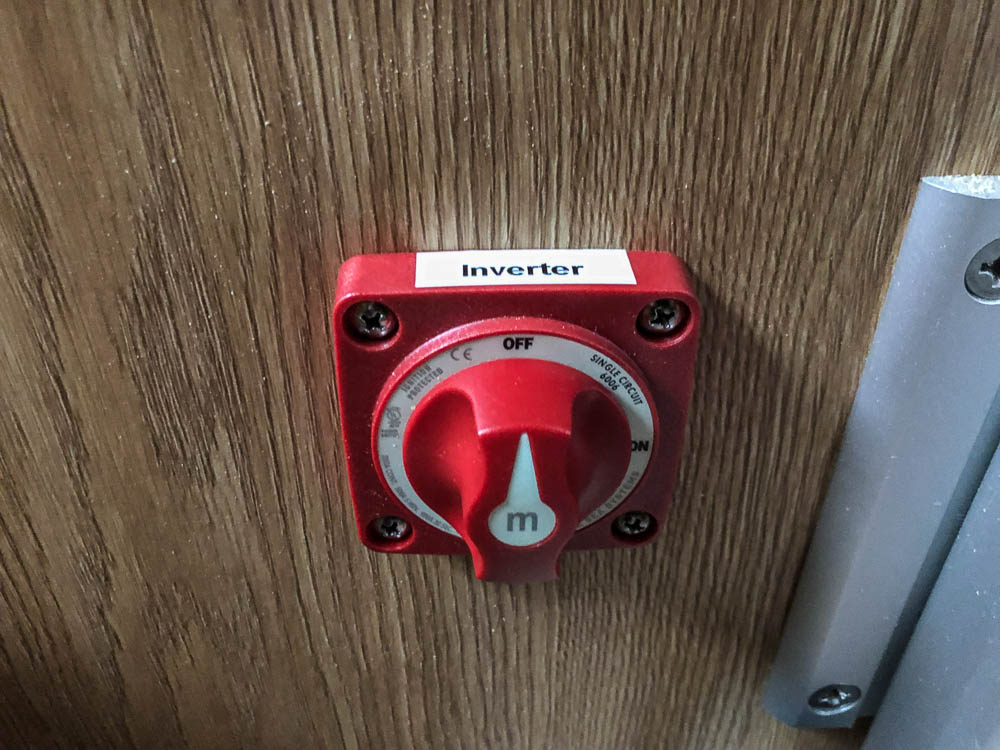
I have never been comfortable with an inverter without a disconnect switch. While the standard installation by Escape does include a 200 amp fuse, I prefer to be able to shut off the 12V side. That requires a large switch. As long as I was going to install a 300 amp marine disconnect switch for the inverter, I also replaced the troublesome trailer disconnect switch. The location of the original is on the face of the dinette seat, and it is far too easy to break the plastic handle.
So I now have disconnects for both the inverter & trailer.
 |
 |
| The Inverter Switch | Trailer Disconnect |
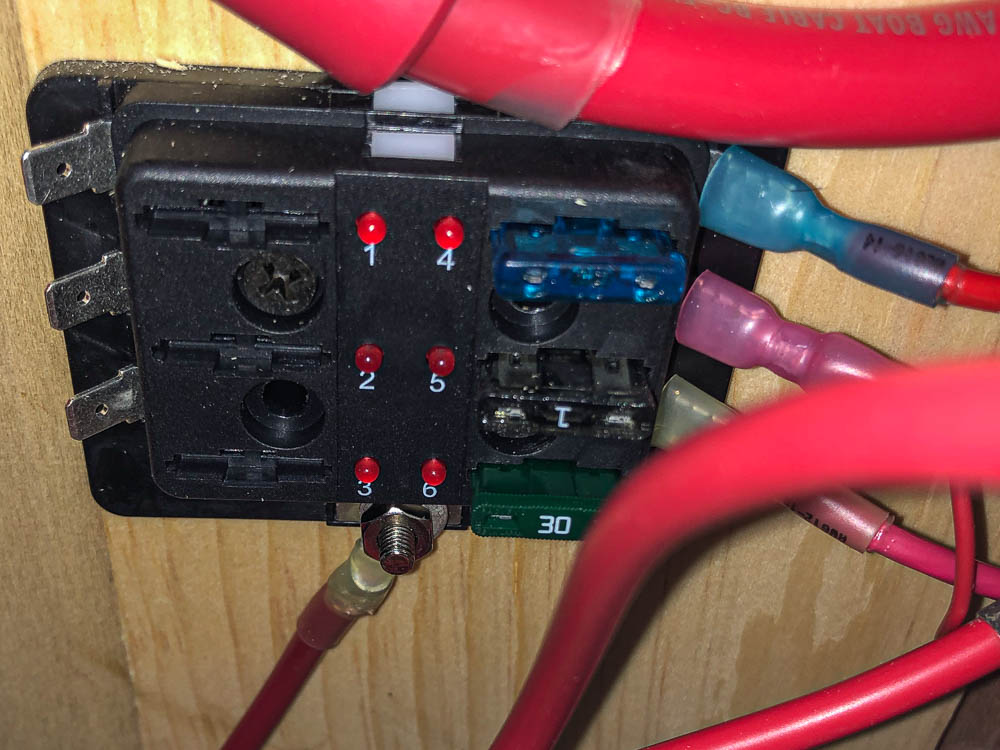
You may have noticed the black blob next to the new trailer disconnect switch. I decided to add a switch to disconnect the feed from the truck to the DC to DC converter. While not an absolute necessity since the Battleborn battery management system will shut off charging when the batteries are full, I had a hole to fill (from the original disconnect switch) and, if I was going to do lots of driving with full batteries, I would just as soon be able to shut off the feed. I added a cover so it can't accidentally be shut off by someone sitting at the dinette. I did manage to tear off a bit of the fake paper "oak" finish removing the old switch label.
As long as I was digging into the trailer's electrical systems, I decided to move the output of the solar charge controller from Escape's tie point at the area of the converter, and go directly to the battery. The reasons? First it is a shorter run from the solar controller to the batteries. Second, and more important - the tie point used by Escape combines the output of the converter & the solar controller. While it would be unusual for the combined output of the two to exceed the 40 amp fuse protecting the feed from the battery, it is possible, particularly with lithium batteries. I have seen as much as 30 amps from the solar controller, and 35 amps from the converter, the sum of which is well over 40 amps.
Adding another ring connector directly to the battery post would make a total of 4 terminal rings - the converter, the solar controller, the battery monitor 12V feed, and the direct feed to my radio used to prevent loosing the settings when the disconnect switch it turned off. Rather than all those terminal rings, I opted for just two, one feeding a 6 way fuse panel, and the other connecting to the converter.
 |
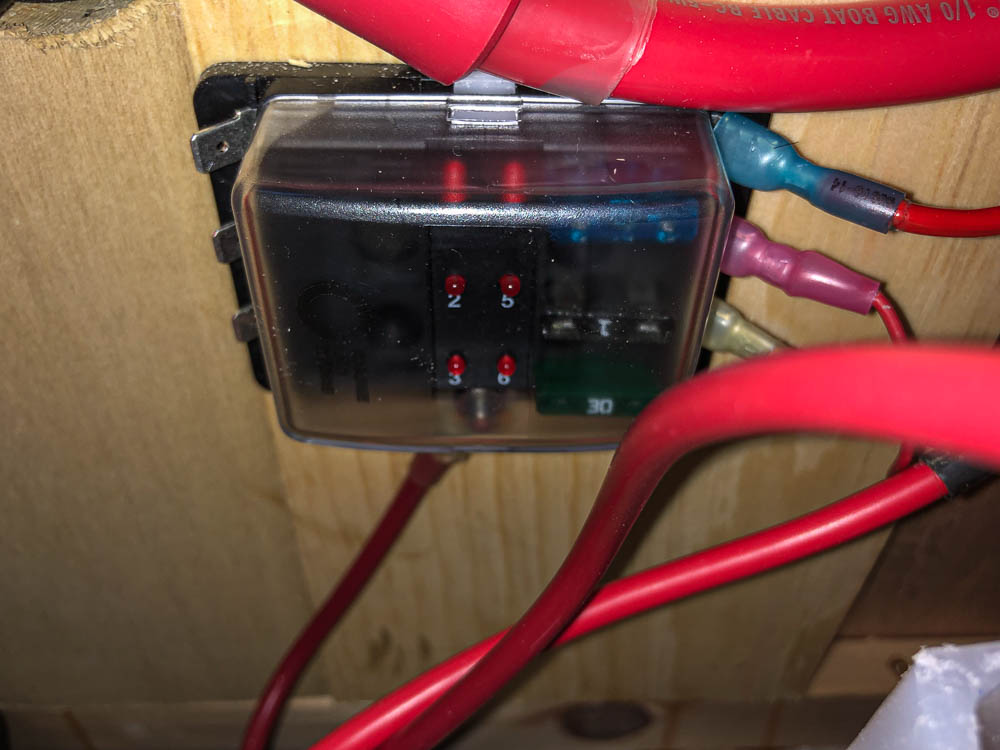 |
| Direct to Battery Fuse Panel | |
The most recent modification is to the medicine cabinet. It is located over the toilet, and if you open the door after traveling, the stuff inside is likely to fall out. I don't need to add that if the toilet lid is open, you have just made junk out of what ever fell out.
My solution was to pop rivet a length of 1" X 1" clear plastic corner protector to each shelf:
 |
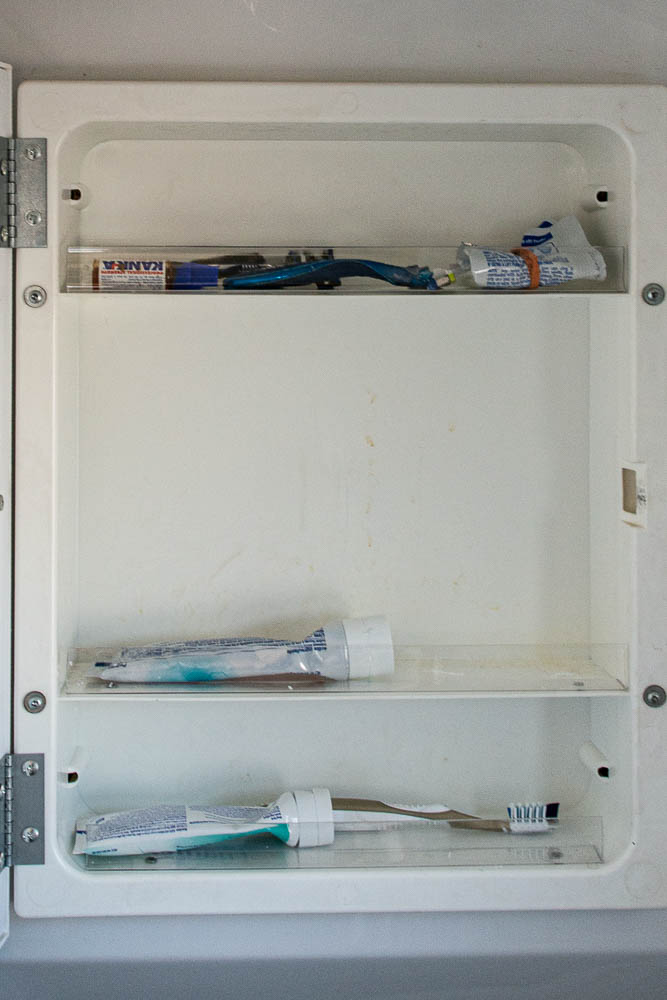 |
| Shelf Modification Adding 1" Corner Brackets | |
A minor, but necessary modification - the WFCO converter (and Escape) uses a long bolt on the back of the converter as the 12V negative tie point. As I added circuits, I ran out of room on the bolt, so I added a ground (-12V) buss for the new wiring.
 |
| New Ground Buss |
The next wiring change was to add a panel to the electronics closet that has multiple 12V, and USB receptacles. This should make plugging in the cell phone amplifier, cell modems, and WiFi repeater much easier & neaten up the wiring. There is a switch to turn on & off the cell phone amplifier USB socket, as well as a couple of 12V receptacles & USB C receptacles.
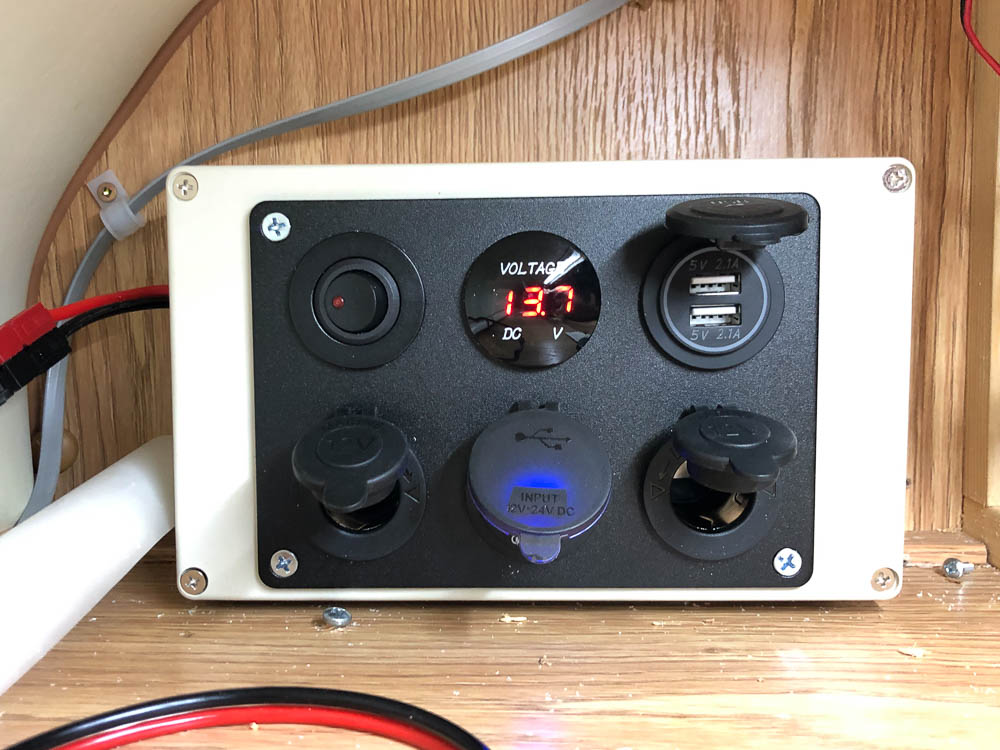 |
| 12 V Distribution Panel |
I made a modification to my Progressive Dynamics PD 4635LIV converter bottom. As previously mentioned, this is a converter designed for lithium batteries. It has a jumper that can be positioned for either lithium or the Charge Wizard when used with lead acid batteries. The problem is when the jumper is in the lithium position, it continually supplies 14.6V to the batteries. This is good for charging lithium batteries, but is higher than I'd like for a float voltage after the batteries are full. Switching the jumper to the Charge Wizard side lets me use the Charge Wizard to choose 13.6V as a float, but does not automatically select 14.6V during bulk charging. My solution was to replace the jumper with a double throw switch, letting me choose which mode the converter uses.
 |
| Converter Switch |
I pulled the bathroom window to make a repair. Hehr (the window manufacturer) had a problem with the panes separating after a new factory started making their small dual pane windows in 2017. Of course mine didn't fail until after the warrant ran out, so I decided rather than spend the $300.00 to replace it, I'd fix mine. I pulled the window out of the trailer, and made a bead of JB Weld epoxy between the two panes. Clamped it overnight, then reinstalled the window. It will probably fog since I had no way to add nitrogen between the panes, but since is is already an opaque bathroom window, who cares?
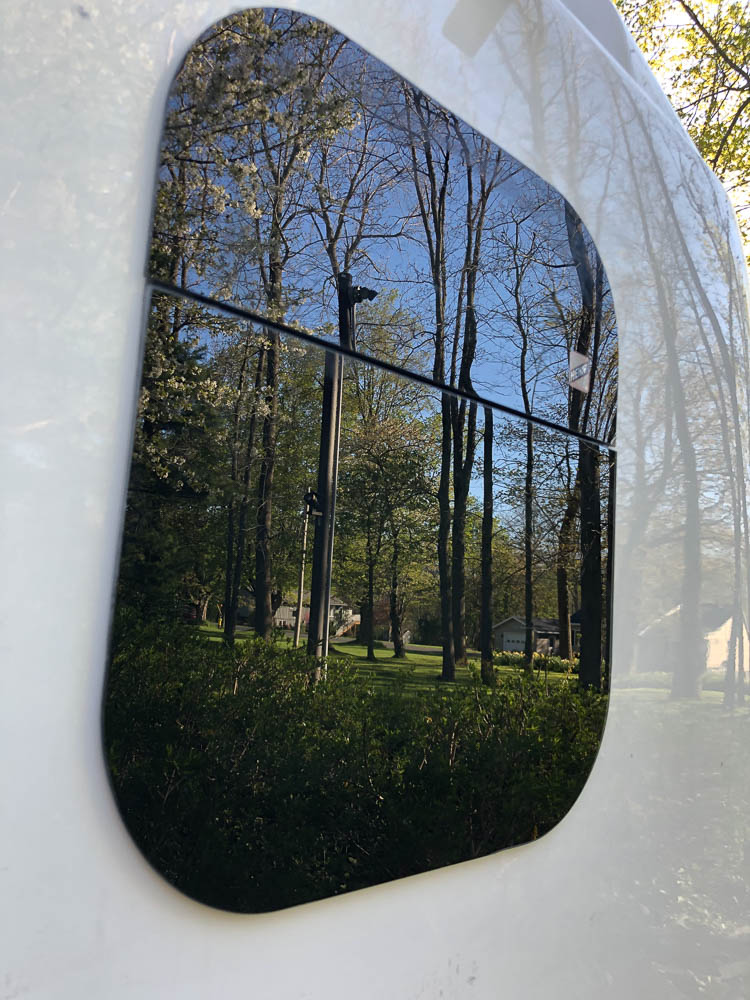 |
| Repaired Window |
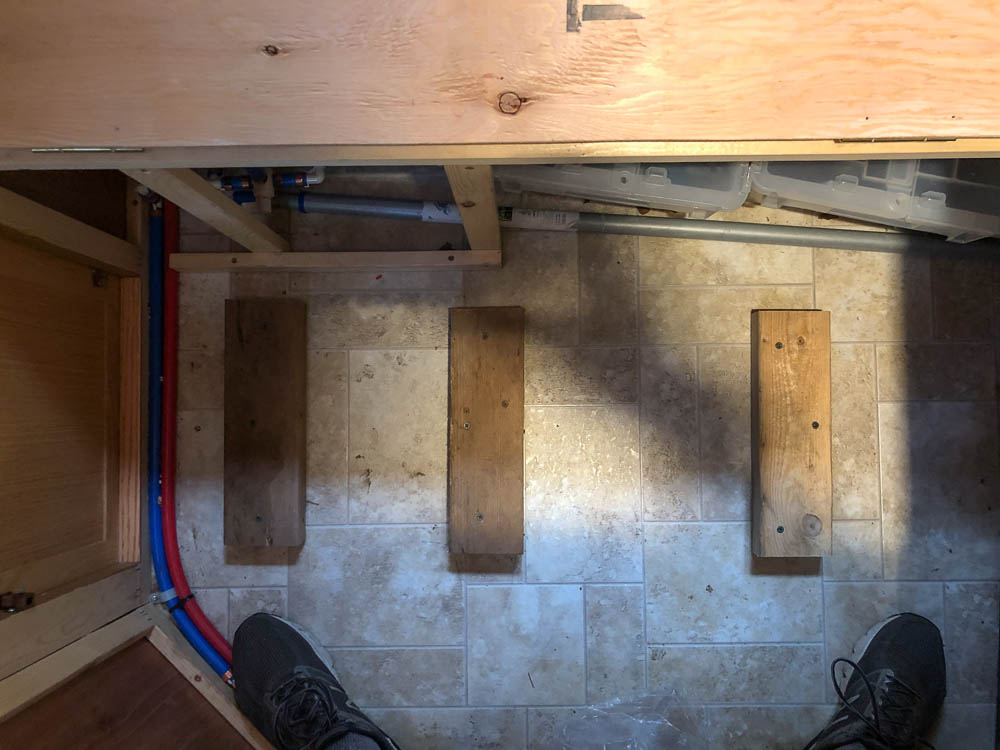
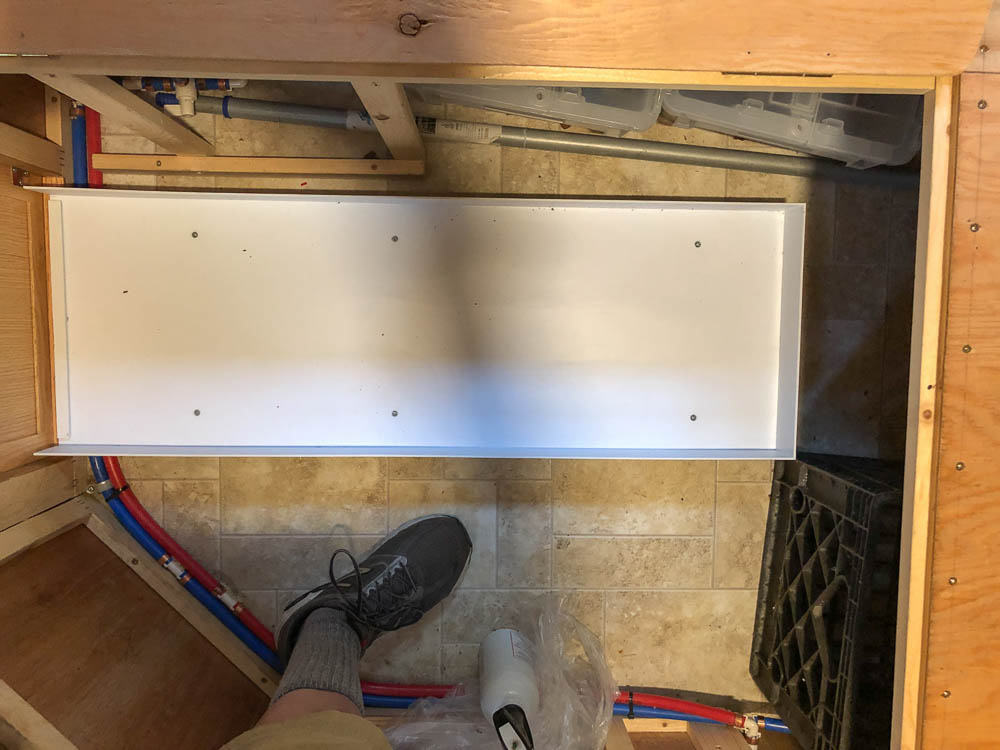
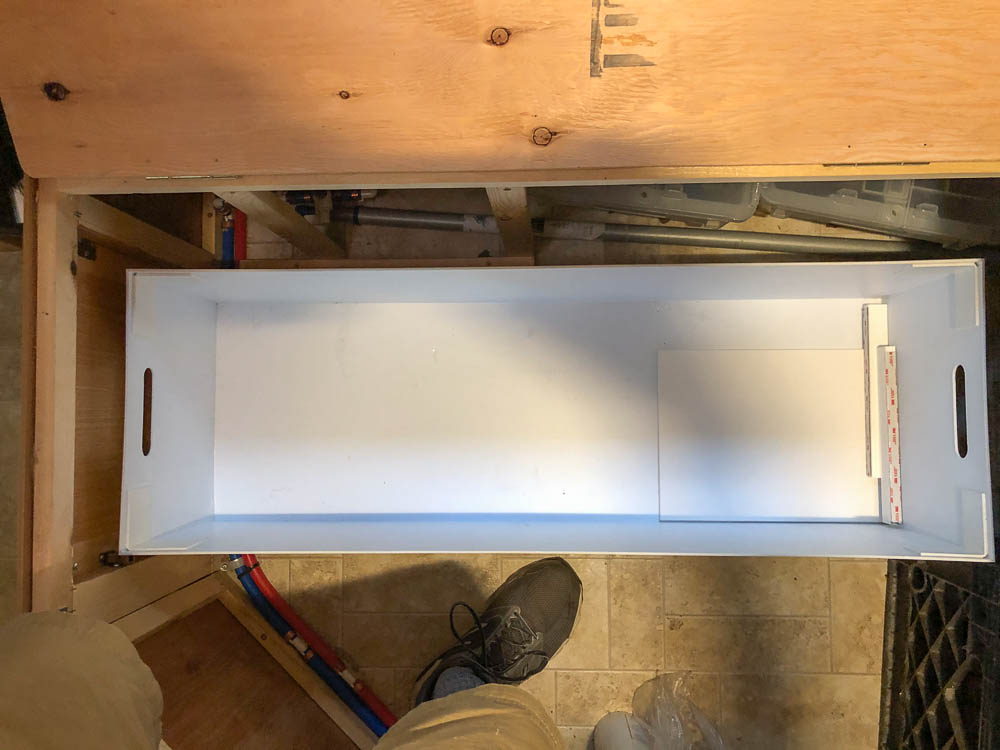
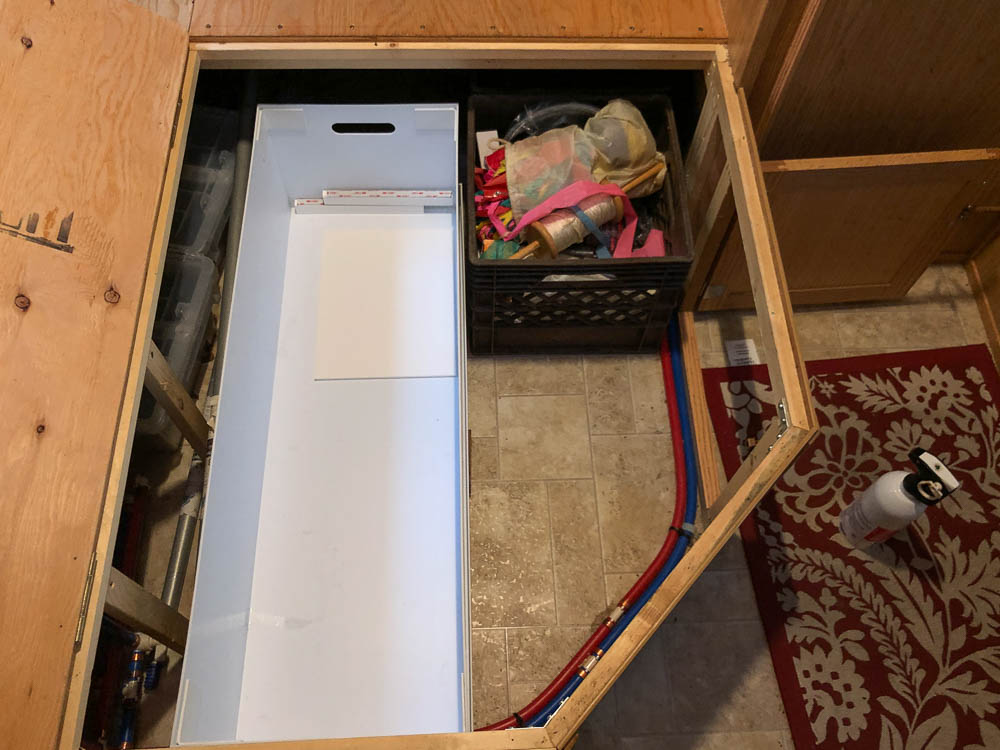
The next project (there is always one) was to add a RV Widget Works (Charles Young) storage bin under the bed. An easy add, although I did have to watch the clearances so that I could still use milk cartons on the right & fit my painter's pole that I use for my weather station on the left.
Complete instructions, including some important clearance checks are emailed with the order. I ordered the longest bin that Charlie's plastic bender can make - 3'.They are custom made to what ever size you need. They are constructed from 1/8"Styrene.
The price for the sled & bin was $139.14 (sold by the inch) and a painful FedEx shipping from Oregon to upstate NY of $66.02.
The first step is to add 3 2'X4"'s to the floor to align the slide with the door & clear the water lines. The sled is screwed to the 2"X4"'s & it's done.
 |
 |
 |
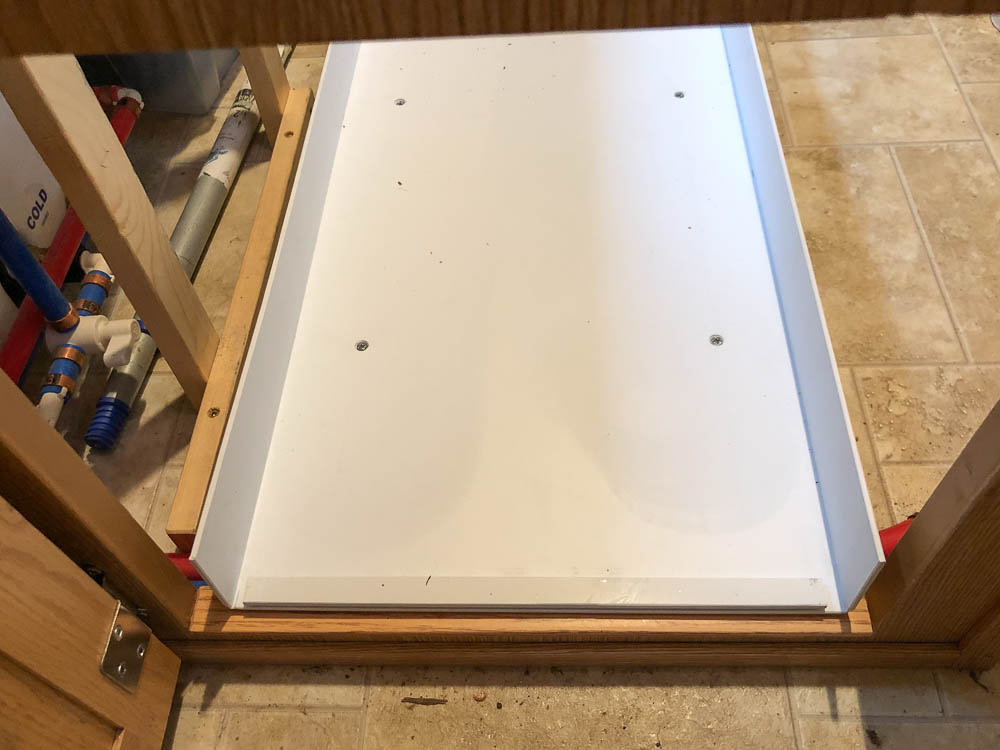 |
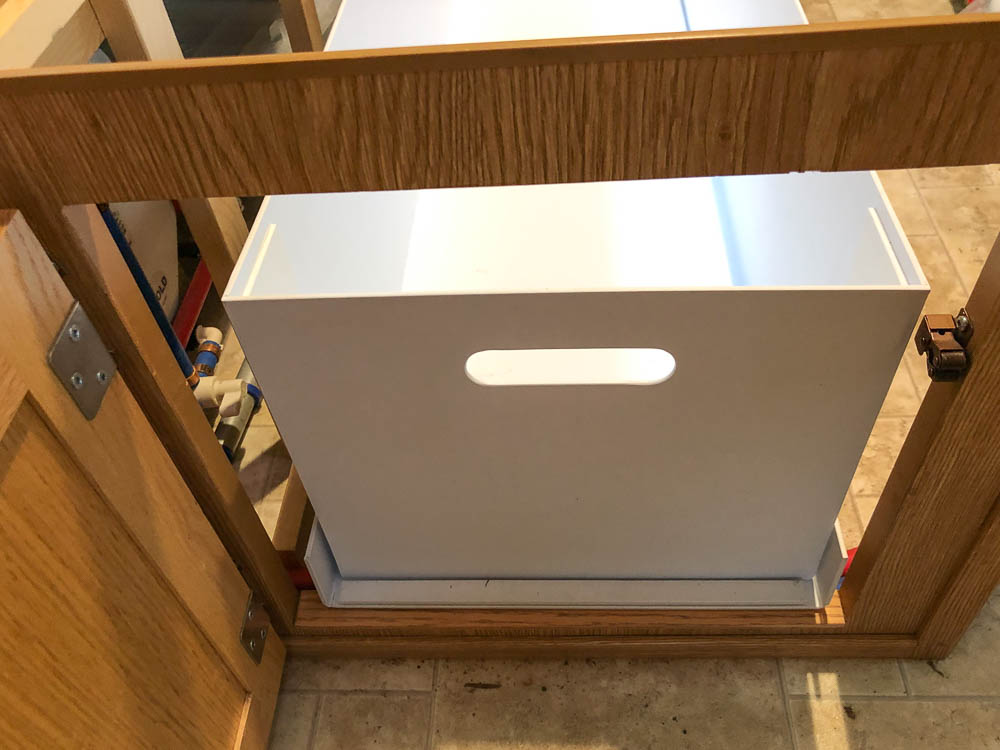
| 2" X 4"'s Screwed to the Floor | The Sled | The Bin in the Sled | View From the Door |
 |
 |
||
| With the Bin | From Above |
I hope I have just installed the last auto FM radio in the trailer. I already improved the antenna with a Shakespeare Boat antenna, but still was unable to pick up stations that my F 150 radio received. So, one last attempt. I found a Sony receiver that had Bluetooth, an aux input & a USB jack that listed 7dBf sensitivity. I installed it with WAGO connectors just in case since I was getting tired of re-crimping 15 connections with each change (this is the 5th radio). After installing I found I was able to exceed the truck's radio, at least for distant stations. There is still one problem - both the solar controller & the converter blank the weakest stations. I tried a couple of filters, etc, but none solved the problem. Since I have lithium batteries, there is no problem with shutting either or both off when listening so I guess I can live with it.
Another improvement that could have been done during the build, but I didn't realize how useful it would be, was to split the seat cushions (and plywood platform) on the rear bench seat. As delivered from Escape, both the back upright cushions & the seat cushion run the full length of the seat. Since the batteries & much of the trailer wiring is located under the bench seat, at least the seat cushion must be removed to open the top. The full length cushion is a bit of a pain to remove & find a place to store.
I checked with Escape & they knew the measurements of my current cushions, and made a pair of half width covers. When they arrived, I checked that they would fit & used an electric carving knife to cut the existing cushion in half. Stuffed both into the new covers, used a jig saw to cut the plywood cover in half, & put everything back together. Since making the change I've been into the under bench space a couple of times, and have to say it is a big improvement. I'll add a photo or two after the trailer gets out of its cover in the Spring.
We have had some good late fall weather so I made a few modifications & additions before the snow flies. First, I changed out the stock kitchen faucet with a Moen single handle version. A little taller, and better looking.
 |
| Kitchen Faucet |
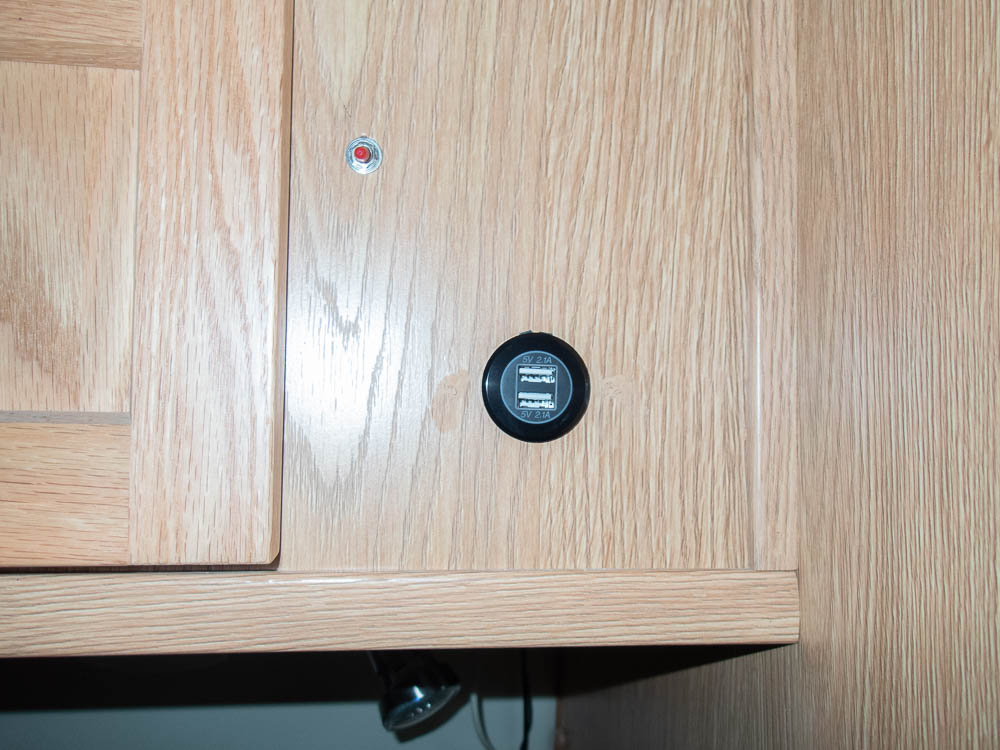
The next project was to add a couple of USB receptacles to the cabinet over the head of the bed. I will use the one on the left to charge my phone while connecting it to the trailer radio with Bluetooth. The one on the right will be used to power my indoor/outdoor thermometer.
 |
 |
 |
| Added USB Receptacles | ||
This was an old project, but I didn't document it here when I did it. I hated the bright LED light in the bathroom during a 3:00AM run. My solution was to add a red LED to the fixture. Since it only draws around 10ma, I didn't include a switch - it is always on. An interesting oops during the install. I cut the wires to the fixture to splice in the LED. When I cut the second wire, both vanished through the 1/2" hole in the ceiling. After a few appropriate words, I ended up using a 1 1/2" hole saw to make an opening large enough that I could grab the wires. The remounted fixture covered the hole.
 |
 |
| With Light | In the Dark |
It is Spring, 2021, so time to start the various projects that have built up over the winter.
First is simple - I installed an AP Products Plug Guard. This is an empty shell for a 7 pin plug that holds the trailer cord when not in use. It keeps the connector from ending up in the mud, etc.
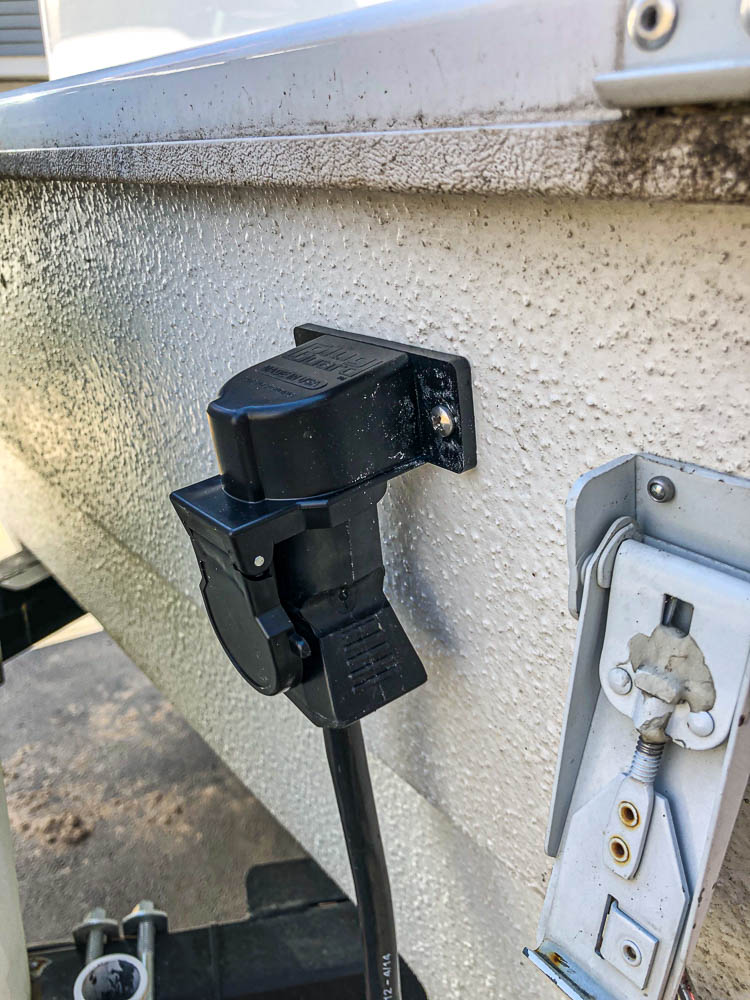 |
| The 7 Pin Storage |
The next project was far more involved. I decided to add one more Battleborn 100 amp hour lithium battery. The original change from wet cells to lithium is documented here, and while I was happy with the change, I can't leave well enough alone. With the additional battery, I should be able to go a week without sun.
 |
| 3 Battleborn Batteries |
I added a piece of Styrene plastic between the batteries & the under seat storage area to prevent stored items from hitting the battery poles. I also had to make a new battery box. Not actually a box, but a piece of 1" X 12" with 2" aluminum angle & straps to hold down each battery. Running the short pieces of #0 wire between each battery was difficult because of the tight spacing, but it is done. I reset the Victron 712 to 300 amps.
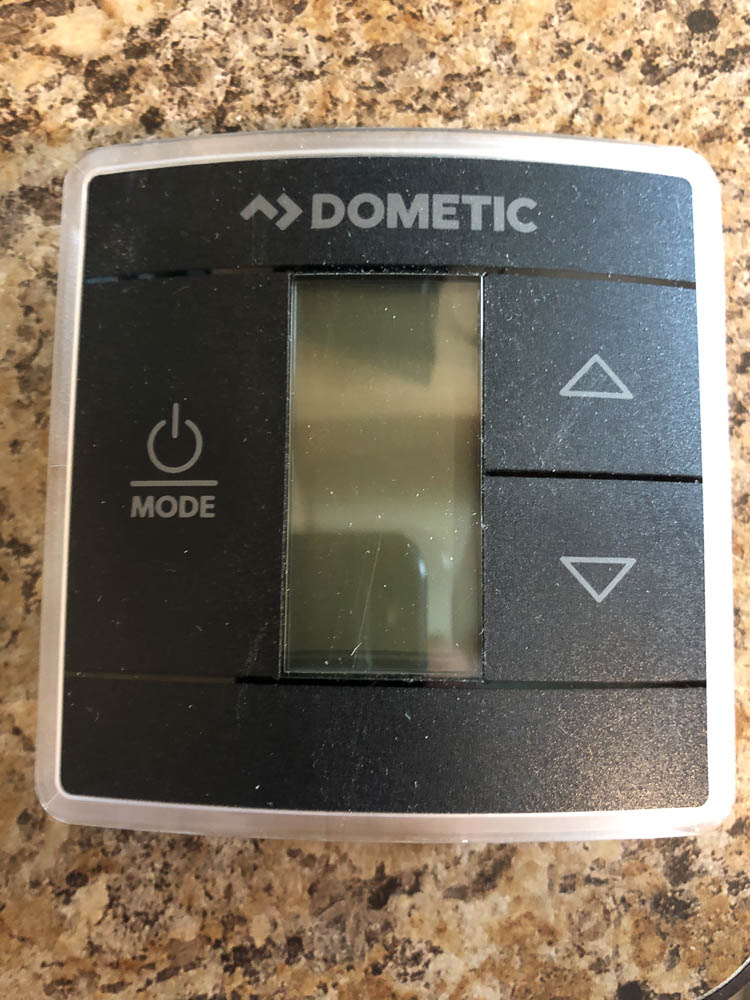
One project I've wanted to do for awhile is to change the Dometic thermostat. The first idea was to replace the one in the trailer with their Bluetooth version. The capacitive touch pads on the existing thermostat are difficult to operate - sometimes they switch, and other times they skip through a couple of touches with just one touch.
 |
 |
| Dometic Thermostat | Micro-Air Thermostat |
Unfortunately, after waiting 2 months for an ordered thermostat, I received notice that Dometic dropped their Bluetooth version. After visiting the Micro- Air website for an Easy Start to add to my air conditioner, I discovered that they make a replacement for the Dometic thermostat that has both Bluetooth & WiFi.
After installing, I discovered that it also has a much better touch screen.
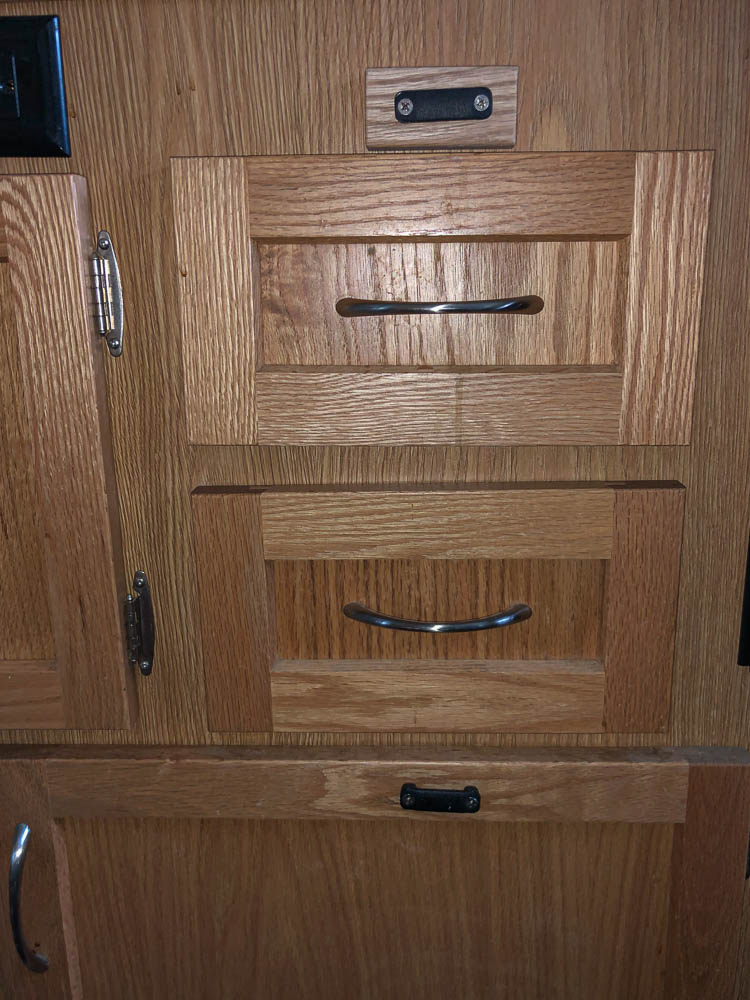
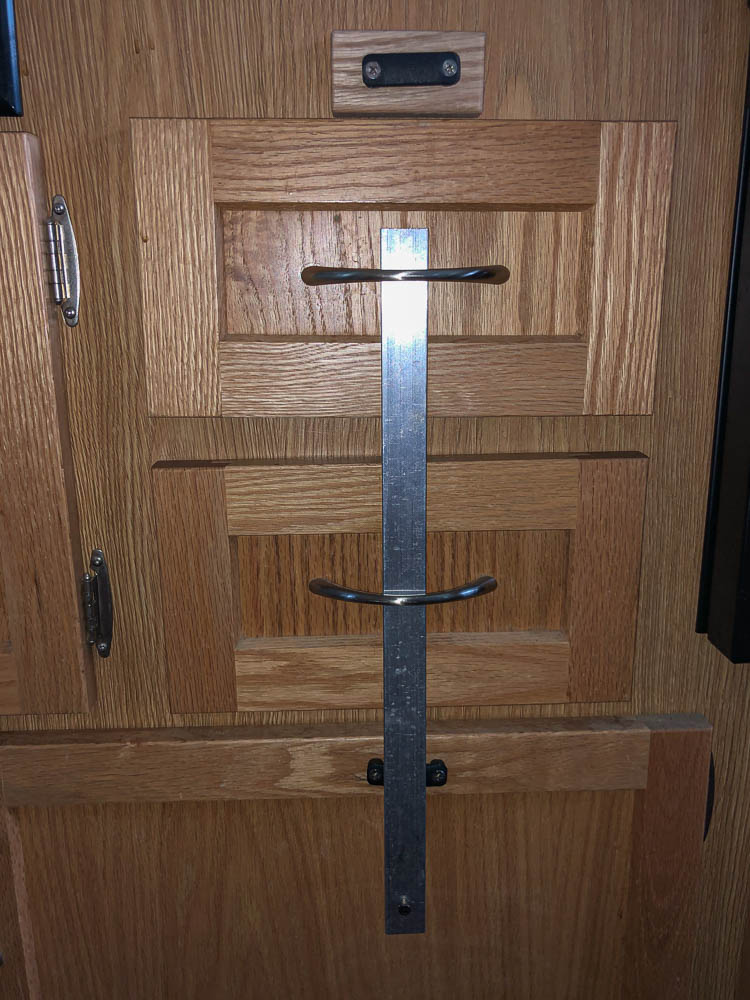
I've had the silverware drawer slide out & end up on the floor more than once. The second time, the drawer itself broke & I ordered a replacement from Escape. I'm not sure why it keeps happening, but on my last trip it ended up on the floor again, so I decided to do something about it.
I added an aluminum bar held in place with 1" kayak webbing straps. A cap screw serves as a stop. I'm not sure if you can tell by the photos, but to lock the drawers you slide the 1" aluminum bar into the bottom drawer handle, up through the upper drawer handle & through the upper kayak strap, then slide the bar down into the lower kayak strap. The head of the cap screw acts as a stop to hold the bar in place. I has to add a backing piece behind the panel above the drawer since all there is is 1/8" plywood. After the glue drys, I'll remove the front oak piece & put a couple of coats of polyurethane on it.
 |
 |
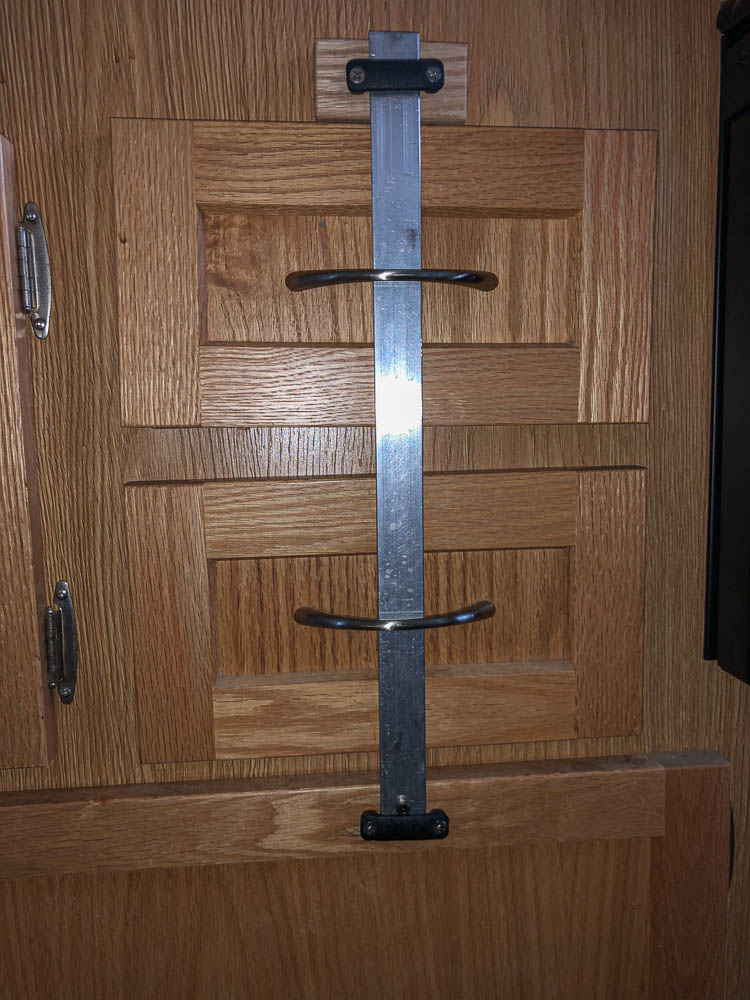 |
| The Straps | Part Way In | Locked |
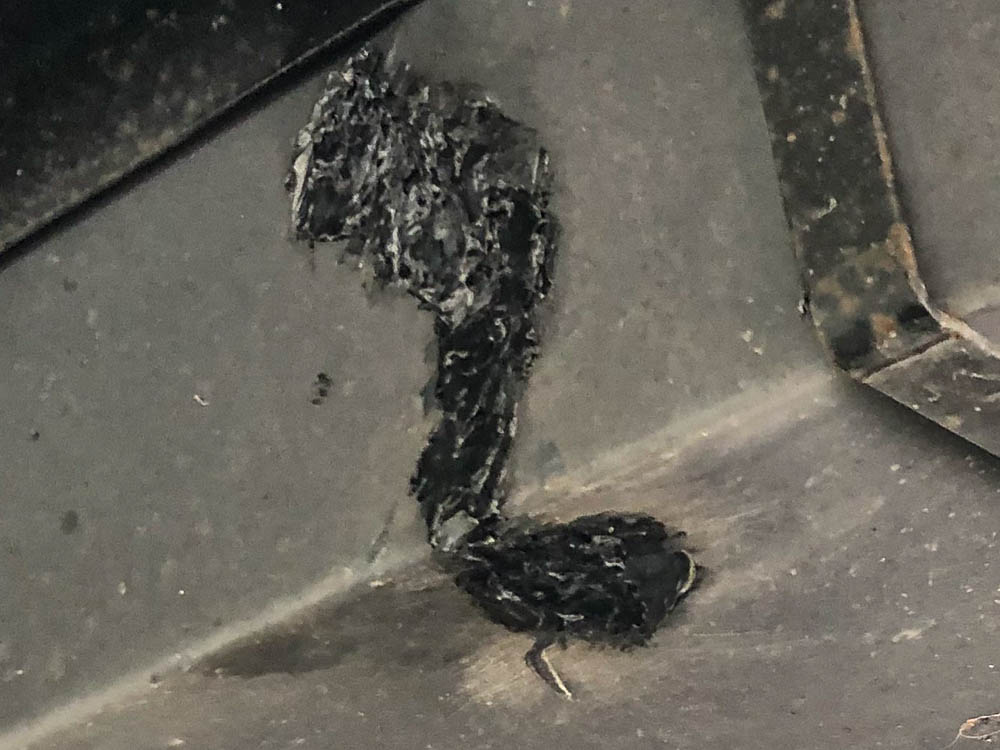
Well, this is a "modification" that I really didn't want, but... I hit a piece of road debris and punched a pair of holes & a crack in my gray tank. I finished the trip dumping gray water in the toilet, but after getting home, had to fix it. The first step was to plastic weld the holes & crack since most glues do not bond well with plastic tanks. I have had lots of experience with an air based plastic welder, but no longer have access to it so I purchased a soldering iron type. It consists of an 80 watt soldering iron with a triangular copper tip. Also purchased some polypropylene welding rod to match the tank material. It isn't pretty, but I was able to put a double layer of plastic in the holes, and fill in the crack:
 |
| Plastic Welding |
I don't have a photo, but the next step was to cover the plastic weld with epoxy in order to strengthen it. Finally, a layer of EternaBond Tape:
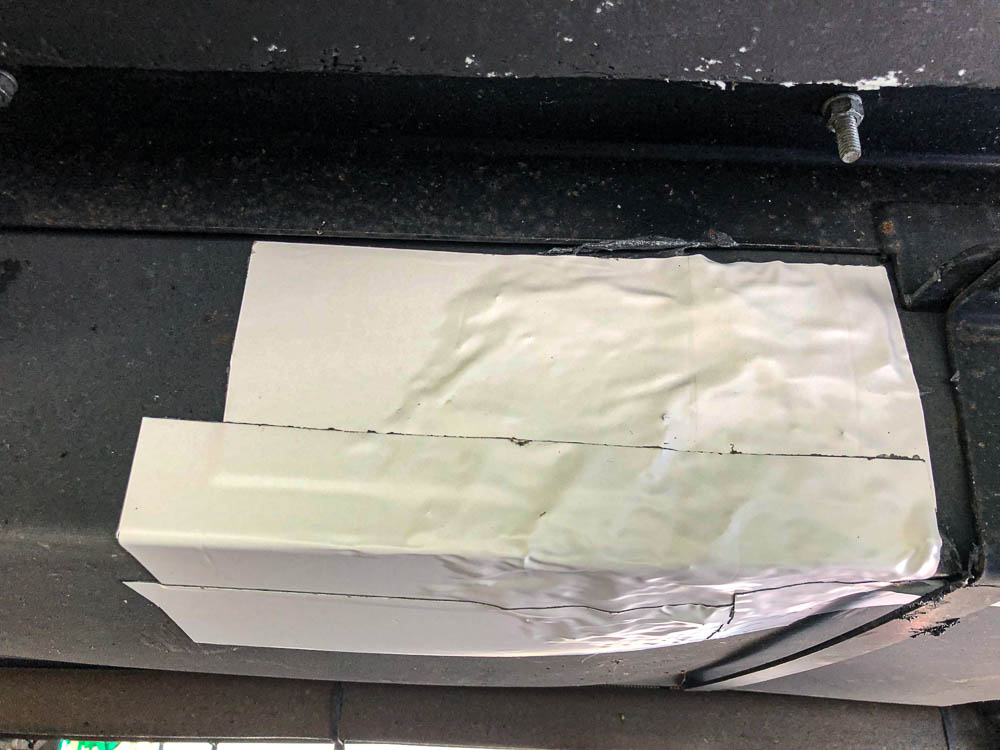 |
| EternaBond Tape |
I let the tape sit overnight, then filled the tank. It held fine for a couple of days, so hopefully, no more leaks.
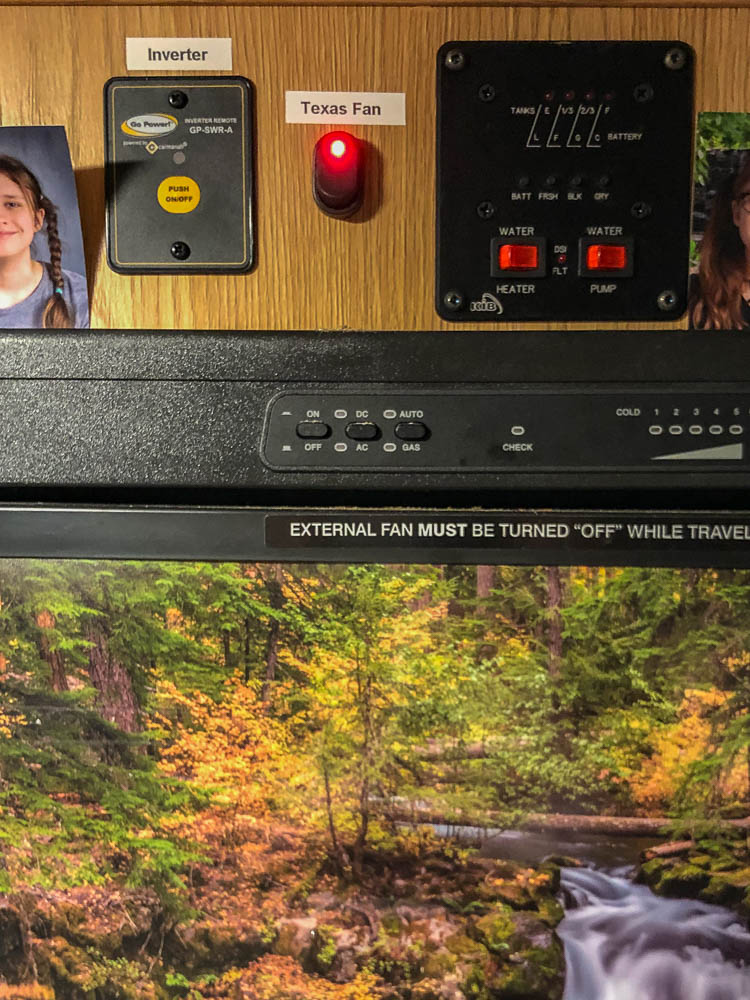
Today (9/30/21) I finally got around to installing an internal Texas Fan switch. While I don't turn it on all that often (it only helps cool the refrigerator at temperatures over 90°F), I got tired of opening the outside lower refrigerator panel to access the switch at the location Escape placed it. I also needed to post a note on the refrigerator door reminding me that it was on since it is temperature controlled and is usually off in the morning. Escape has a BIG NOTE across the top of the refrigerator telling me the fan must be off when traveling. If the fan comes on while the trailer is moving it sometimes blows a thermal fuse, shutting down the refrigerator until replaced. I used a lighted switch to make it easy to tell when it is on.
 |
| New Switch |
Today's project (10/3/21) was to upgrade the solar controller. While I'm not a fan of flexible solar panels, I decided to reduce the storage footprint of my 160 watt solar panel with a folding 300 watt Dokio suitcase model. Since the combination of the rooftop 320 watts & old portable topped out the Victron 100/30, I switched to a Victron 100/50. Of course it wasn't a simple switch - I needed to upgrade the wire size (now #6 welding cable) and the output fuse block (now a 60 amp marine circuit breaker). I also added a better tie point for paralleling the rooftop & portable panels. Not a lot to see, but here is a photo of the new controller:
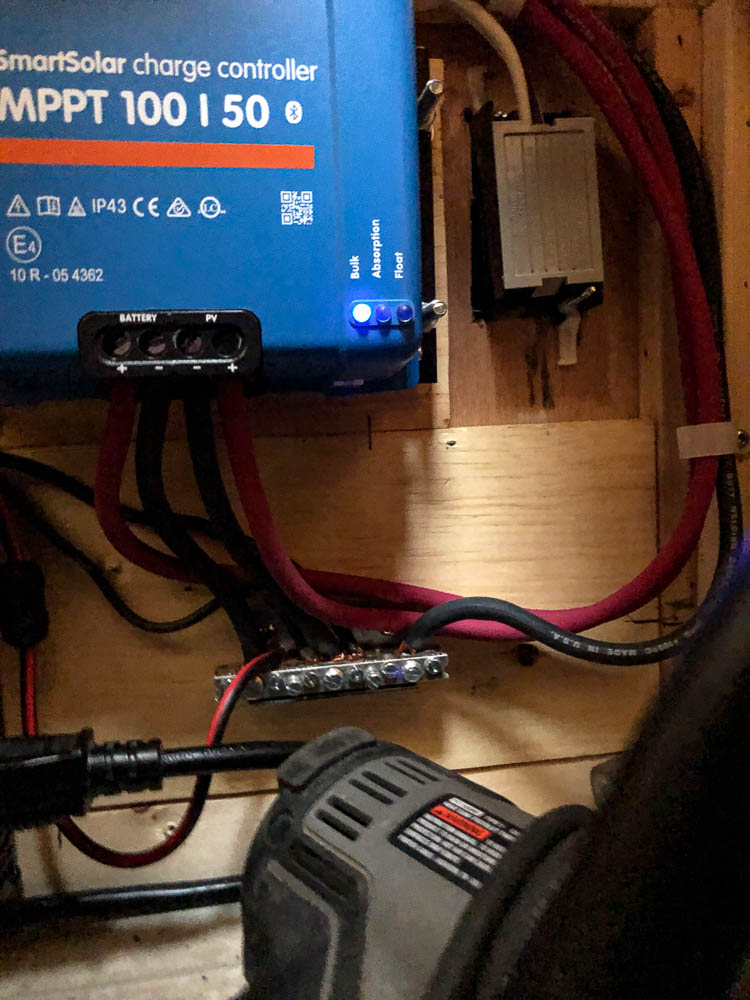 |
| Victron 100/50 |
After firing things back up, everything worked, but I discovered an interesting difference between the 100/30 & the 100/50. The Bluetooth signal from the Victron 100/50 is much weaker than from the 100/30. So weak, I can't read it from the truck. Since I like to check on how the charging process is going while on the road, I looked for a solution. Of course Victron has one; all you need to do is pay an additional $49.30 for a Victron Energy VE.Direct Smart Dongle. This can be plugged into almost any Victron device an provides a bluetooth connection. It is much stronger than the one provided by the 100/50. So, I hope the Fall projects are done.
I'm back from my 2021 - 2022 winter trip to Arizona & have a bunch of things to do.
The first needs a bit of explaining. I replaced the original thermostat with a MicroAir thermostat. The "touch" capabilities of the original thermostat left a lot to be desired. Sometimes it did nothing, other times it went through 2-3 "touches" with one touch. It did not show the current temperature, and was too dark to see except when setting it. The MicroAir solved all those problems, shows indoor & outdoor (if connected to the internet) temperature, and also provided WiFi & Internet control, ie I could turn on or off the AC or heat from anywhere using my phone (assuming I am within Bluetooth range or have an internet connection at the phone & trailer).
The problem was the MicroAir thermostat kept freezing at 3:00AM. It would show that it was calling for heat, but didn't fire the furnace. The customer service representative suggested doing a firmware update, and once I had internet coverage I did, and it worked better, but I still had it hang one night. Changing the three wires connected to the thermostat at 3:00AM with frozen fingers was a pain.
So, I decided to put both thermostats on the wall with a three pole, double throw switch to let me choose between them. At the same time I decided to try to solve another minor problem. My favorite electric heater, a 1986 Pelonis ceramic unit died. I bought an inexpensive ceramic disk heater from Walmart & it works, but trying to set a specific temperature was difficult. I decided to add a 120 volt AC receptacle that was controlled by a standard wall thermostat. I added a furnace relay & transformer (an Aube RC840T-120) and a household thermostat. The whole thing looks a bit weird, but it solves most of my heating & cooling problems.
 |
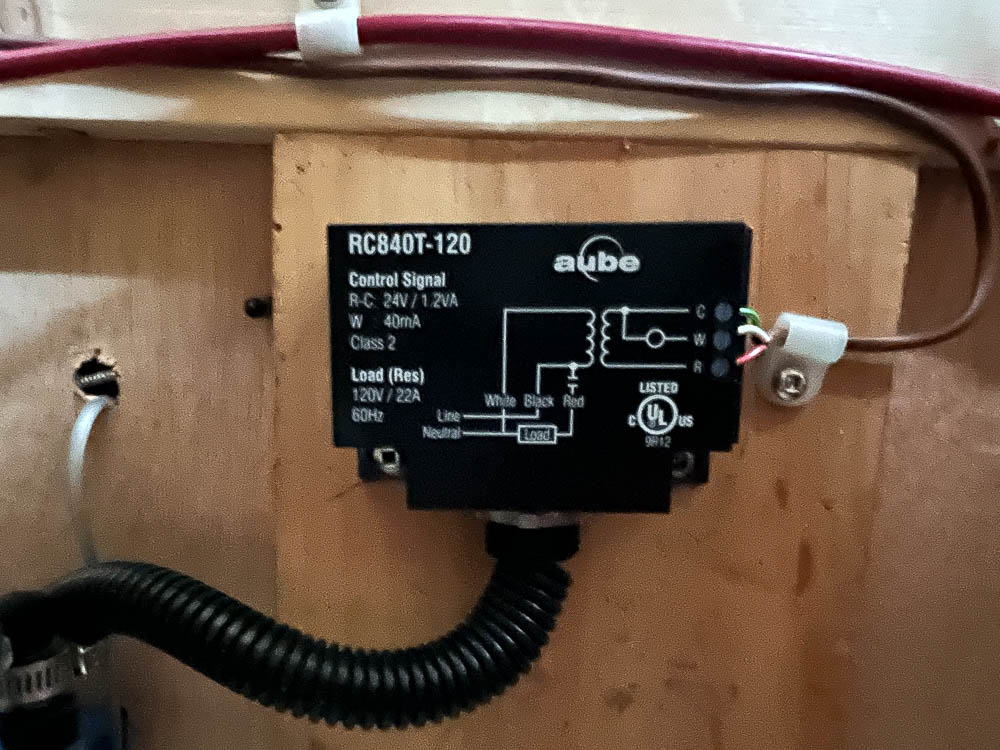 |
| Three Thermostats | The Transformer/Relay |
The next project was to replace the propane hoses between the tanks & regulator. They are not cracked or leaking, but have hardened to the point where they should be replaced. The regulator uses standard NPT 1/4" threads instead of the more often used 1/4" Inverted Male Flare connector, so of course I bought the wrong ones the first time.
Another project was to replace the trailer brakes with "Nev-R-Adjust" assemblies. They are now standard on Escape trailers, but not in 2017. It is time for new brakes so I decided to update to the automatically adjusting type. While I could do the job myself, I decided to have it done at the same time I have the bearings repacked at a local trailer dealer.
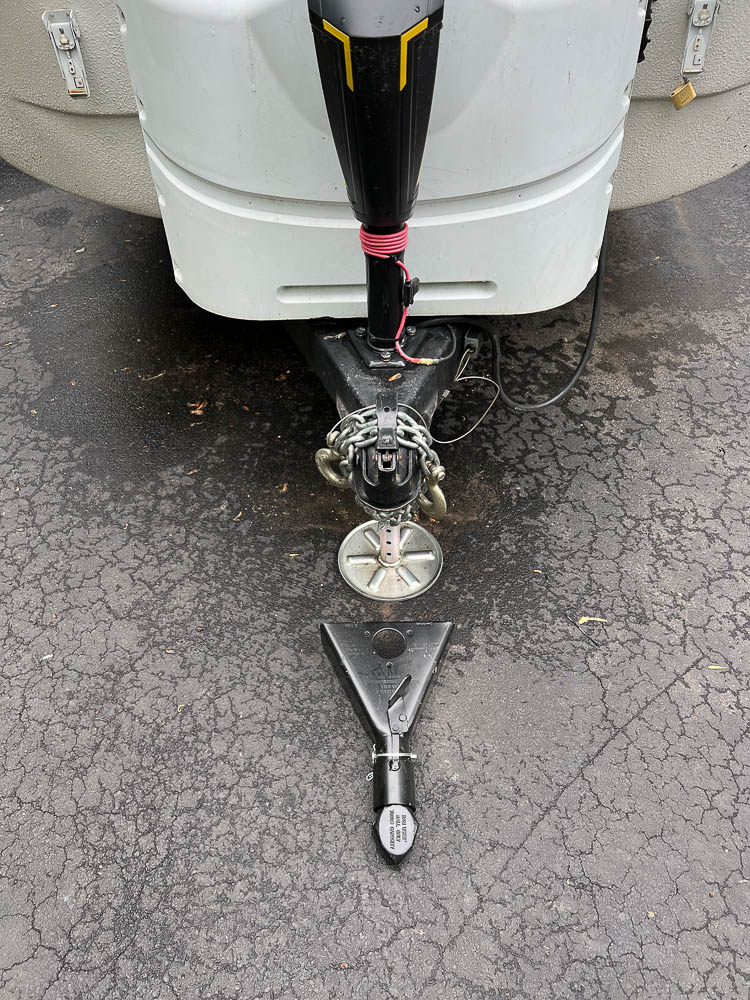
Another project is to replace the trailer coupler. The original tends to jam, particularly if the trailer is at an angle to the tow vehicle. After destroying my tongue jack at Big Bend National Park many miles from any source for repair, I decided to switch to a more reliable coupler. I decided to go with a Curt 25217 Black A-Frame Coupler. The old coupler has to be removed, and the new one welded in place. While I've done quite a bit of welding, I don't have the equipment anymore, and prefer to have it done by a certified welder.
 |
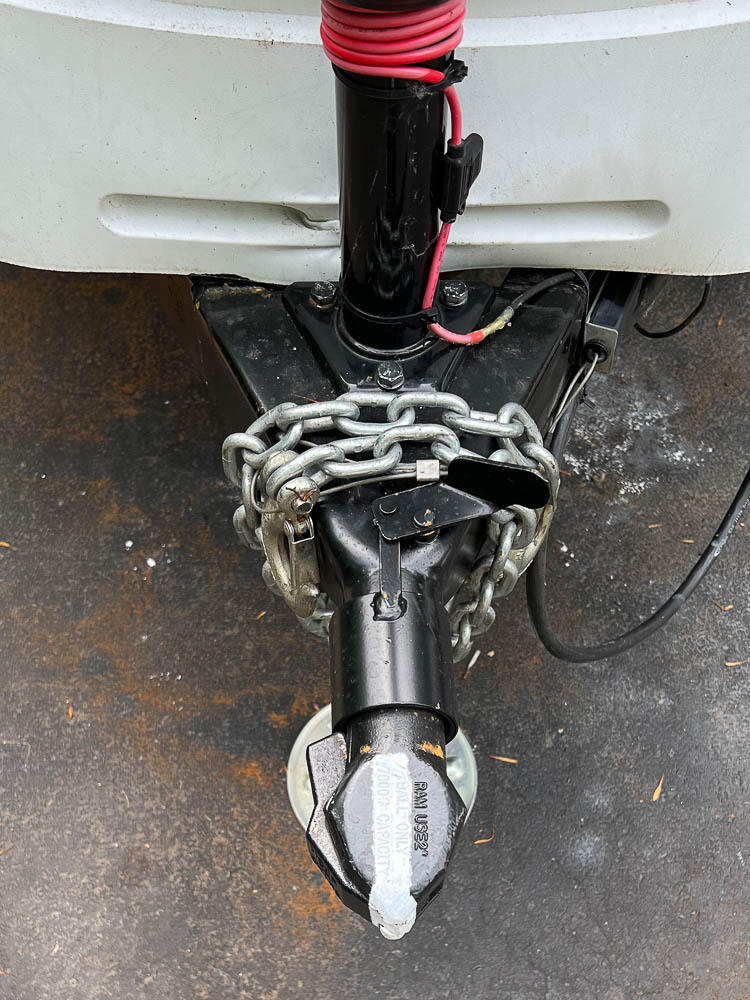 |
| The Old | The New |
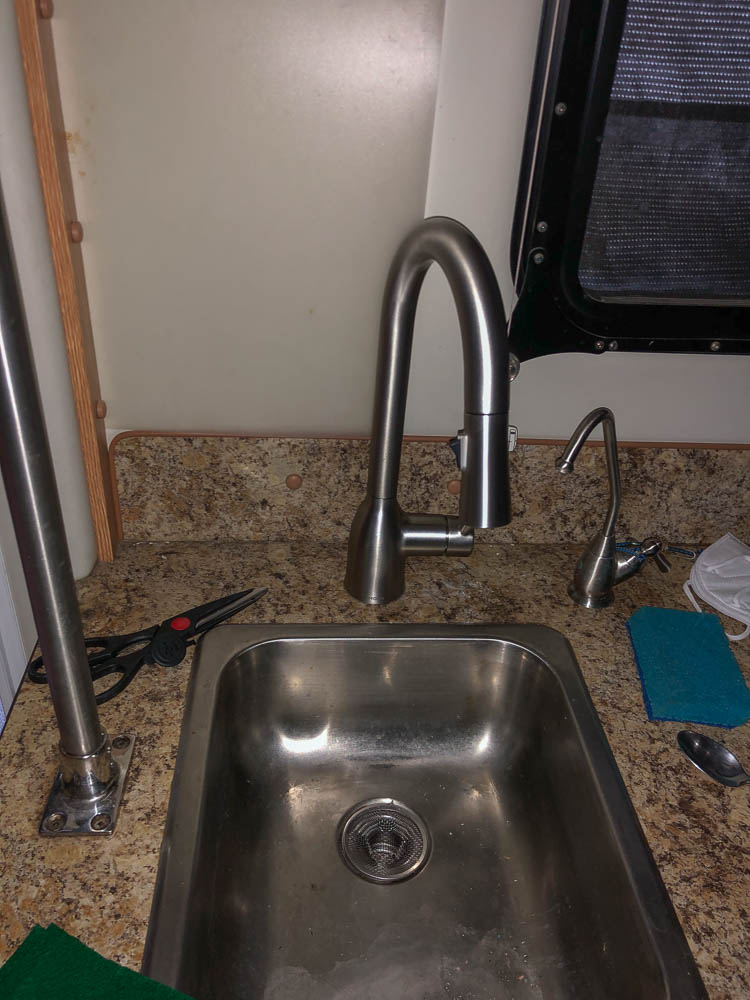
The next project was to replace the kitchen sink. The stock sink is just a bit too small when it comes to washing pie pans, cooking utensils, etc. At the suggestion of another Escape 21 owner, I purchased a Dayton D117191 Single Bowl Top Mounted Stainless Steel Bar Sink. It is about one inch deeper, about the same interior size front to back, and 3" wider. I ordered the single hole version since I wanted the faucet centered, then drilled an additional hole for my filtered water spigot.
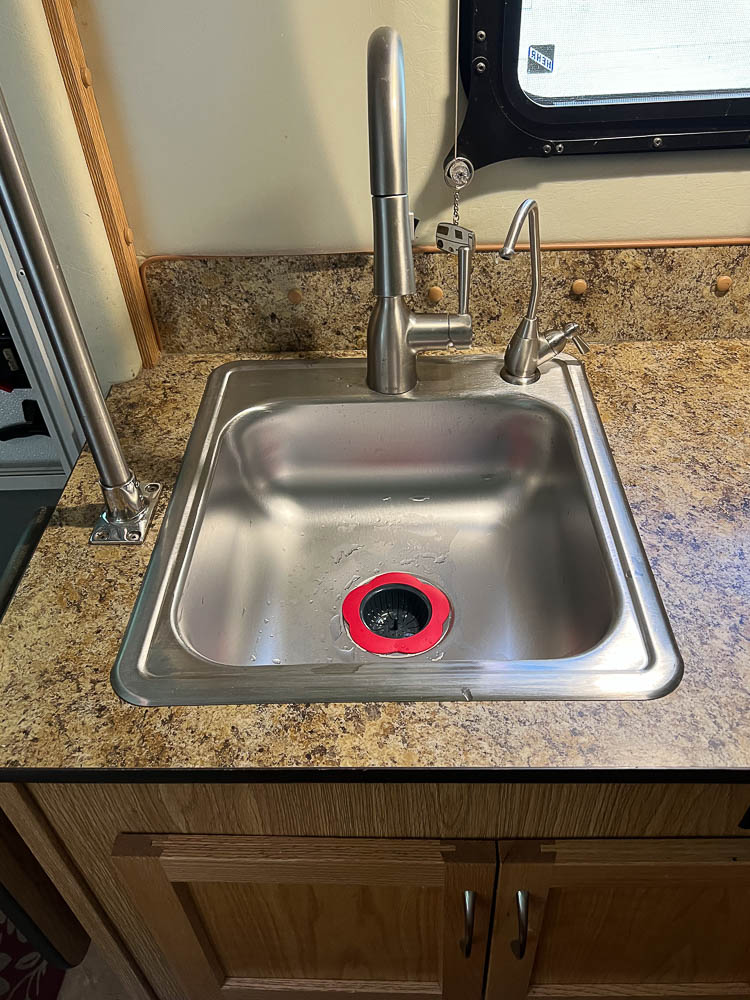 |
| The New Sink |
At the same time I decided to switch from the Escape provided "S" trap which they located in the cabinet below the sink cabinet with a proper vented "P" trap. The unvented "S" trap produced slow draining, and would often lose the water seal, resulting in gray tank smells in the sink area. While I don't like using Air Admittance Valves because they are prone to failure, there is no other way to get a vent in the proper location to prevent the trap from losing it's water seal. The AAV is at the top of the "T".
2024:
First, I added a small shelf on the dinette side of the kitchen wall. This is handy for coffee & drinks while I have the laptop on the regular table. I did have to modify the lid (door) to the under seat storage to clear the table when folded.
 |
 |
| The New Table | |
I switched the Dometic 12,000BTU air conditioner for a Houghton 9600. The advantage is more than 10db quieter, a bit more headroom, and 2" off the outside height of the trailer. The disadvantage - the Houghton Rec Pro AC uses a remote rather than a wall mounted thermostat. The old Dometic had electronics inside that used a Dometic thermostat to run both the AC & the furnace. So, I had to add a thermostat for the furnace. I had already added an Emerson battery powered digital thermostat for the 120V outlet I plug my electric heater into, so I used another one for the furnace.
 |
 |
 |
 |
| The Houghton on the Roof | 2 Thermostats | The AC Remote | Inside View |
The next project was one I have been putting off for a long time. In 2017 Escape used cheap & poor quality bottom mount drawer slides. I have had drawers end up off track many times, and more than once they ended up on the floor even when driving paved roads. I came up with a method of keeping the drawers closed, at least for the kitchen ones, but it was a pain to latch & unlatch when traveling every couple of days. So, I first replaced the slides with soft close 50 pound rated real drawer slides. Doing this in the limited available space & getting them aligned properly was "interesting".
 |
 |
| The Old | The New Slides |
The next part of the project was to find a way to keep the drawers closed when traveling, hopefully one that is quick & easy to implement. I found a "T" single bolt drawer handle at Lowes that, with a little grinding of the base, fit between the drawers. Using a 2" 10/24 bolt & a compression spring, I mounted the handle between the drawers. Turn it parallel to the drawers and they open, perpendicular, they stay closed.
 |
 |
 |
 |
| A Couple Views of The Handle & Spring | Locked Position | Lowes Part | |
That is it so far, but I will be adding to this page as I add things to the trailer.
This page is maintained by: vermilye@oswego.edu